Trigger
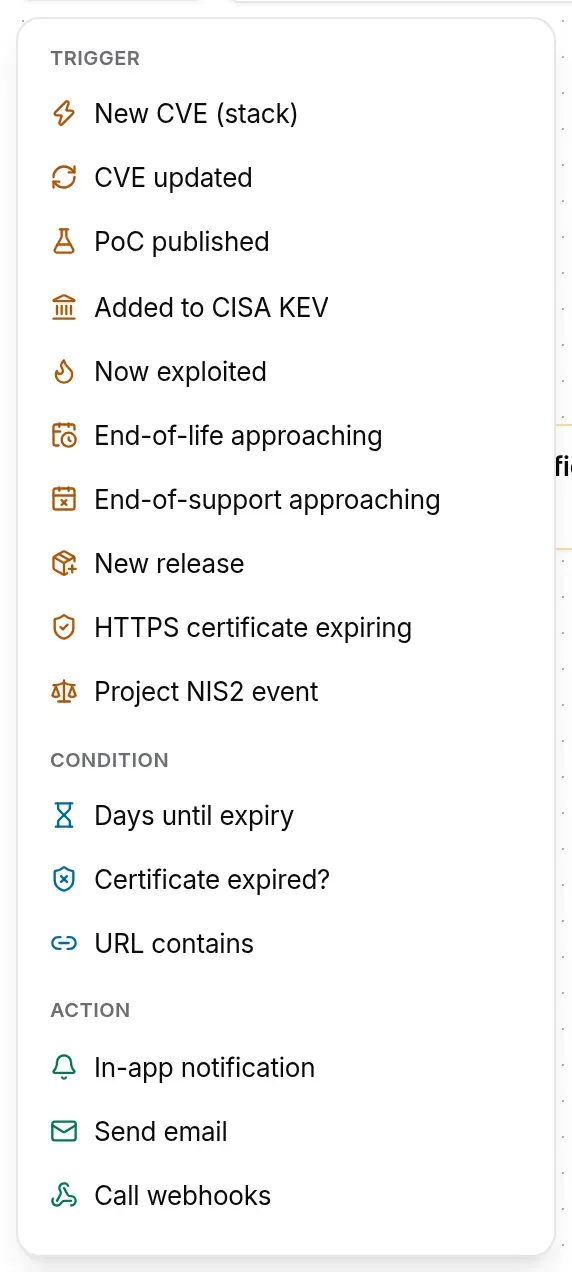
The event that starts the workflow. There is exactly one per workflow, and it cannot be deleted. Orange tile.
A workflow decides what happens when an event affects your project: a new CVE on the project’s stack, a product nearing end of life, an HTTPS certificate about to expire, a NIS2 deadline. In TechWatchAlert, every notification goes through a workflow: with no active workflow for an event, nobody is told — not in the bell, not by e-mail, not by webhook.
The screen lives under Workspace › Workflows. It shows the workflows of the active project (the one selected at the top of the menu). Every project member can view them; only those allowed to manage workflows can change them (see Who can do what).
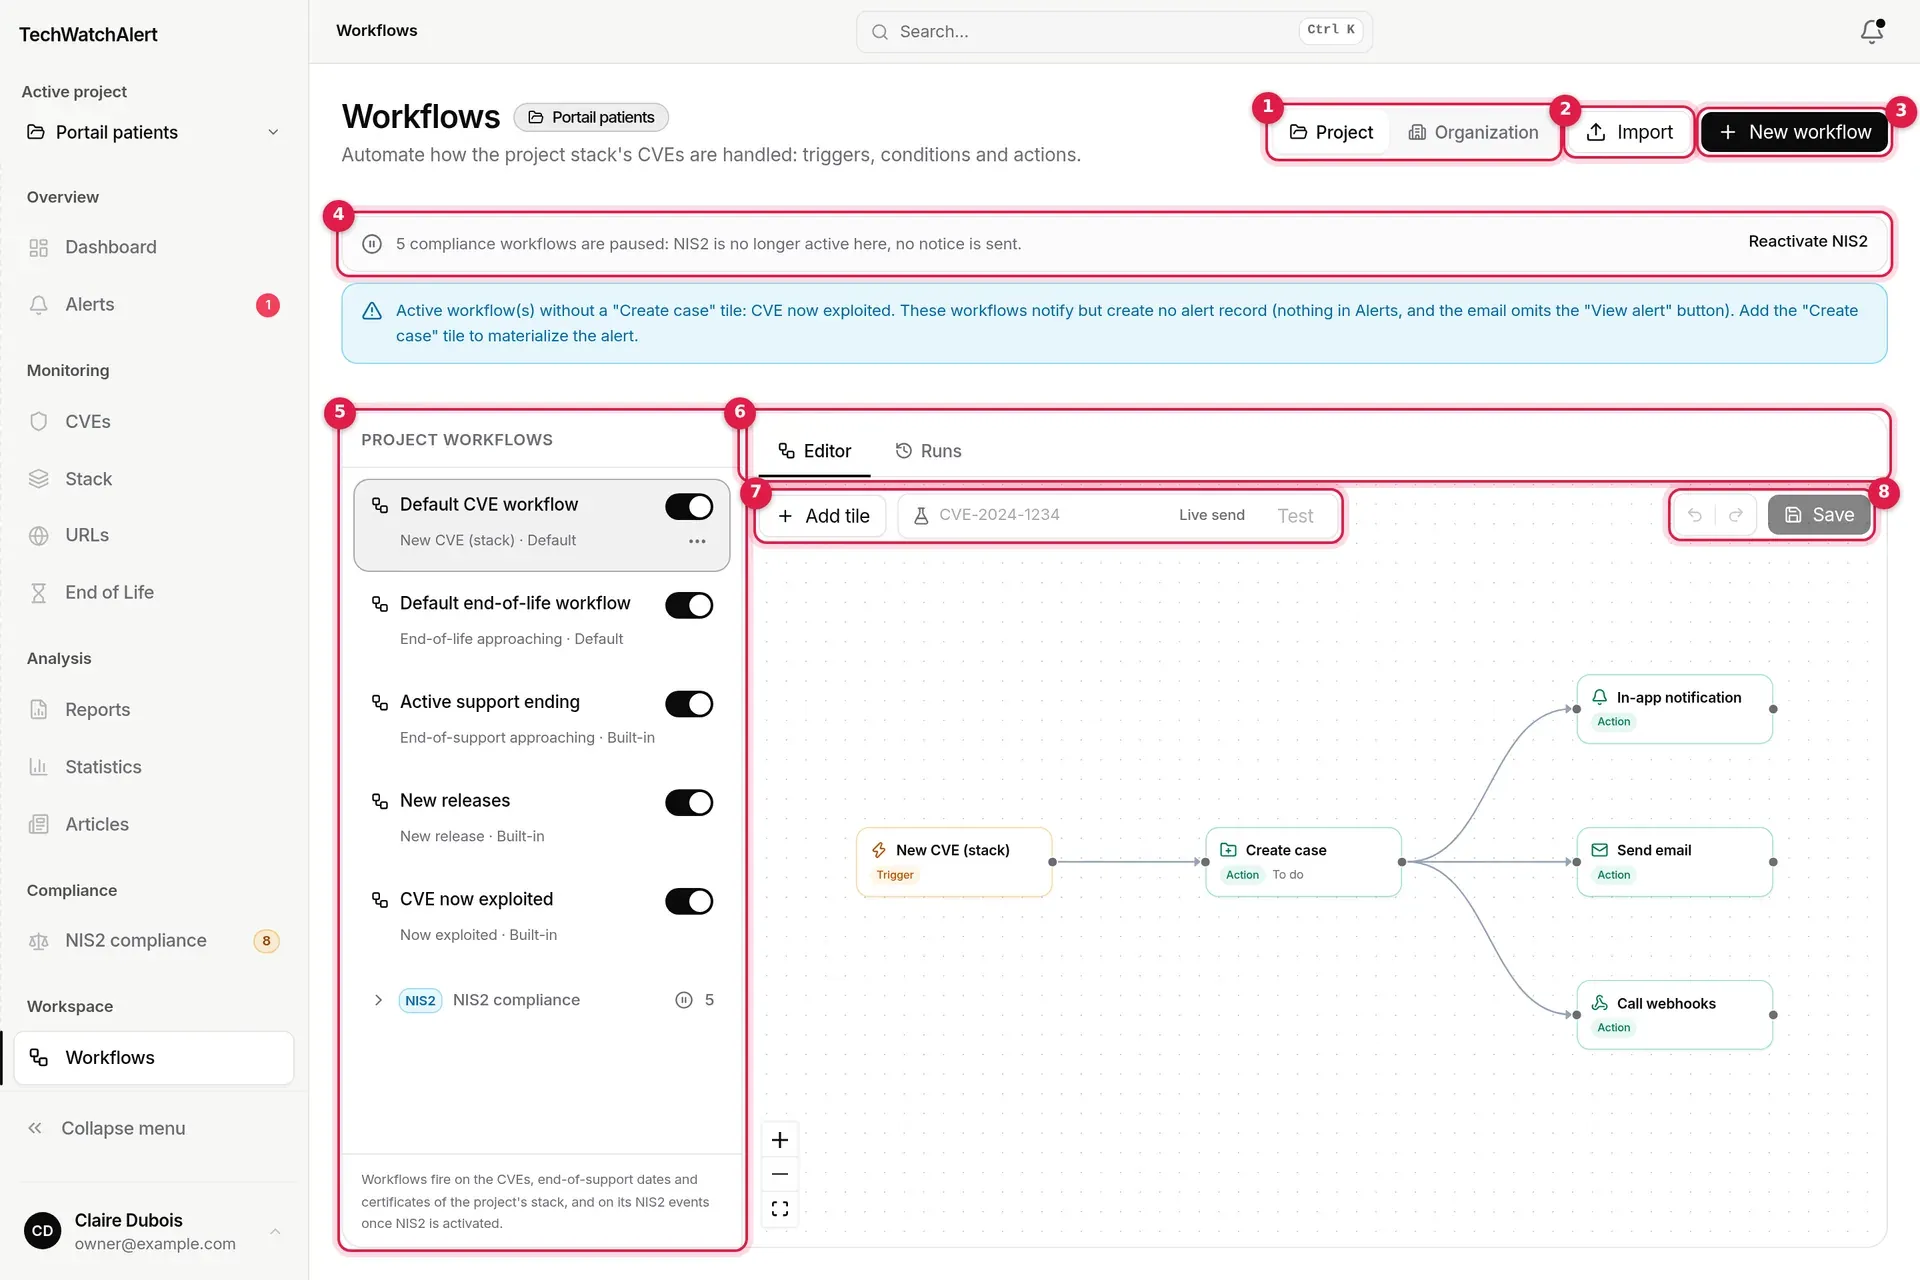
.json file.A workflow is a small diagram of tiles joined by arrows, read from left to right.
Trigger
The event that starts the workflow. There is exactly one per workflow, and it cannot be deleted. Orange tile.
Condition
A question asked of the event. It has two outputs: yes (green) and no (red). Blue tile.
Action
What gets done: notify, send an e-mail, call webhooks, create a case, open a ticket… Actions can be chained. Green tile.
A few rules, enforced by the server when you save:
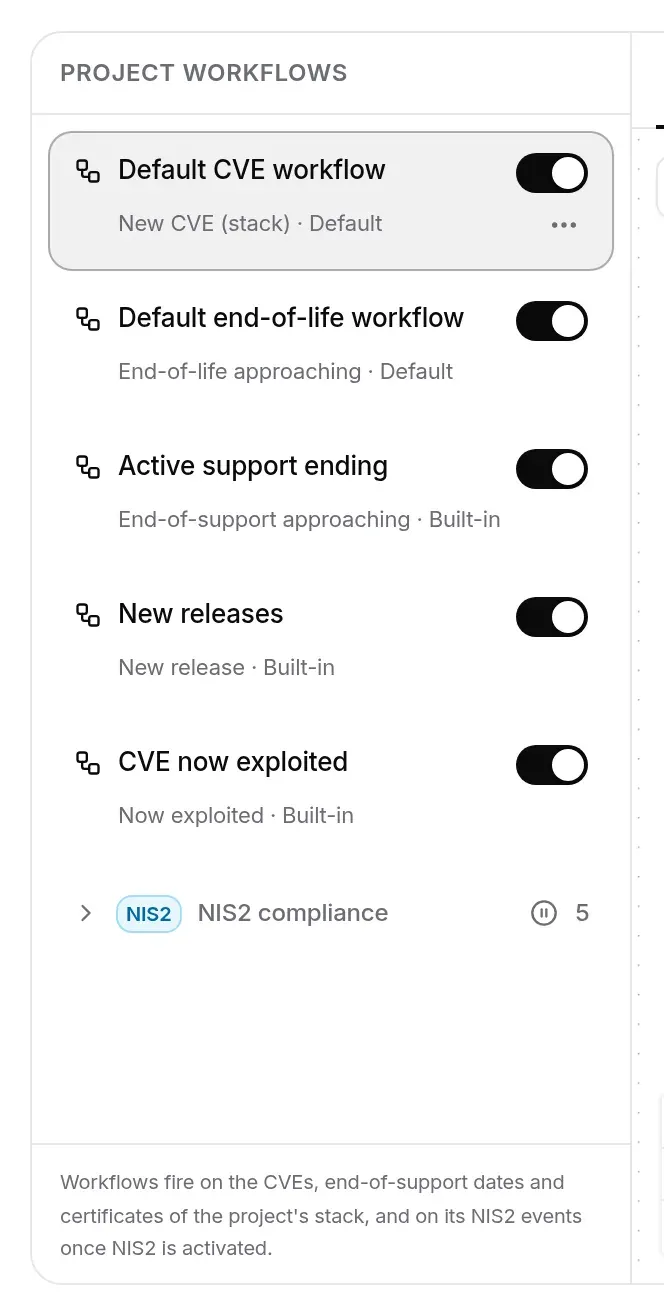
Every project is created with five ready-made workflows:
| Workflow | Trigger | What it does |
|---|---|---|
| Default CVE workflow | New CVE (stack) | Creates a case (the alert record), then in-app notification, e-mail and the project’s webhooks. |
| CVE now exploited | Becomes exploited | In-app notification, e-mail and the project’s webhooks. |
| Default end-of-life workflow | End-of-life approaching | In-app notification. |
| Active support ending | End-of-support approaching | In-app notification. |
| New releases | New release | In-app notification. |
Each card shows the full name (two lines at rest, all of it on hover and on the open workflow), then, below, its trigger in plain words (“New CVE (stack)”, “End-of-life approaching”…) followed by its kind:
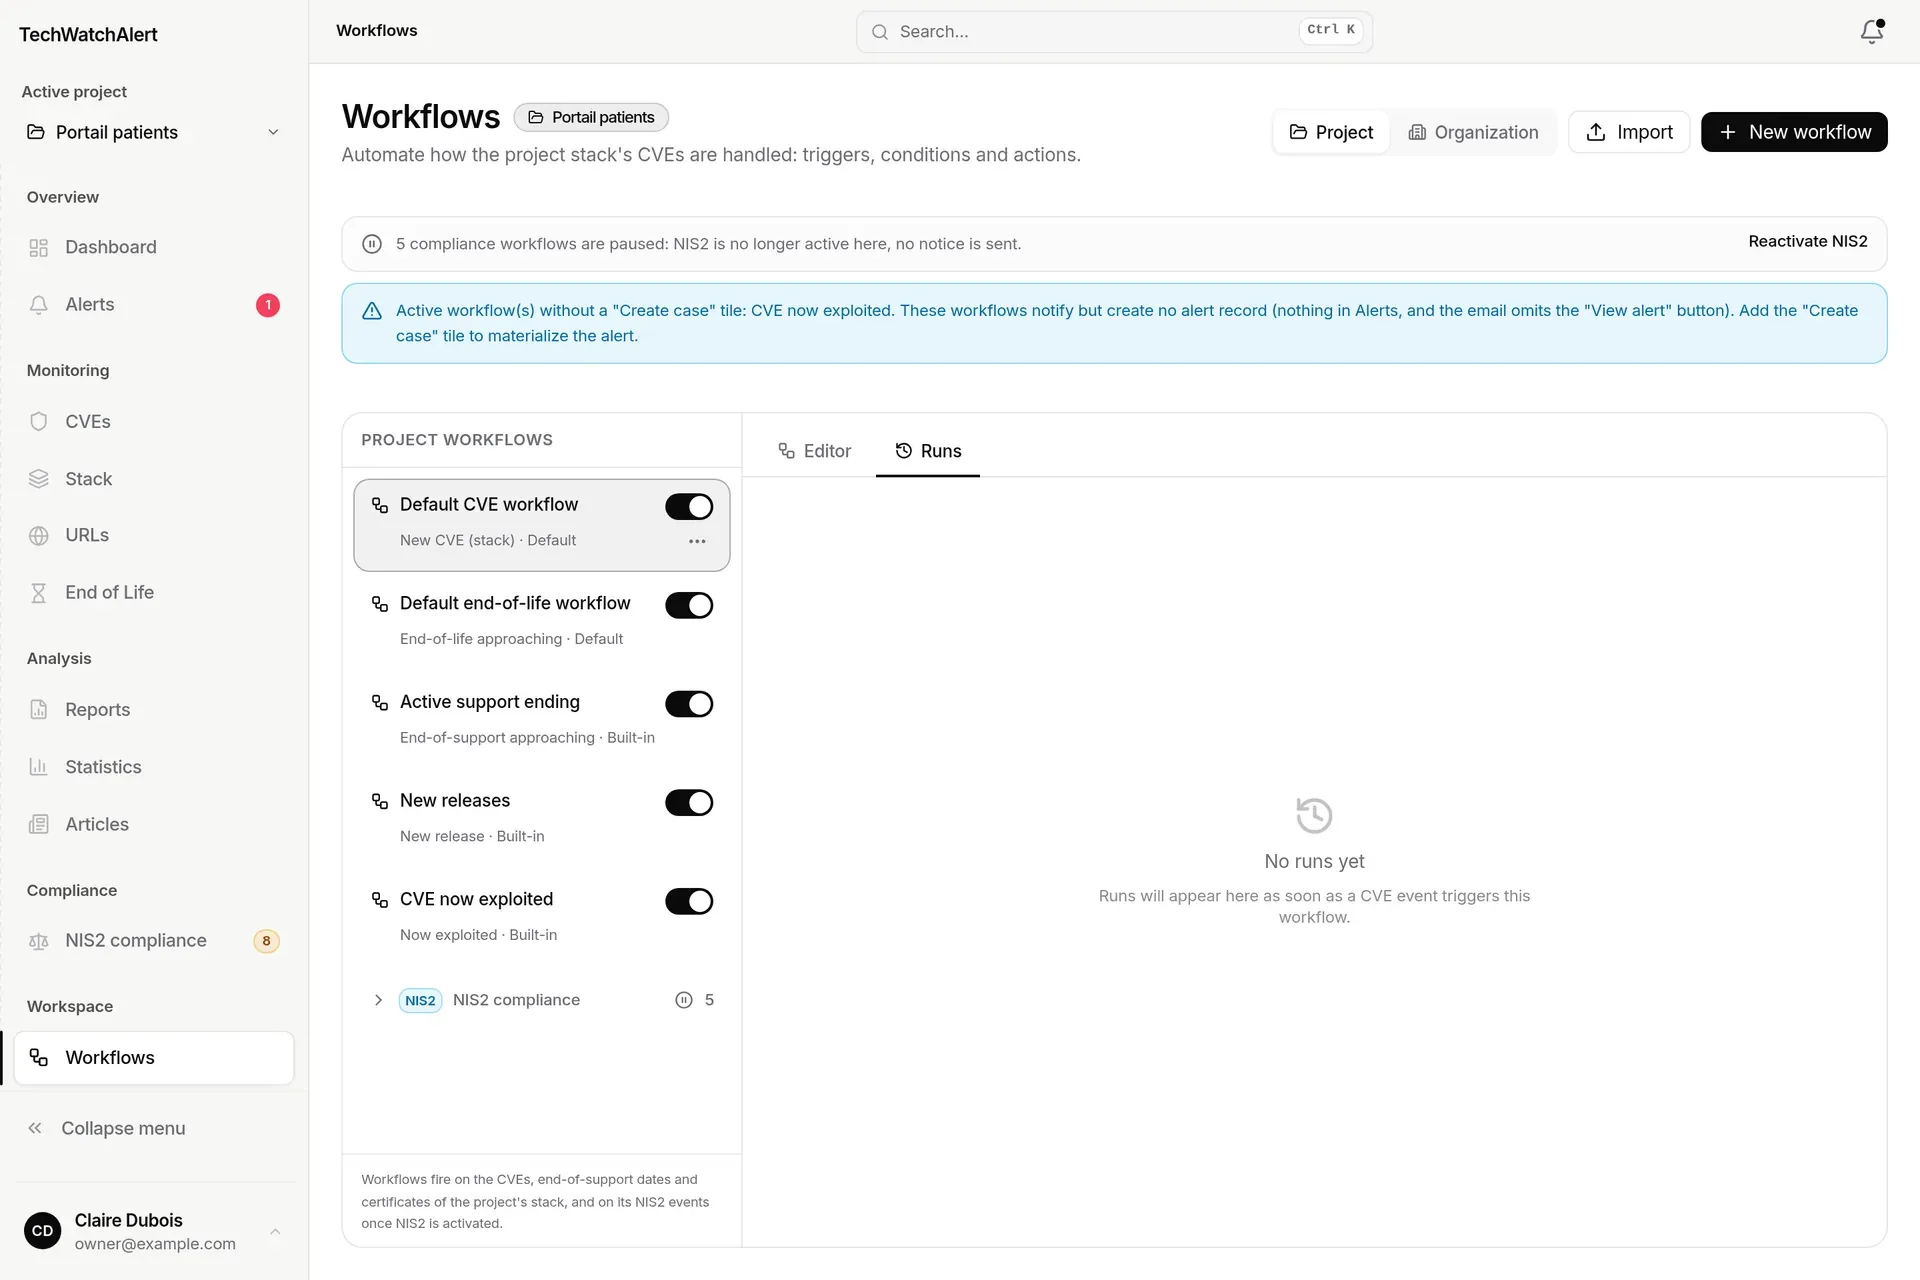
Default workflows are listed first, then the rest in creation order. A struck-through workflow is disabled. The switch on the right enables or disables it straight away, without going through Save. A green dot with an initial shows a colleague who has this workflow open right now.
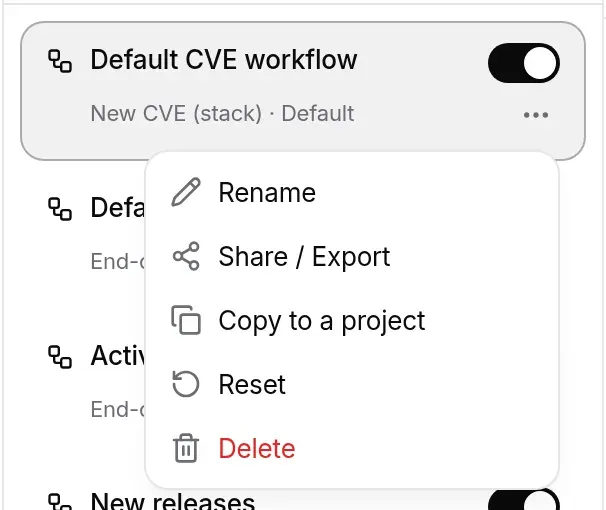
A workflow’s actions are in its ⋯ menu (under the switch; shown on hover, and always on the open workflow):
| Entry | Action | When it is offered |
|---|---|---|
| Rename | Rename: the name becomes editable in place. Enter confirms, Esc cancels. | Always |
| Share / Export | Share / Export (see Share, import, copy) | Always |
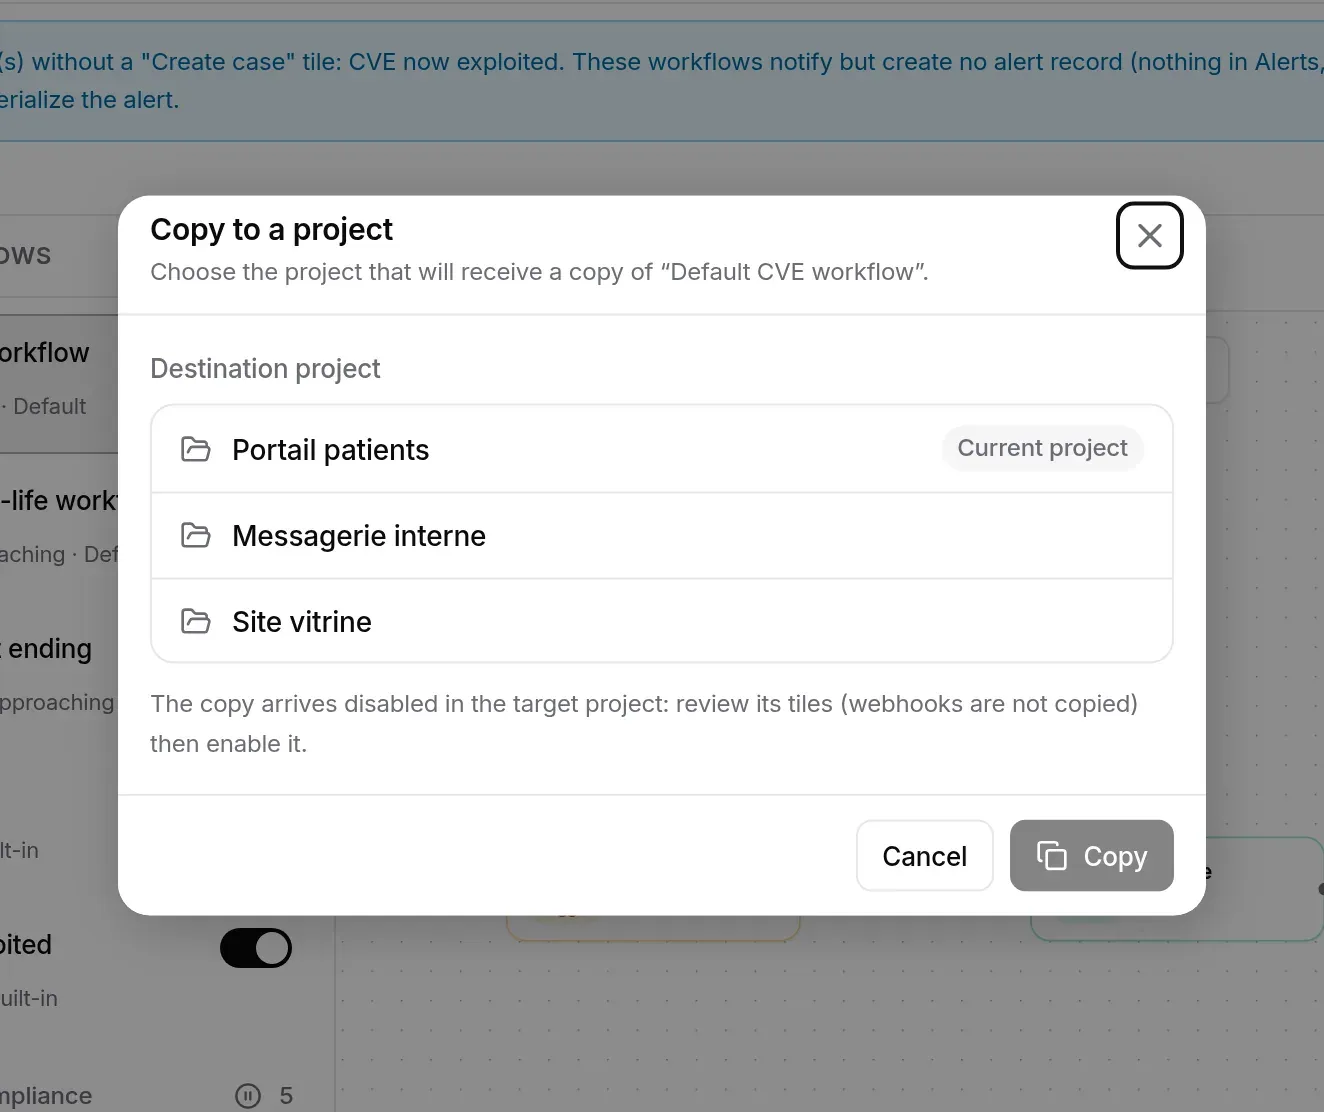
| Copy to a project | Copy to a project | Project scope |
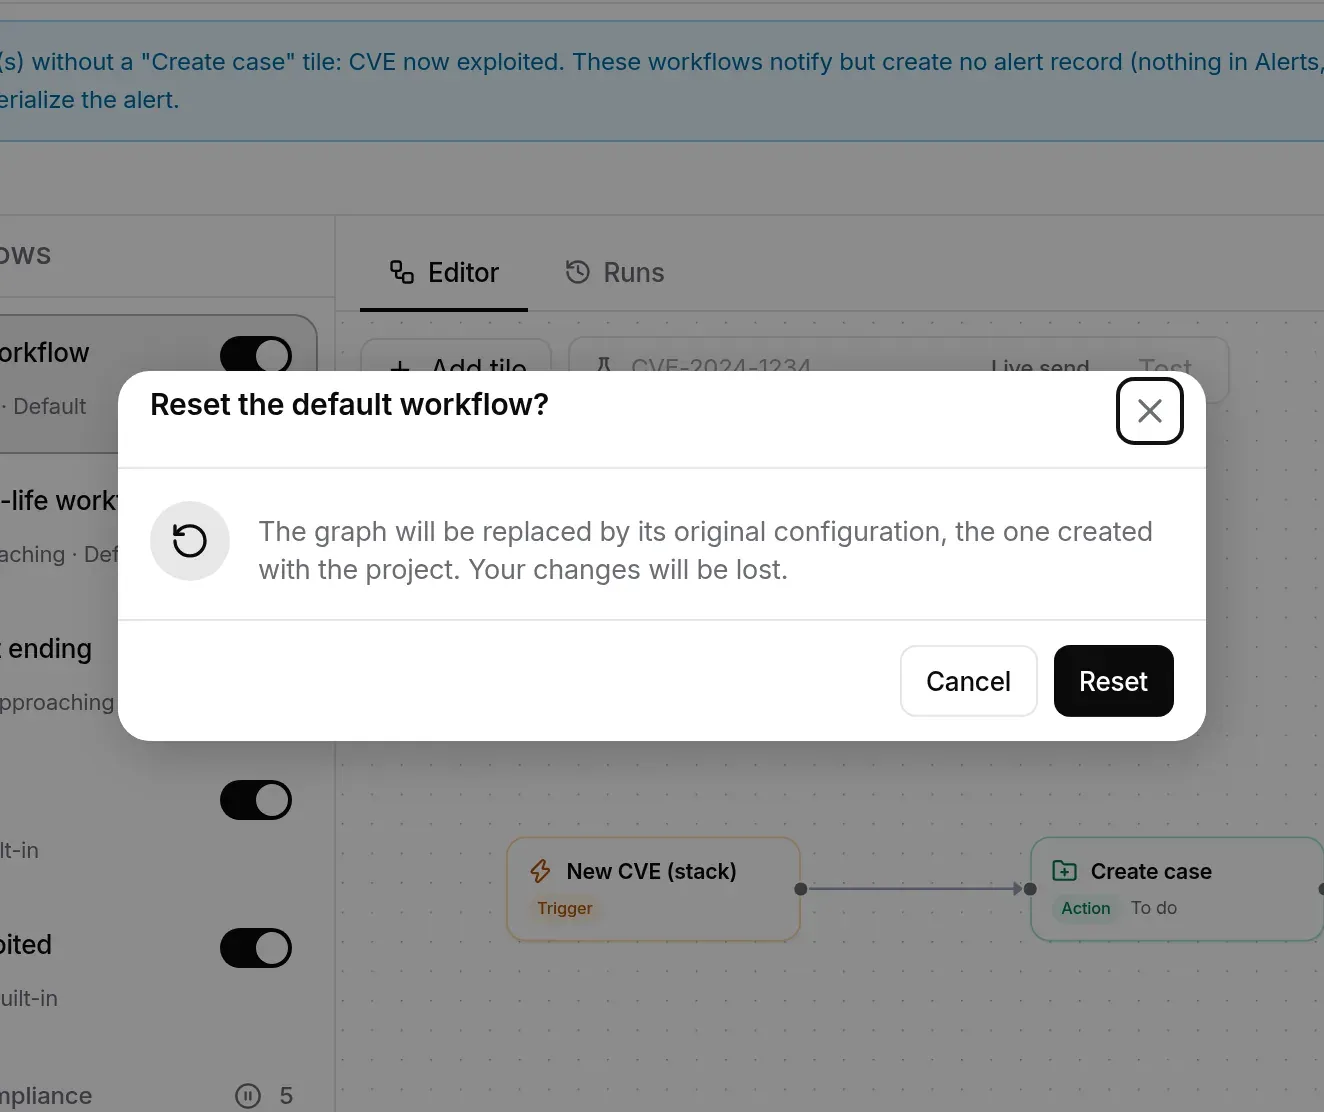
| Reset | Reset: restores the original diagram | Default CVE workflow, workflows supplied with the project, NIS2 workflows |
| Set as default workflow | Set as default workflow | Hand-made workflows, except NIS2 |
| Delete | Delete | Always |
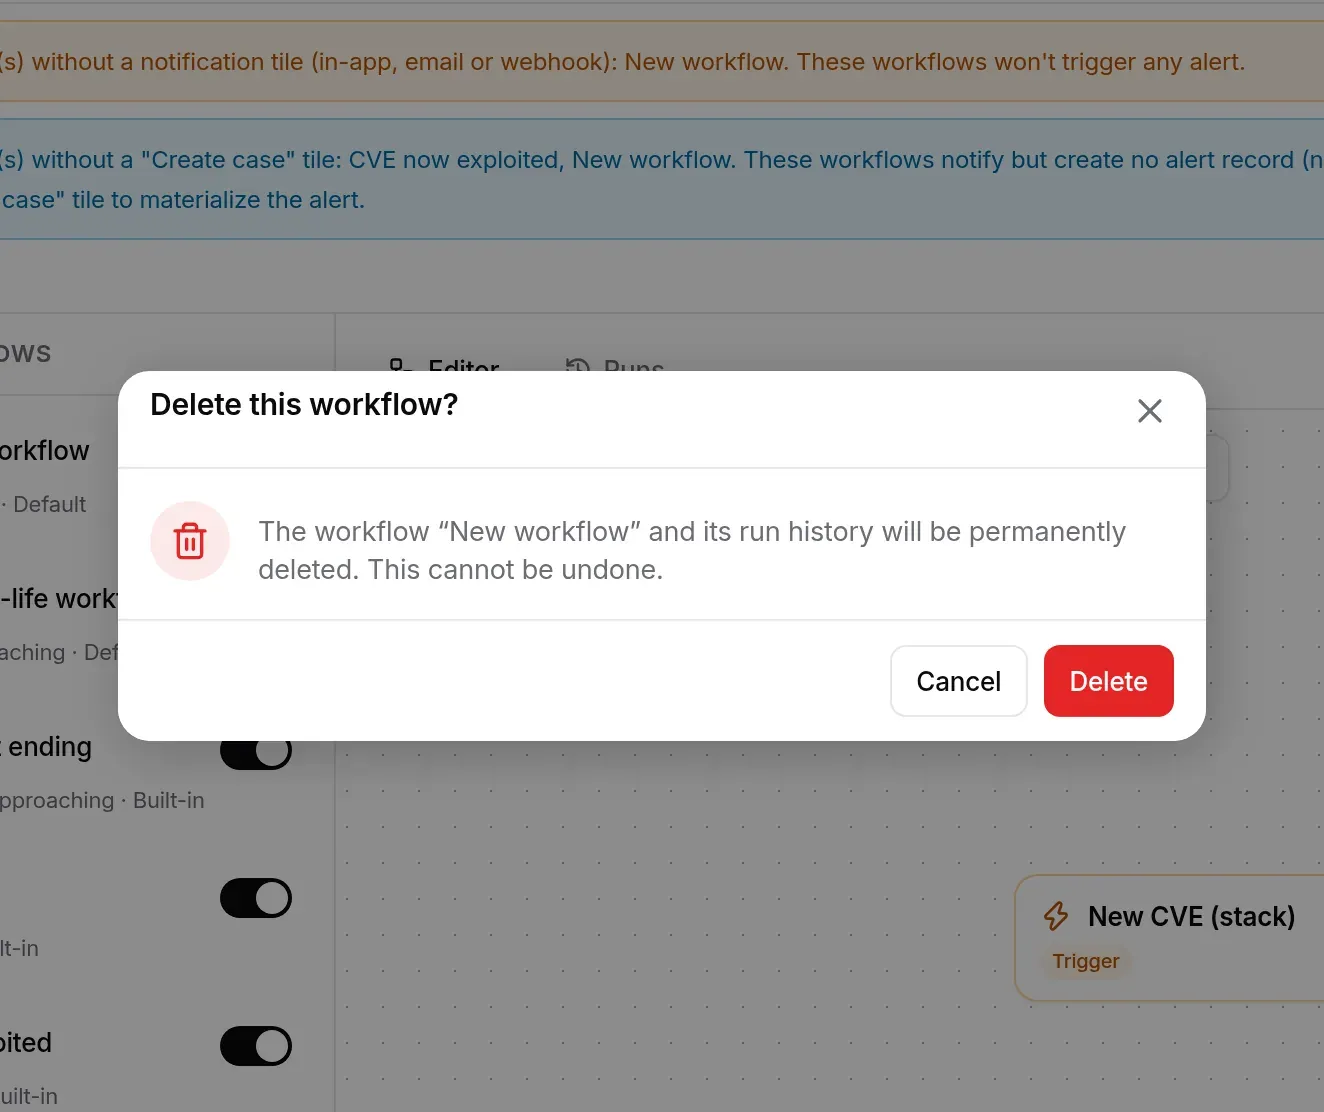
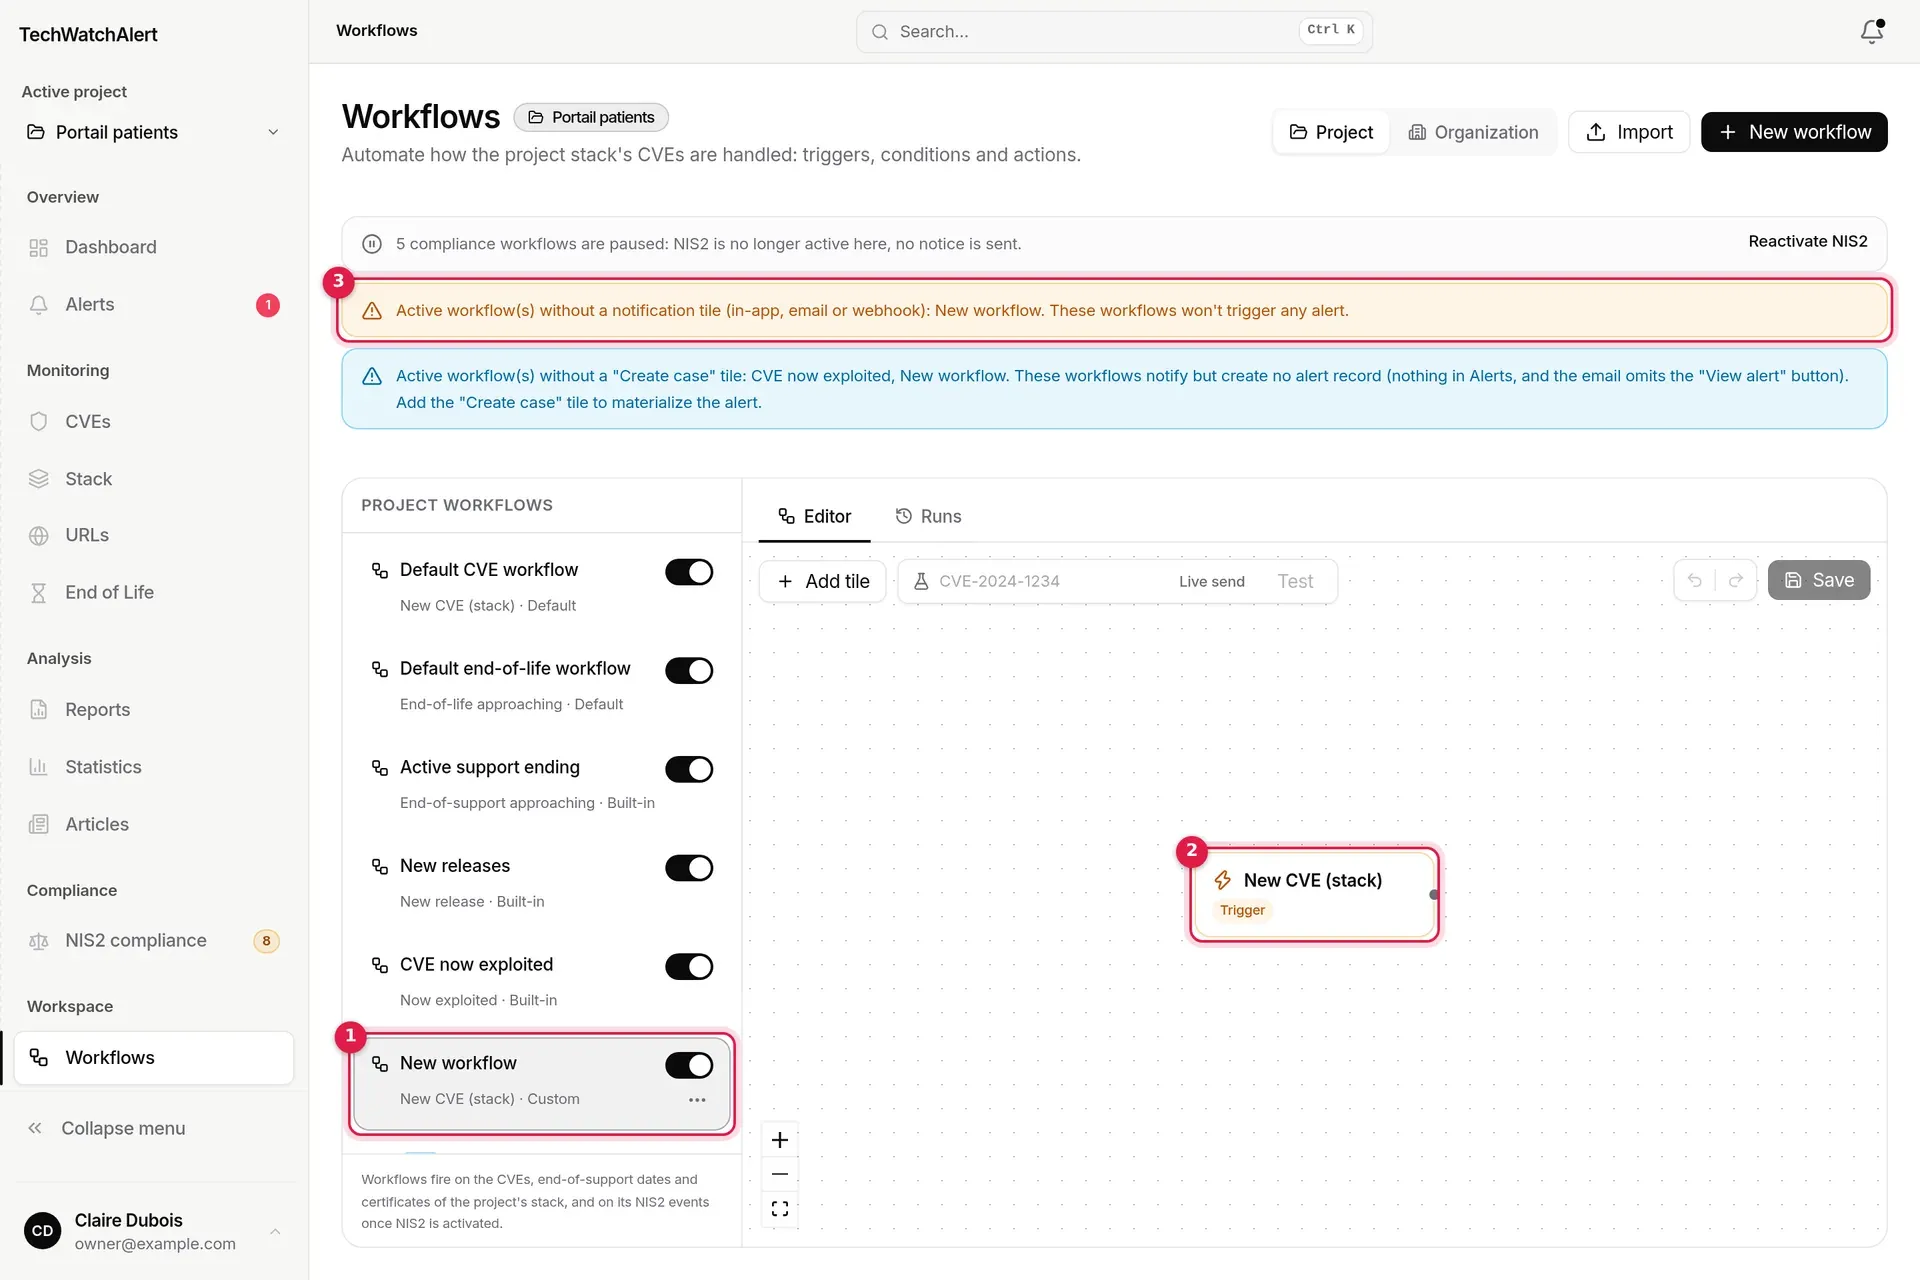
Above the list, banners flag whatever will keep alerts from arriving:
Click a workflow to open it in the Editor tab.

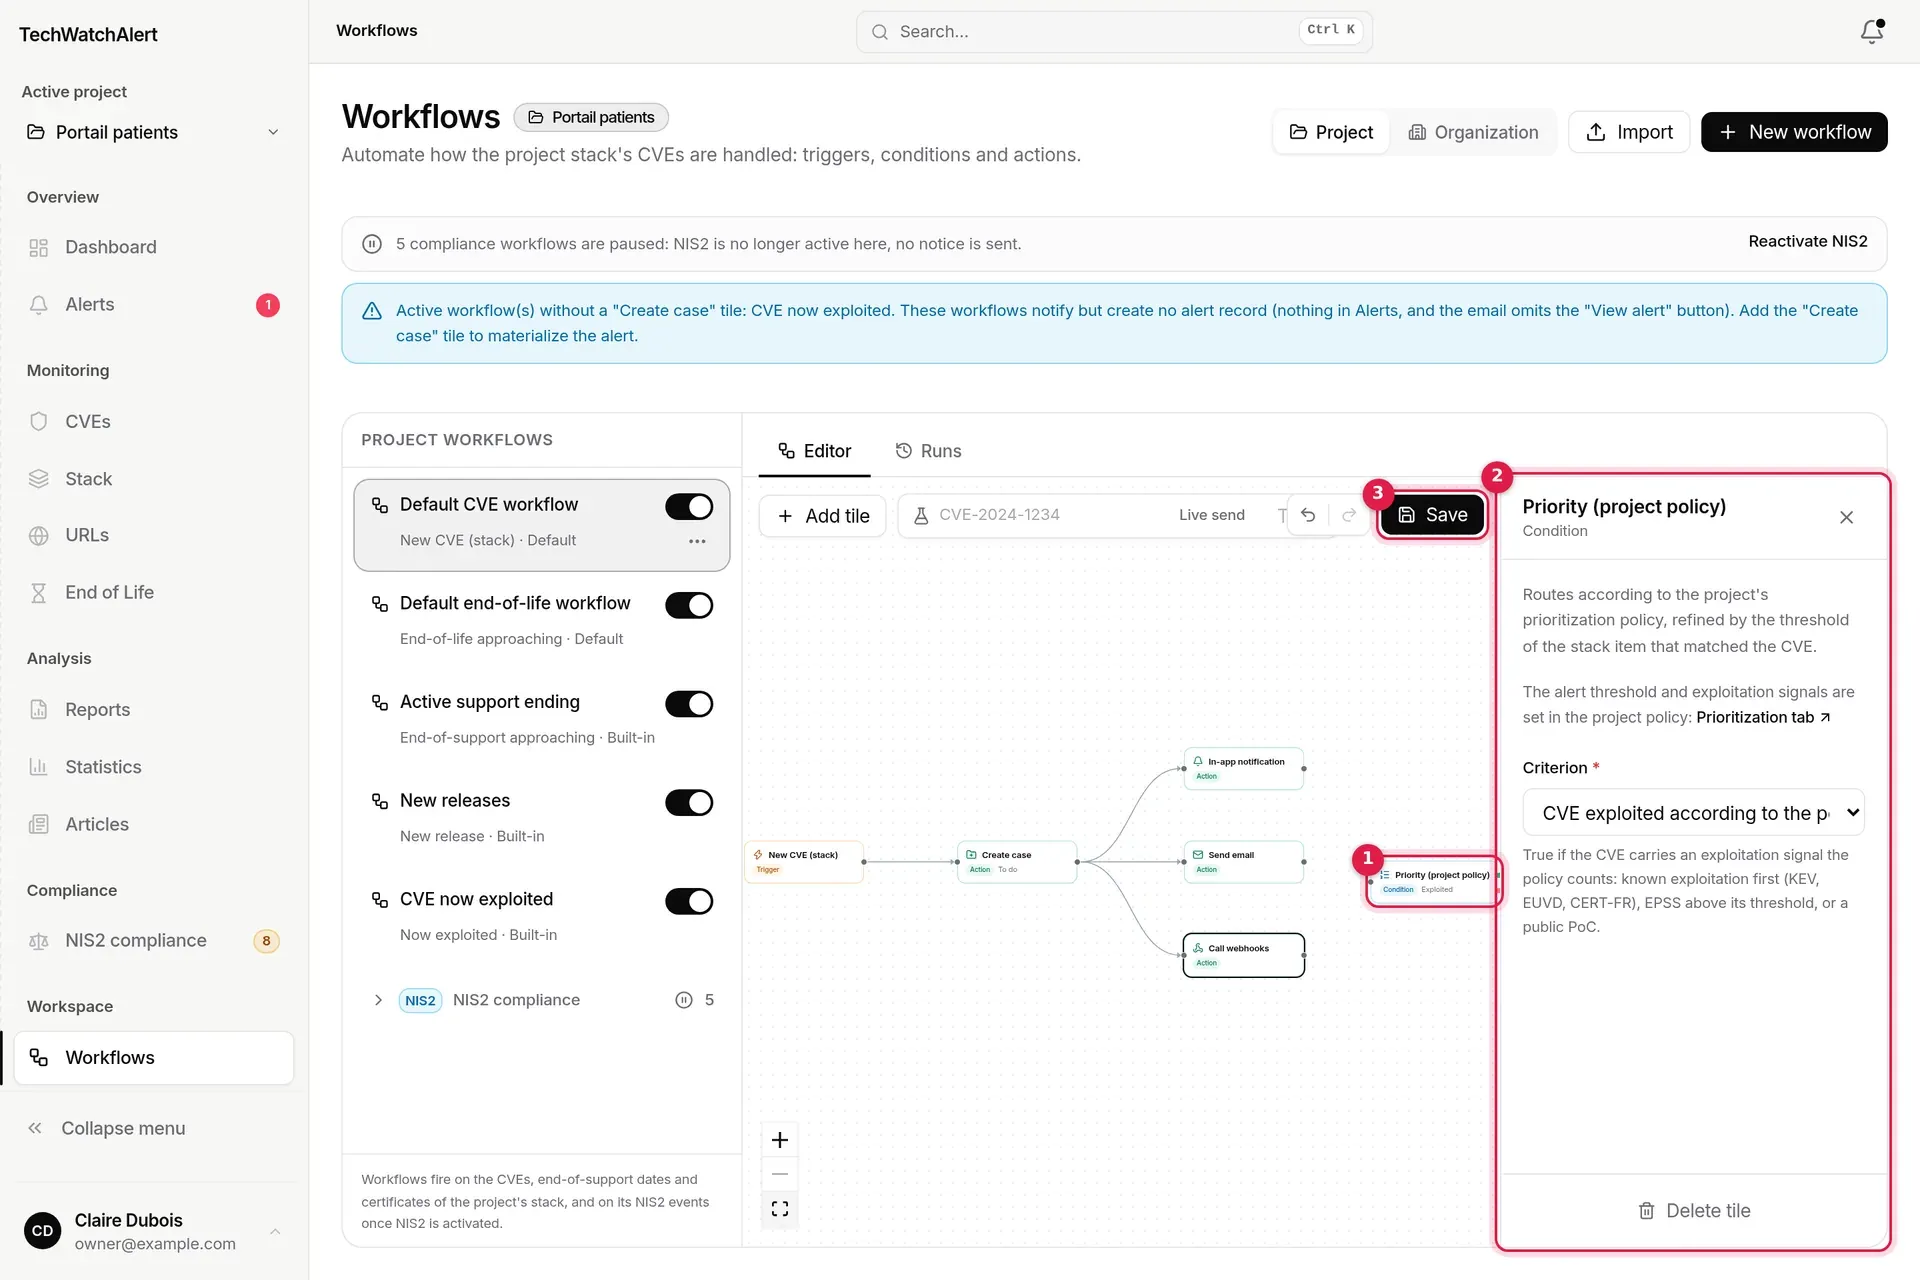
A tile does not live on its own: Create a ticket does nothing without a ticketing tool, Call webhooks without an active webhook, and a CVE tile only sees the project’s stack. Each tile’s panel therefore has a Where it’s set box: what the tile reads or needs, and links that lead straight to the right screen, on the right settings tab. In the palette, a line under each tile’s name already says so before you place it.
| Tile | Depends on | The link leads to |
|---|---|---|
| CVE triggers, Product name, Vendor name, Match type | the project’s stack; for New CVE (stack), CVE updated, PoC published and Fix available, also the project’s exclusion rules | Stack; project settings, Exclusions tab |
| End-of-life approaching, End-of-support approaching | the followed products, the advance notice | End of life; project settings, General tab |
| New release | the products whose new releases the project follows | End of life |
| End-of-life conditions | the followed cycle | End of life, Stack |
| HTTPS certificate expiring, certificate conditions, URL contains | the monitored URLs | URLs |
| NIS2 triggers and condition | the NIS2 registers | NIS2 settings, Due dates |
| Priority | the prioritisation policy | project settings, Alerts page |
| Case status, Create case | the case | Alerts |
| Has tag, Add tag | the organisation’s tag catalogue | organisation settings, Tags page |
| In-app notification | the project members | project settings, Members page |
| Send email | the project members and each one’s pace | Members page; My notifications, which opens without leaving the editor |
| Call webhooks | the project’s active webhooks, the Send webhooks switch | project settings, Integrations page |
| Create a ticket | the project’s ticketing tool, the plan | project settings, Integrations page |
| AI analysis option | the platform’s AI, the organisation’s AI quota | the organisation’s Subscription tab (owner) |
In an organisation workflow, recipients are the organisation’s members: the link leads to the Members page of the organisation settings.
When the editor can check it, the box also gives the state: Configured, To configure, Disabled, Not in plan or Unavailable, with the reason (“No ticketing tool is configured for this project: the tile will do nothing.”). A tile that cannot act as configured carries an orange dot on the diagram: click it to see why. Checked: the ticketing tool (missing, disabled, not in plan), the project’s webhooks (none active, chosen webhook disabled, delivery switched off), the tag catalogue (empty) and, when the option is ticked, the AI analysis (AI not configured on the platform, plan without AI).
Links take your rights and the plan into account: without the right to see the project’s webhooks or to manage the tag catalogue, the box says so instead of showing a link; a page the plan does not include is marked with a padlock.
While changes are not saved, leaving the workflow asks for confirmation first: opening another workflow from the list, switching to the Runs tab, changing scope or project, creating or importing a workflow, following a link (menu, breadcrumb, panel links, command palette, notifications), or using the browser’s Back and Forward. The Unsaved changes window offers:
Closing or reloading the browser tab, or following a link to another site, shows the browser’s own warning.
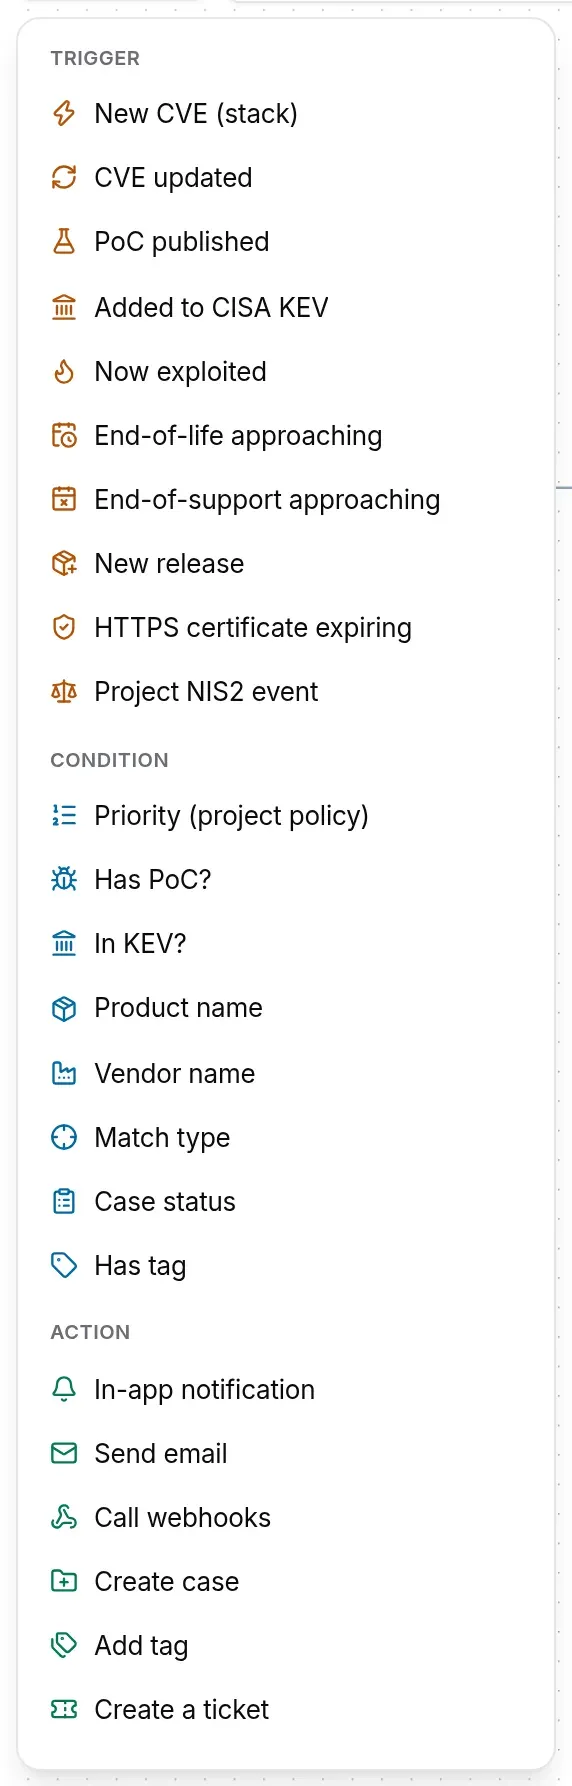
| Trigger | Fires when… |
|---|---|
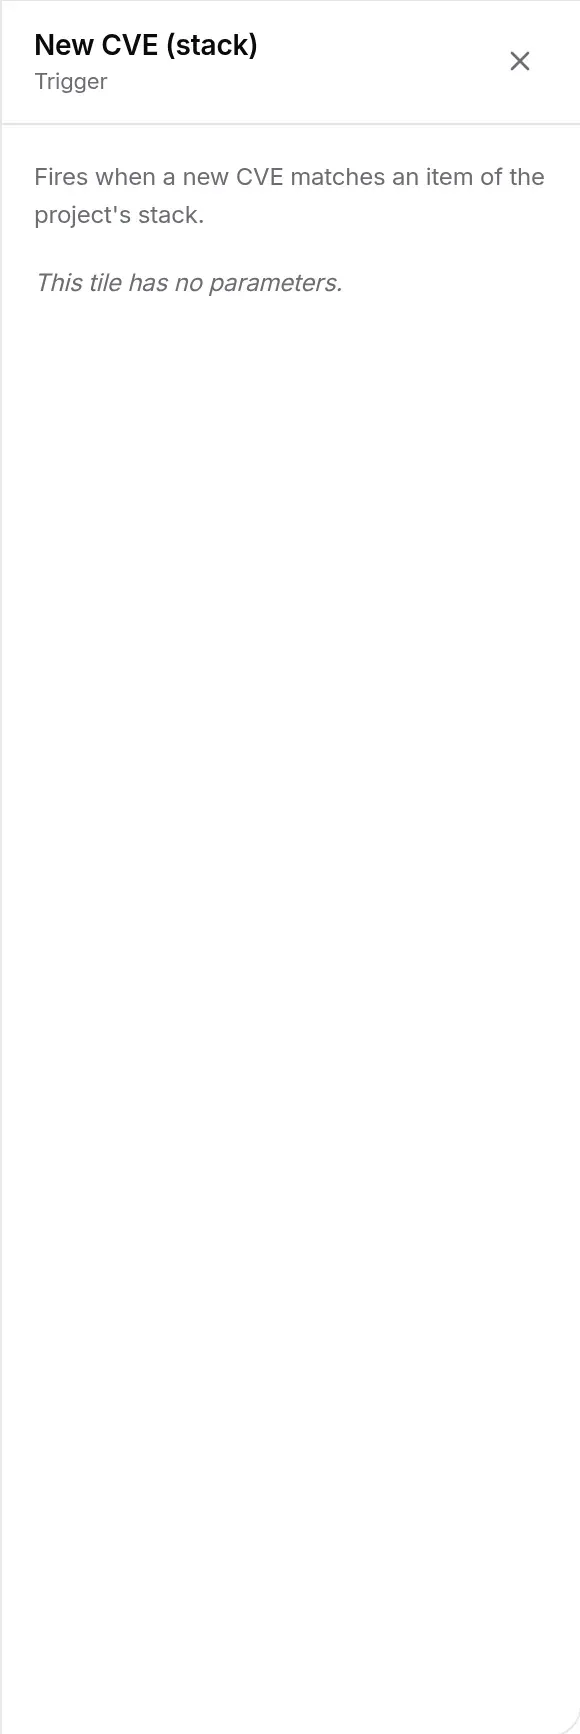
| New CVE (stack) | a new CVE matches an item of the project’s stack. Once per CVE, per workflow and per member concerned. Only CVEs published since the project was created fire it (see Alerts); the same goes for the triggers below, except for a CVE that already has its alert. |
| CVE updated | a CVE already known to the stack is modified. At most once a day per CVE. |
| PoC published | a public exploit is published for a CVE of the stack. |
| Added to CISA KEV | a CVE of the stack enters the CISA KEV catalogue. |
| Now exploited | a CVE of the stack becomes known to be exploited, whatever the source: CISA KEV, VulnCheck, CERT-FR or ENISA’s EUVD. It covers KEV too: no need to keep both triggers in the same project. |
| Fix available | a fixed version is published for a stack CVE that had none (CVE, NVD, GitHub, OSV or the affected systems of a CERT-FR advisory). What counts is the switch from “no known fix” to “fix known”: a re-import does not fire it again, and a CVE published with its fix from the start goes through New CVE (stack). The notification and the e-mail name the fixed version; the webhook carries it in versions_corrigees. The message follows each person’s pace (immediate or digest). |
| Linked to ransomware | a stack CVE is linked to ransomware by CISA (“Known” field of the KEV catalog) or by VulnCheck, including when CISA silently reclassifies an older entry. A source confirming the other does not fire it again. Urgent: the e-mail goes out at once, even for digest readers; the notification names the source, the webhook carries it in rancongiciel_sources. |
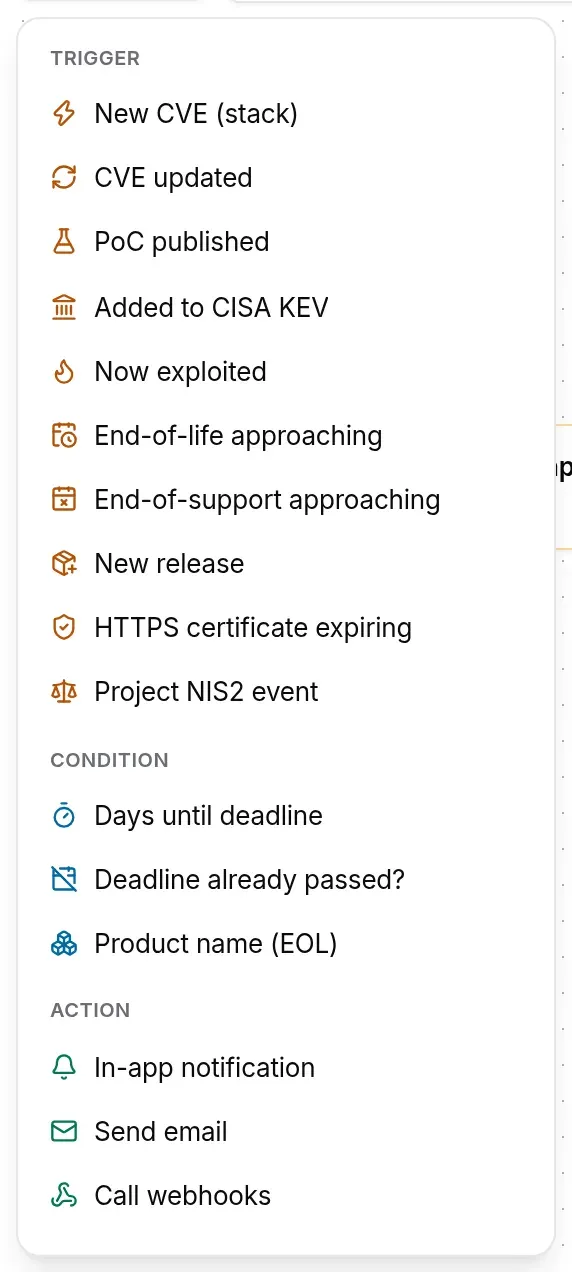
| Trigger | Fires when… |
|---|---|
| End-of-life approaching | a product tracked in End of Life nears its end of life. |
| End-of-support approaching | a tracked product nears its end of support. |
| New release | a new version of a tracked product is detected. |
| Trigger | Fires when… |
|---|---|
| HTTPS certificate expiring | the certificate of a monitored URL crosses a threshold: 60, 30, 14, 7 or 1 day before expiry, then at expiry. |
| Trigger | Fires on… |
|---|---|
| Project NIS2 event | the NIS2 events ticked in its settings: remediation due date approaching, overdue, escalated to the security lead; component out of support, escalated; inventory review due; risk to approve, risk decision, risk acceptance to review. Only offered once NIS2 is activated on the project. |
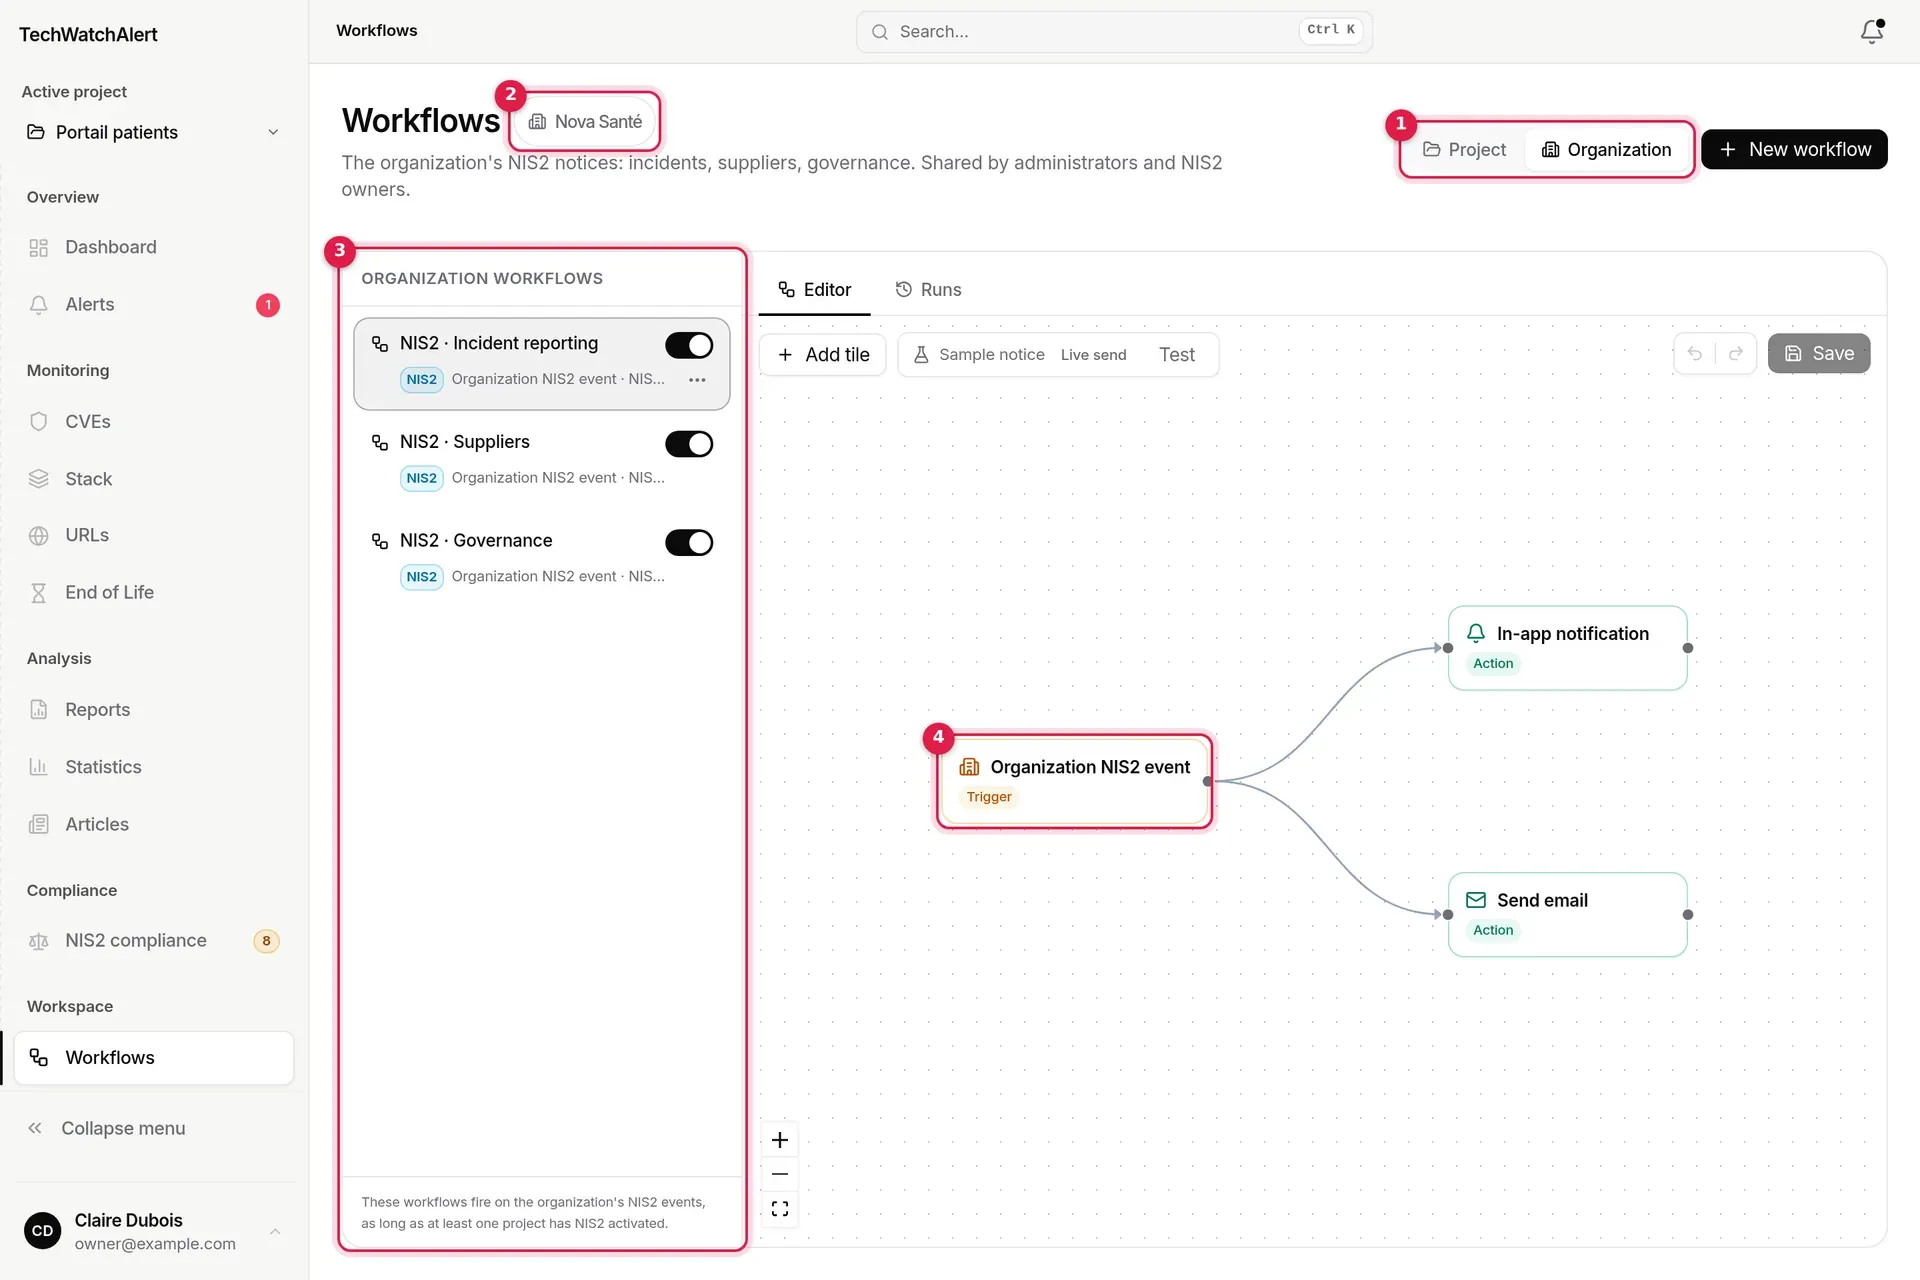
| Organization NIS2 event | only available in the Organization scope: incident reporting deadline, supplier to assess, NIS2 report ready, NIS2 owner named. |
| Condition | Family | Settings | True when… |
|---|---|---|---|
| Priority (project policy) | CVE | Criterion * | the CVE meets the chosen criterion under the project’s prioritisation policy (see below). |
| Has PoC? | CVE | — | a public exploit exists. |
| In KEV? | CVE | — | the CVE is in the CISA KEV catalogue. |
| Product name | CVE | Operator *, Value * | the CVE’s main product contains / starts with / ends with / equals the text. |
| Vendor name | CVE | Operator *, Value * | the same for the CVE’s main vendor. |
| Match type | CVE | Value * (Vendor, Product) | the stack item that matched the CVE is of this type. |
| Case status | CVE | Operator * (equals, not equal), Value * | the CVE’s case in the project has this status; “No case” when there is none. |
| Has tag | CVE | Tag * | the CVE carries this tag in the project (organisation tags). |
| Days until deadline | End of life | Operator *, Value * (−3650 to 3650) | the number of days before the deadline meets the comparison; negative = deadline passed. |
| Deadline already passed? | End of life | — | end of life or end of support has already been reached. |
| Product name (EOL) | End of life | Operator *, Value * | the product name matches. |
| Days until expiry | Certificate | Operator *, Value * | the number of days before expiry meets the comparison; negative = already expired. |
| Certificate expired? | Certificate | — | the certificate has already expired. |
| URL contains | Certificate | Operator *, Value * | the URL (or its label) matches. |
| NIS2 event type | NIS2 | Events * | the incoming event is one of those ticked: useful to handle an escalation differently from a plain due date. |
The numeric operators are “greater than”, “greater or equal”, “less than” and “less or equal”.
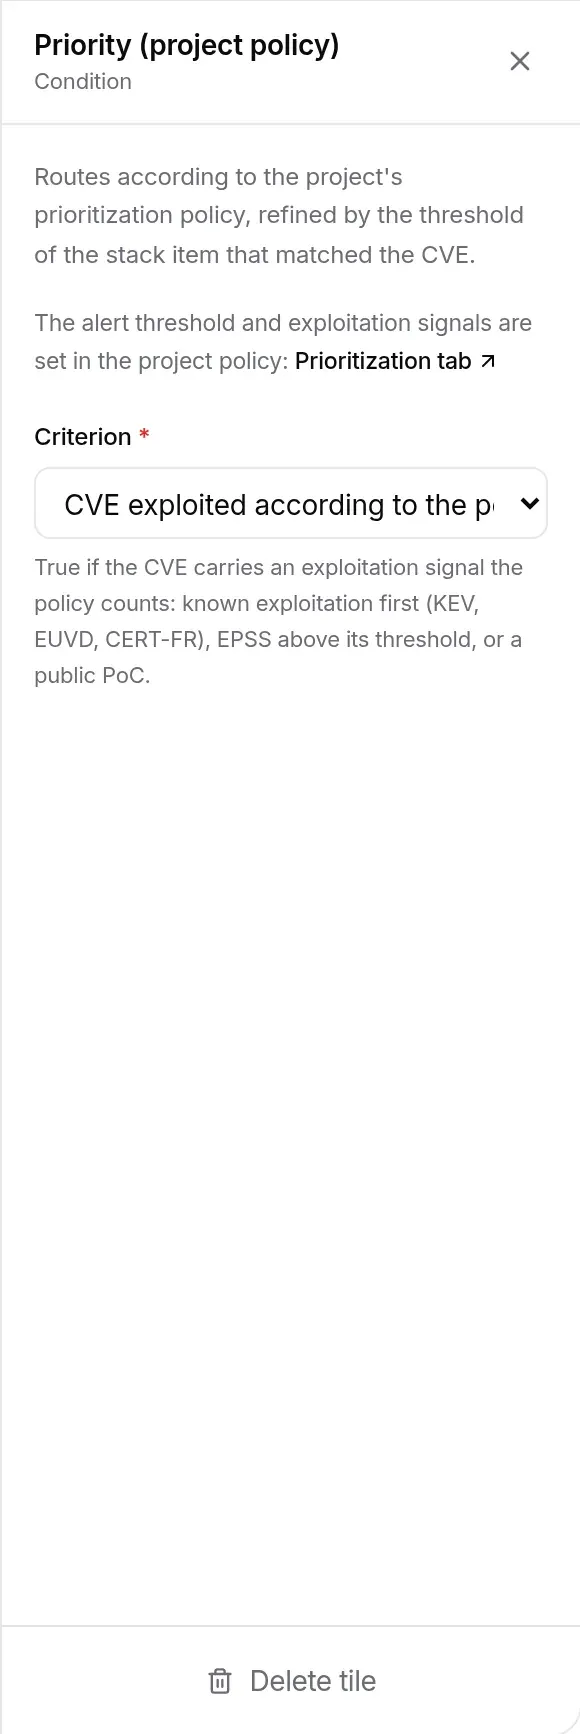
The Priority condition reads the project’s prioritisation policy (link Prioritization tab in its panel), refined by the threshold of the stack item that matched the CVE. Its four criteria:
| Criterion | True if… |
|---|---|
| CVE exploited according to the policy | the CVE carries an exploitation signal the policy counts: known exploitation (KEV, EUVD, CERT-FR), EPSS above its threshold, or a public PoC. |
| CVE with known exploitation, ranked first | exploitation is known (CISA KEV, ENISA EUVD or CERT-FR) and the policy ranks it first. |
| CVE above the alert threshold | the CVSS score reaches the alert threshold: the stack item’s if refined, otherwise the policy’s. |
| CVE below the threshold but alerted by the exploitation exception | the CVE is below the threshold but alerts anyway because it is exploited. |
| Action | Family | Settings | What it does |
|---|---|---|---|
| In-app notification | All | Recipients (NIS2) | Creates a notification in the bell. |
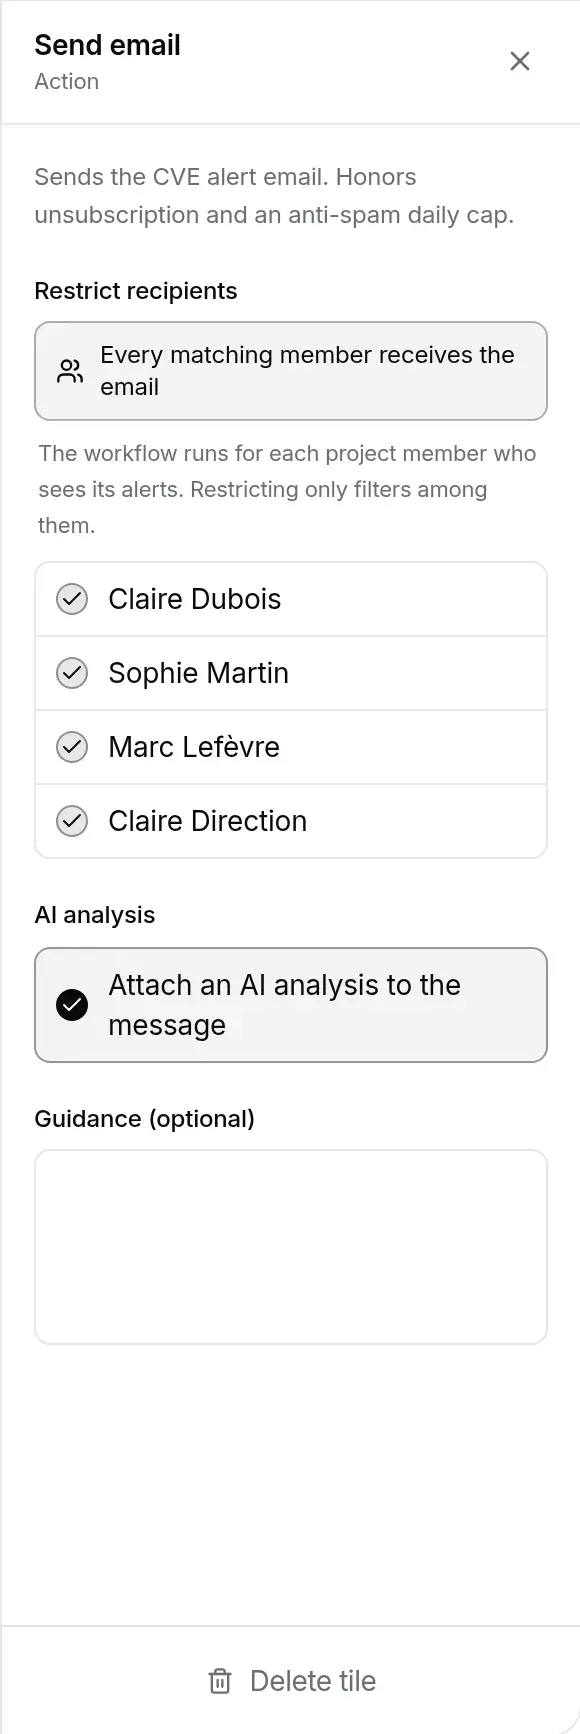
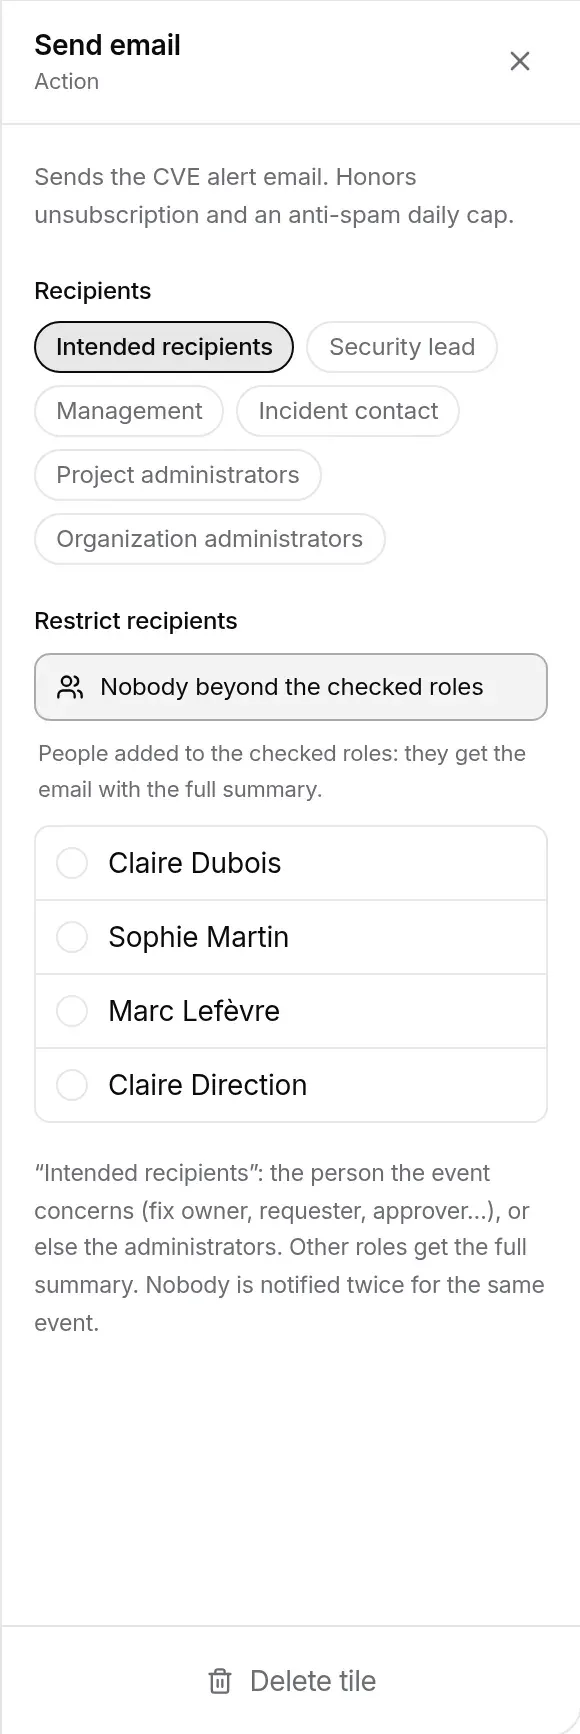
| Send email | All | Restrict recipients, AI analysis, Guidance (optional); Recipients (NIS2) | Sends the alert e-mail, following each recipient’s chosen frequency. |
| Call webhooks | All | Webhook, Format, AI analysis, Guidance (optional) | Sends the alert to the project’s webhooks. |
| Create case | CVE | Status | Creates the CVE’s alert record in the project with the chosen status (To do by default). |
| Add tag | CVE | Tag * | Adds an organisation tag to the CVE in the project. |
| Create a ticket | CVE | — | Opens a ticket in the tool set up in the Integrations page of the project settings (Jira, GitLab or GitHub). |
What to know about each action:
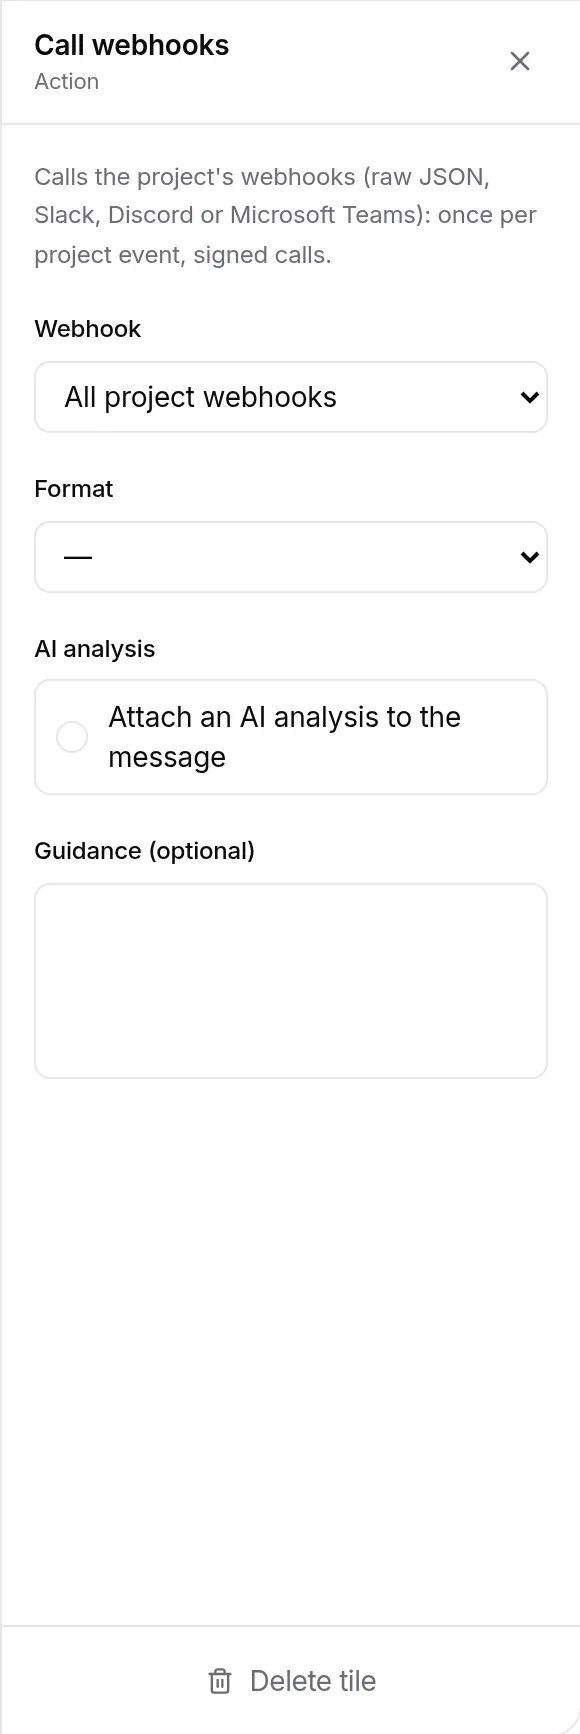
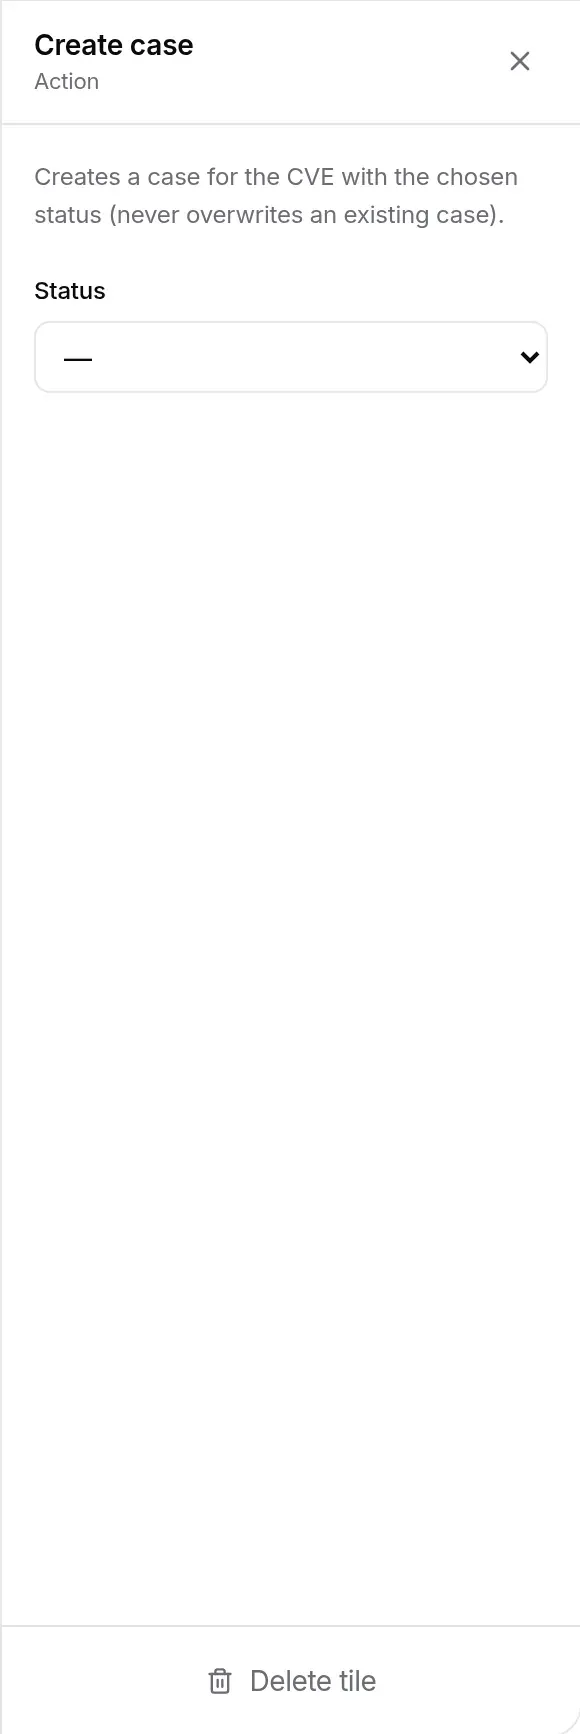
The exact graph format (tiles, parameters, arrows) is described in the API guide: Workflow JSON format.
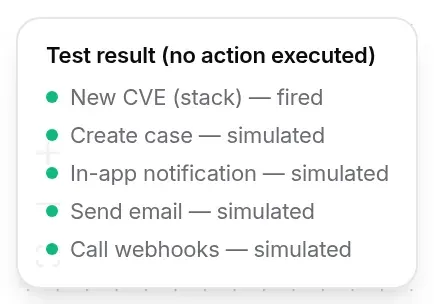
The toolbar test field replays the workflow as it stands on screen (even unsaved) against a real case, without running anything: conditions are evaluated, actions are only simulated.
CVE-2024-6387;nodejs 20;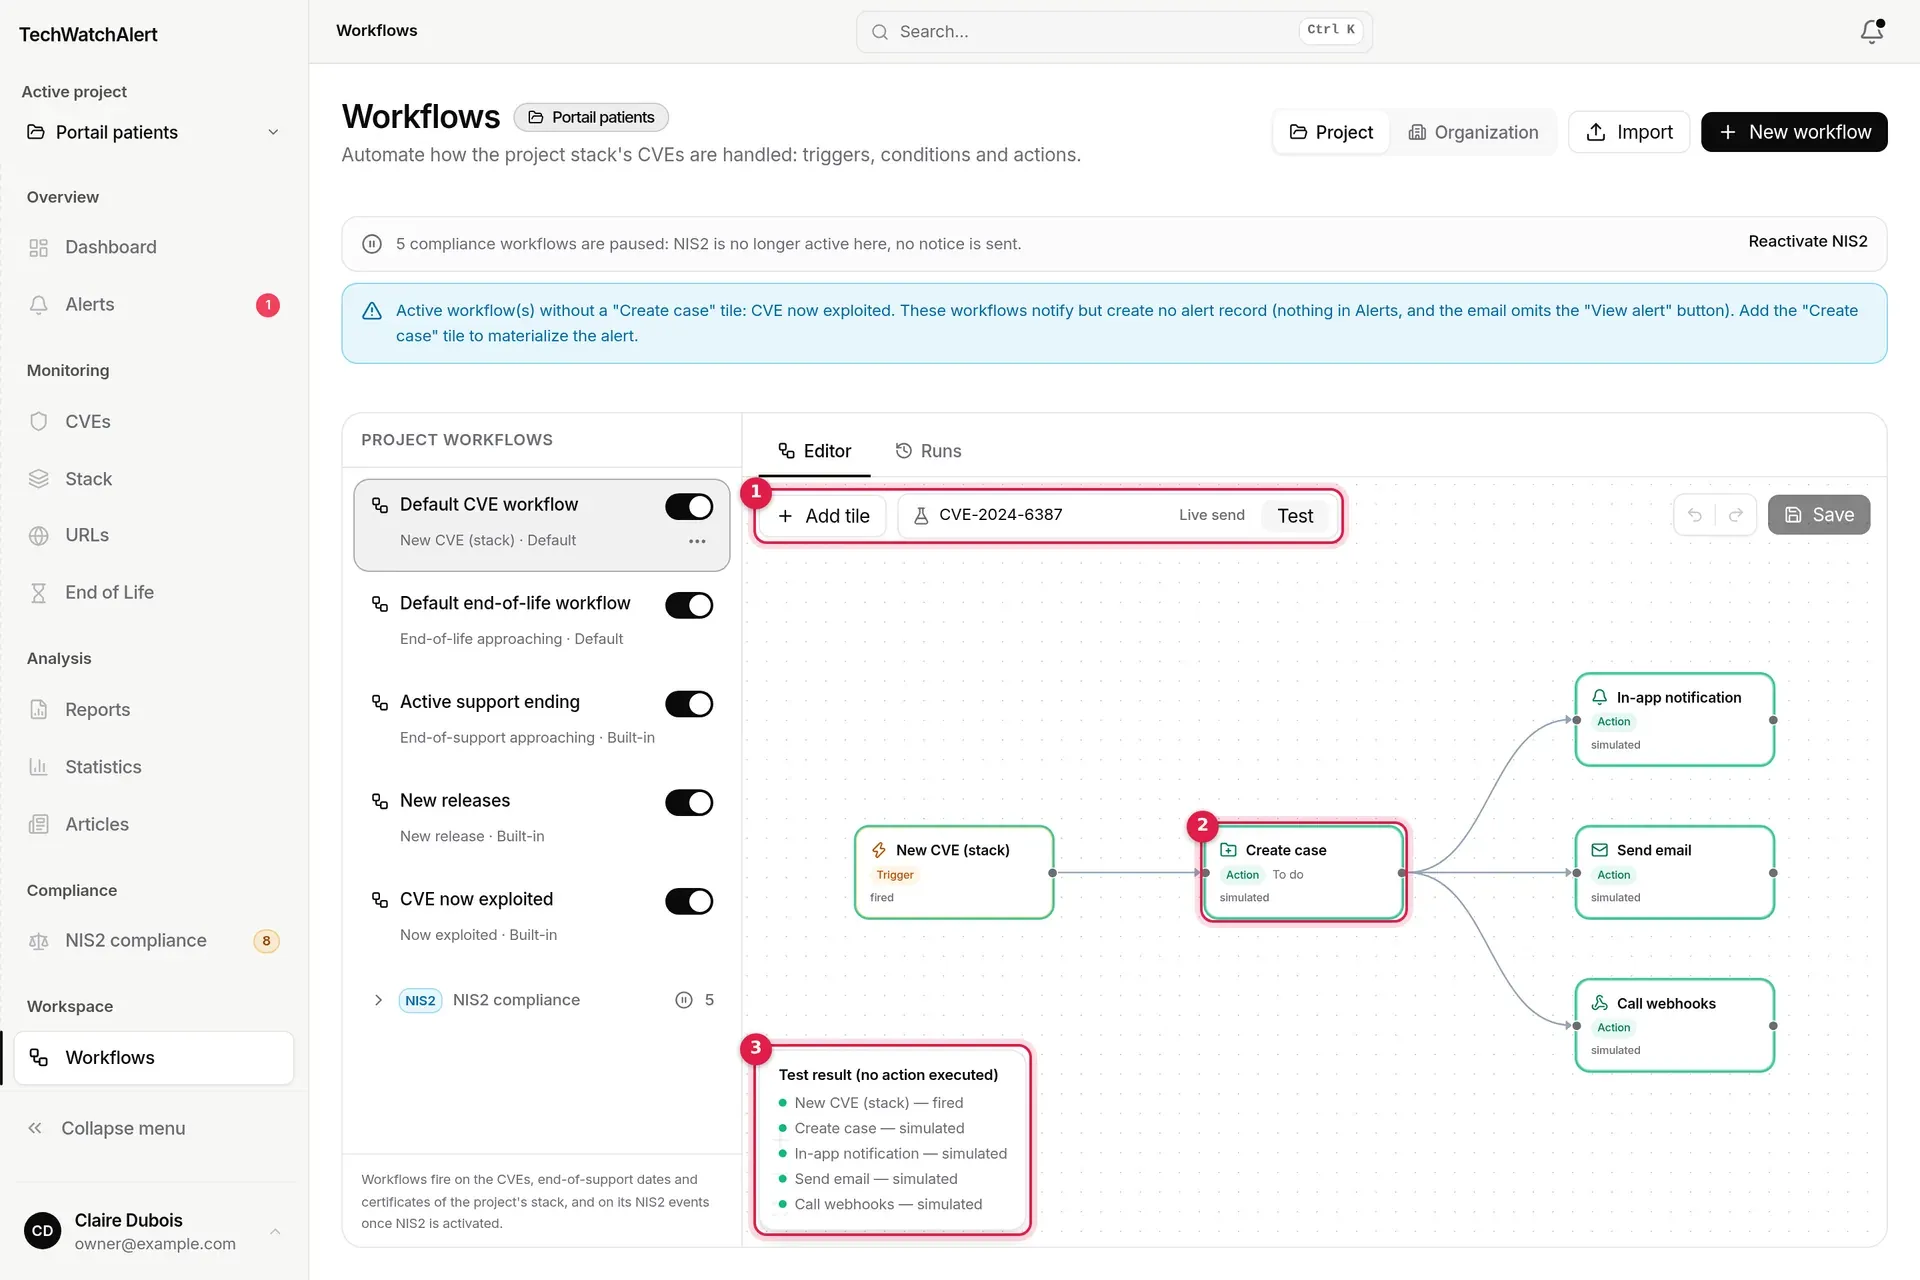
The Runs tab lists the last 50 runs of the selected workflow: Event, CVE, Status, When. Click a row to see the detailed path, tile by tile, with the reason an action was skipped. A webhook call first shows as queued (blue dot): it goes out after the event has been recorded, and its actual outcome, sent or error, then replaces that mention (see Notifications › Project webhooks).
| Status | Meaning |
|---|---|
| Success | every action reached completed (or was skipped for a normal reason). |
| Partial | at least one action failed. |
| Failed | the workflow has no trigger. |
| Throttled | a cap (on e-mails, for instance) held an action back. |
| Test | test run. |
A run is never repeated for the same event: a new CVE, a PoC, a KEV addition, a switch to exploited, a fix becoming available or a link to ransomware triggers one run per workflow and per member; a CVE update, at most one a day.
The last two also leave a trace in the CVE’s case history, when there is a case, whether or not a workflow is set up: “Fix available” with the fixed version, “Linked to ransomware” with the source. These lines do not change the case status and do not count as team actions.
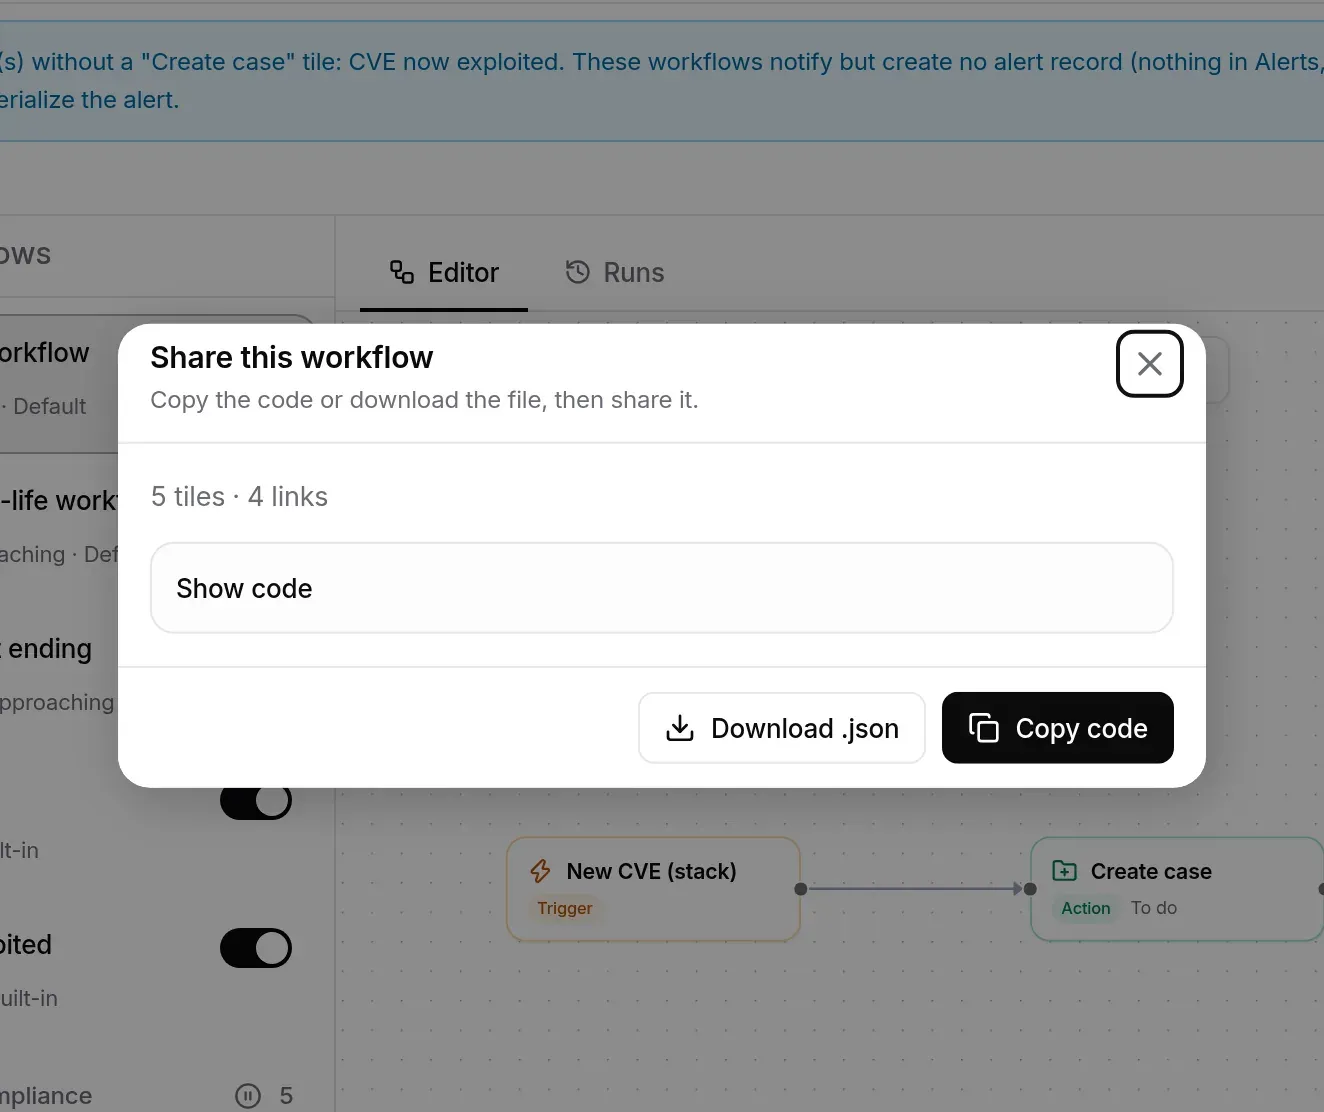
workflow-name.twa-workflow.json)..json file and creates a new workflow. A bare graph (tiles and arrows) is accepted too. The server validates the graph as it does on save.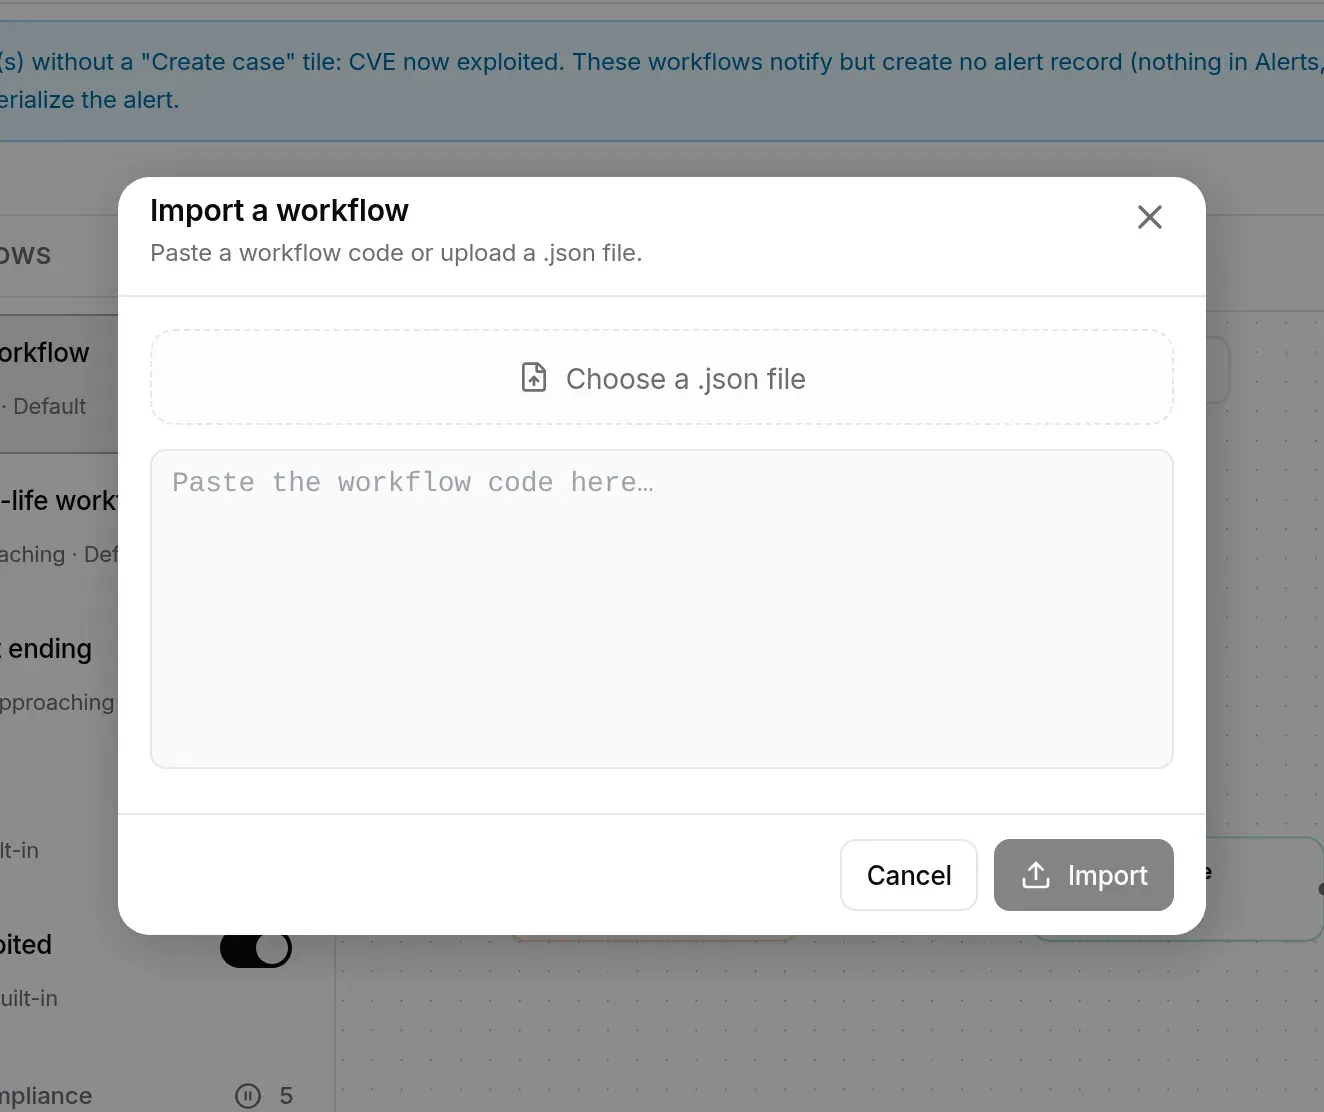
New workflow immediately creates an active workflow called “New workflow”, with just the New CVE (stack) trigger. The banners warn at once that it does not notify anyone yet.
The app’s shortcuts lead straight to the right workflow: the “Choose who receives the alerts” step of the Getting started card opens the default CVE workflow; in NIS2 compliance › Settings, a workflow’s name opens it in the editor, and View workflows opens the project’s ones.
Once NIS2 is activated on a project, its notices (remediation due dates, escalations, end of life, inventory reviews, accepted risks) also go through workflows, grouped in the collapsed NIS2 compliance section of the list. If NIS2 is later deactivated, these workflows are Paused: they resume as they were on reactivation.
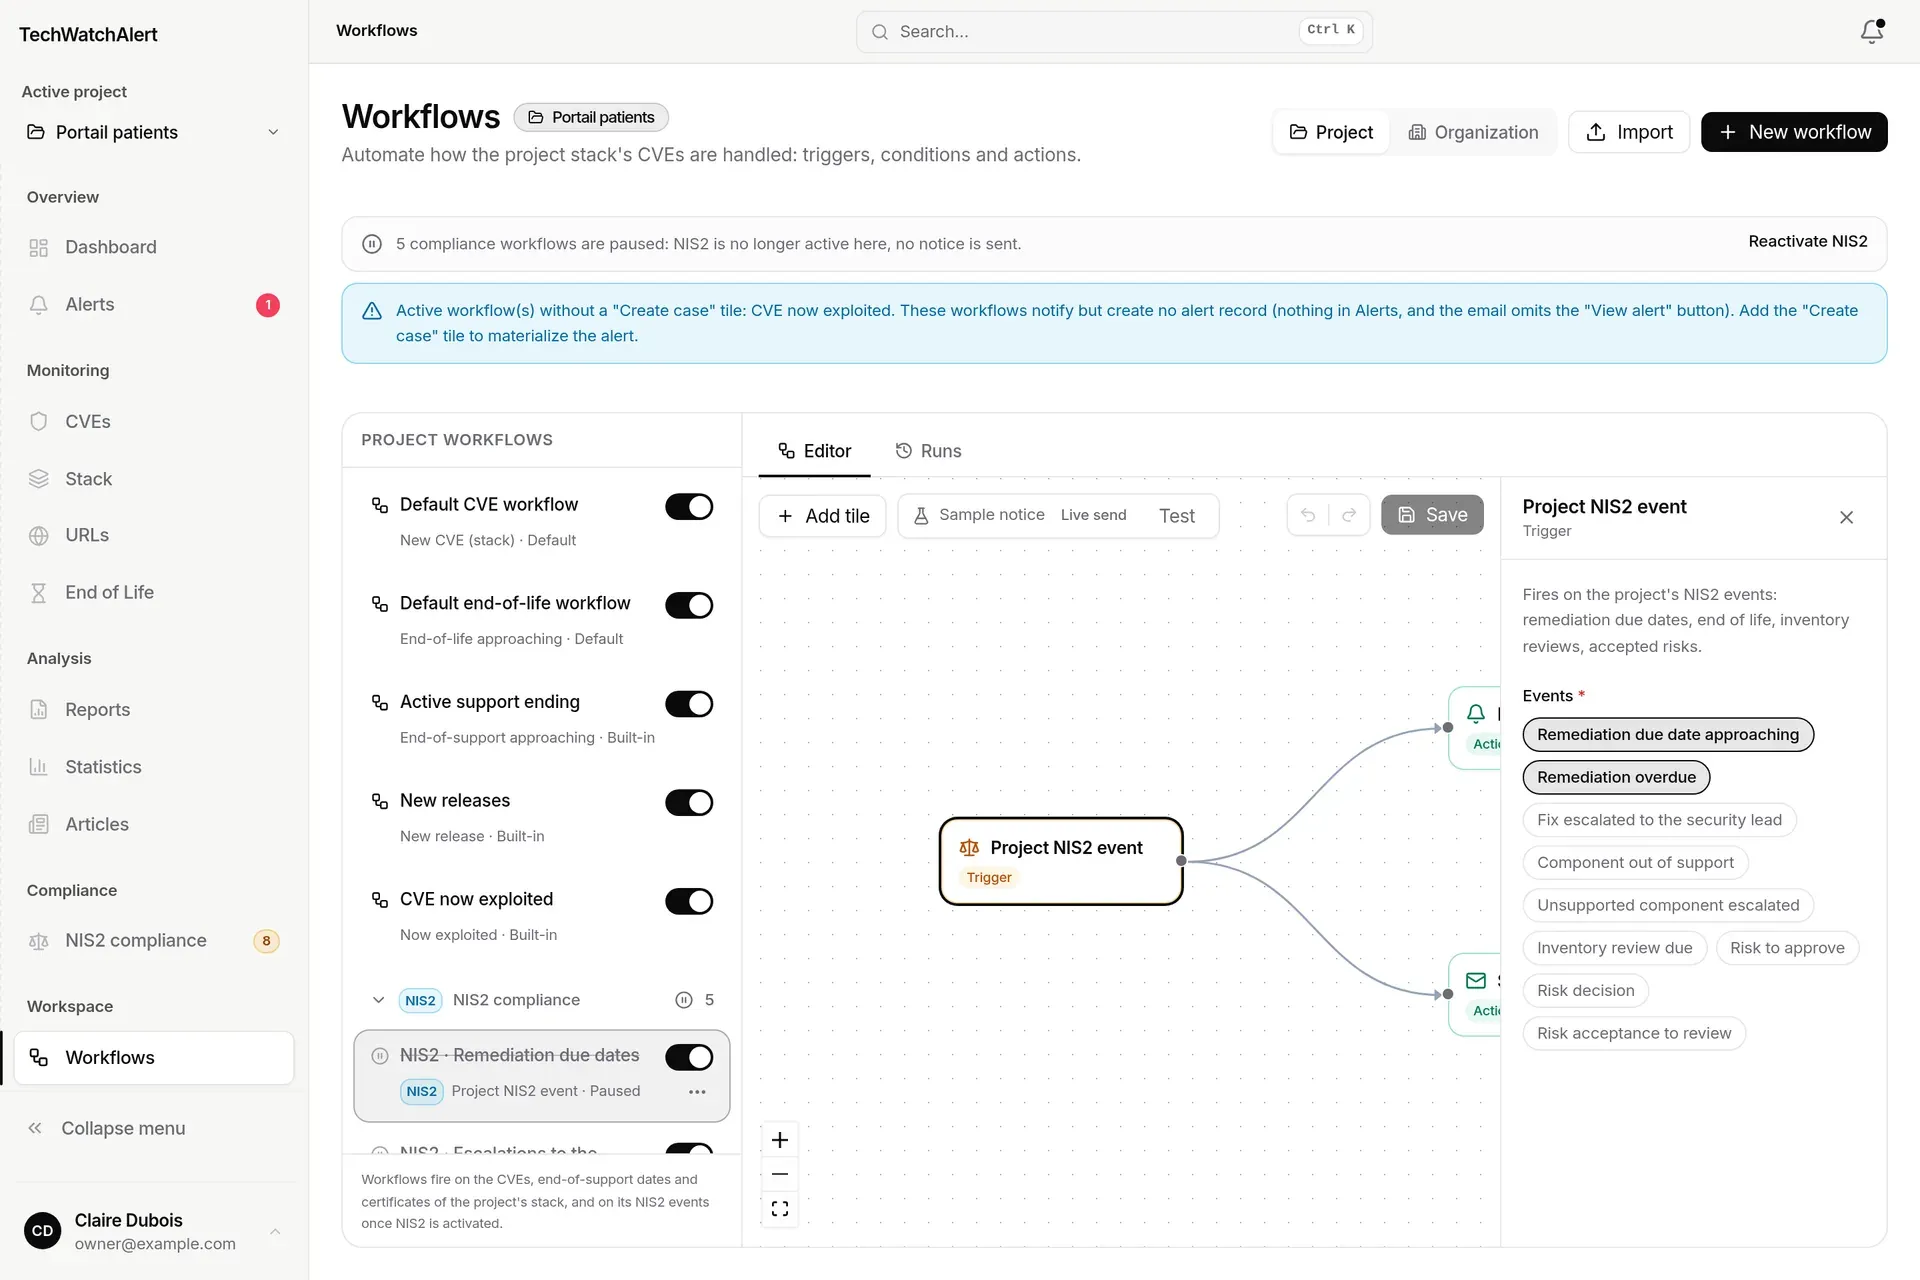
| NIS2 workflow | Scope | Events |
|---|---|---|
| NIS2 · Remediation due dates | Project | remediation due date approaching, overdue |
| NIS2 · Escalations to the security lead | Project | fix escalated, unsupported component escalated |
| NIS2 · End-of-life components | Project | component out of support |
| NIS2 · Inventory reviews | Project | inventory review due |
| NIS2 · Accepted risks | Project | risk to approve, decision, acceptance to review |
| NIS2 · Incident reporting | Organisation | incident reporting deadlines (24 h, 72 h, one month) |
| NIS2 · Suppliers | Organisation | supplier to assess |
| NIS2 · Governance | Organisation | NIS2 report ready, NIS2 owner named |
In these workflows, notification tiles have a Recipients setting by role: Intended recipients (the person the event concerns: fix owner, requester, approver…, or else the administrators), Security lead, Management, Incident contact, Project administrators, Organization administrators. Nobody is notified twice for the same event.
The Organization scope gathers the three organisation workflows. They are shared by the organisation’s administrators and NIS2 owners; only organisation administrators can change them.
The NIS2 settings themselves are covered in NIS2 compliance › Settings.
On the Workflows screen, the AI assistant can create or modify a workflow from a sentence (“Create a workflow that e-mails me about critical CVEs with a public PoC”). The proposed diagram is loaded into the editor as a draft: nothing is saved until you choose Approve and save (or Create the workflow for a new one), and Cancel restores the previous diagram. The assistant only builds project workflows.
This feature requires:
It uses the assistant’s daily message quota and the organisation’s monthly AI quota.
| Action | Viewer | Analyst | Administrator | Owner |
|---|---|---|---|---|
| View workflows and their runs, dry run | ✓ | ✓ | ✓ | ✓ |
| Create, edit, enable, delete, live test | ✓ | ✓ | ||
| Copy to a project, AI workflows | ✓ | ✓ |
These are each role’s default rights; they can be adjusted member by member (see Team, roles and groups). Copying requires the right to create workflows in the target project; the AI builder, the right to create workflows in the current project. Without edit rights, the editor opens read-only.
Plan: workflows are included in every plan. What depends on the plan: the number of project webhooks, the Create a ticket tile (case management) and the AI builder.
I disabled the default CVE workflow: will I still be alerted? No, unless another active workflow in the project listens to the same event. The “All workflows are disabled” or “without a notification tile” banner reminds you.
Do my colleagues receive the e-mails from my workflows? Yes, if they are project members, can see its alerts and Restrict recipients does not leave them out. Each receives them at their own frequency.
Why does my test say “no” when the CVE is critical? The Priority condition follows the project’s prioritisation policy and the stack item’s threshold, not just the severity. Check the Alerts page of the project settings.