Account and sign-in
This page covers everything that happens before you enter the application and when you leave it: sign-up, email confirmation, sign-in, two-factor authentication (2FA), forgotten passwords, trying without an account, accepting an invitation and signing out.
These screens share the same layout:
- at the top, the TechWatchAlert name (it leads to the public website), the name of the screen (“Sign in”, “Create an account”…) and, on the right, the button that switches between the light and dark themes;
- at the bottom, the links The site, Documentation, Terms of use, Privacy and Support (an email to support@techwatchalert.com).
Signing in
Section titled “Signing in”Address: /login. This is where you land if you are not signed in.
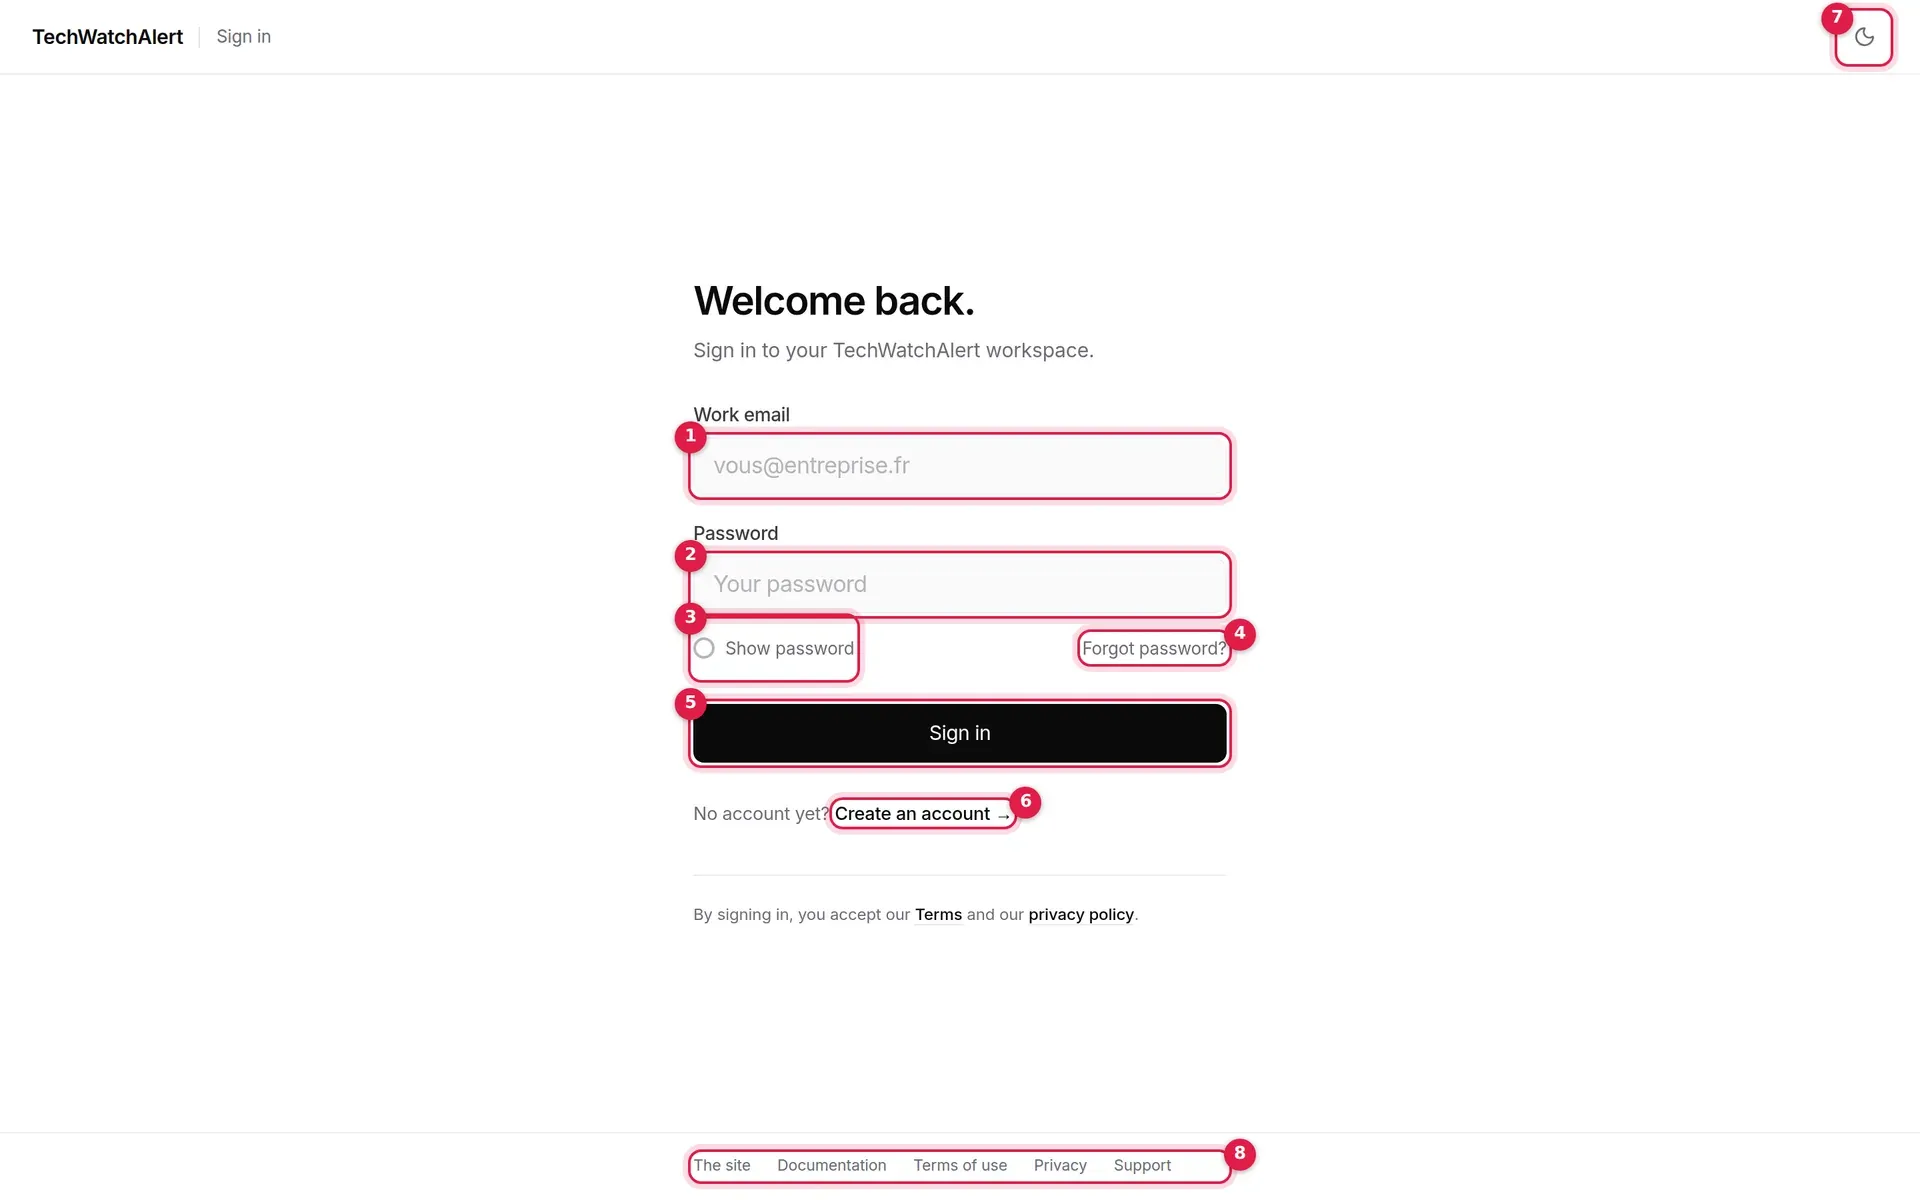
- Work email: your account’s address. Upper or lower case makes no difference.
- Password.
- Show password: a tick box that shows what you type.
- Forgot password?: leads to the reset request.
- Sign in.
- Create an account →: leads to sign-up.
- Switches between light and dark themes.
- Footer links.
By signing in, you accept the Terms and the privacy policy (links below the form).
What happens next
Section titled “What happens next”- Without two-factor authentication, you land on the dashboard, or on the page you were trying to open before being sent to sign in.
- If two-factor authentication is on, the Two-step verification screen asks for your code.
- If your account has no organisation yet, the application sends you to the start-up wizard. See First steps.
- If you came from an invitation, it is accepted straight away.
The session stays open as long as you use it: it renews itself and only expires after 7 days without activity, and at the latest 30 days after you signed in, however active you are. You then need to sign in again.
Signing in with SSO
Section titled “Signing in with SSO”When you leave the email field, TechWatchAlert checks whether your domain belongs to an organisation that has set up single sign-on (SSO). If so, the Sign in with your organization’s SSO button appears below the address:
- if the organisation still allows passwords, the usual form remains available below “or with a password”;
- if it requires SSO, the password field disappears and only the SSO button remains.
The address returned by your identity provider must belong to one of the organisation’s verified domains; otherwise sign-in is refused with the message “This address is not in a verified domain of your organization: SSO sign-in refused.”.
SSO set-up is described in Organisations.
Error messages
Section titled “Error messages”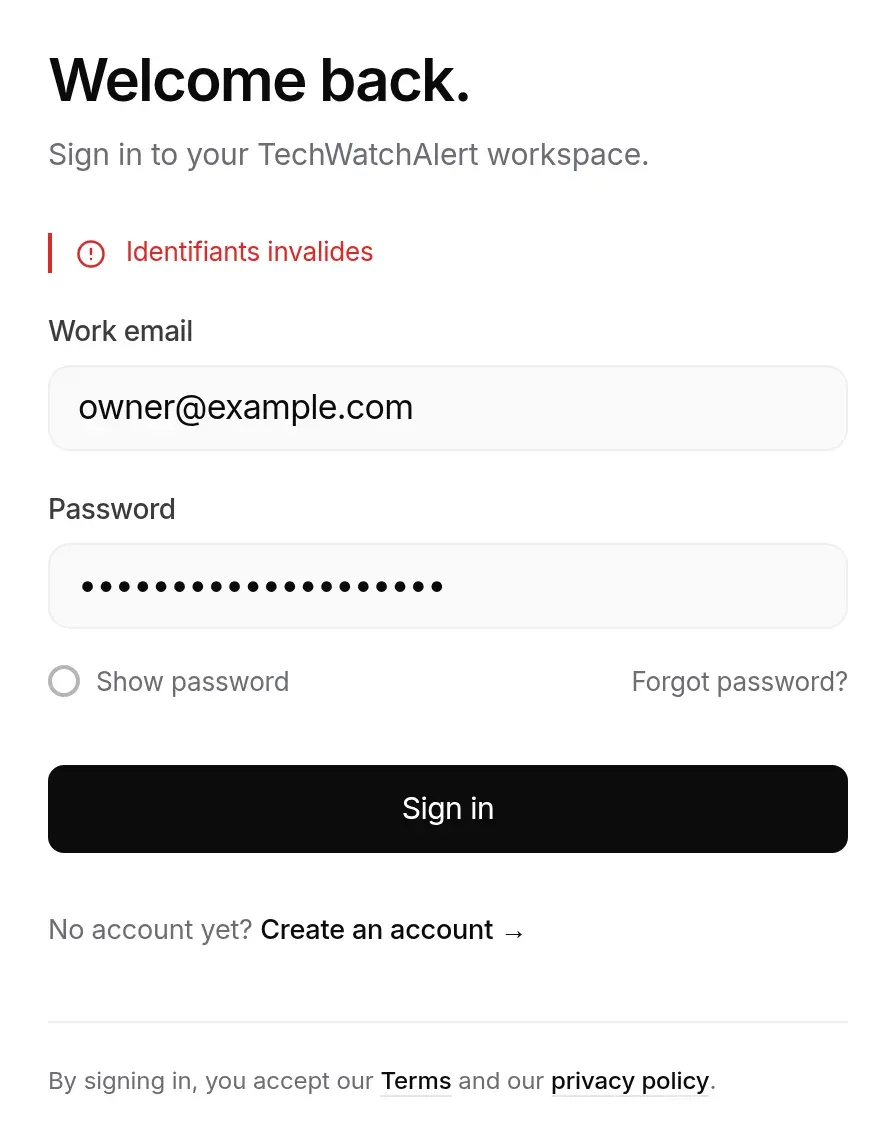
| Message | Cause |
|---|---|
| Identifiants invalides (invalid credentials) | Unknown address or wrong password. The message is deliberately the same in both cases. |
| Compte désactivé (account disabled) | The account has been disabled by the platform administrators. |
| Ce compte est en cours de suppression. Écrivez au support avant le dd/mm/yyyy pour l’annuler. (this account is being deleted; write to support before that date to cancel) | You confirmed the account deletion (see Settings › Delete my account): it can still be reversed until that date. |
| Your organization requires sign-in via SSO. | Your domain is subject to SSO: use the SSO button. |
| Trop de tentatives. Réessayez dans une minute. (too many attempts, try again in a minute) | More than 10 attempts in a minute from the same network address. |
| Trop de tentatives sur ce compte. Réessayez dans n minute(s). (too many attempts on this account, try again in n minutes) | Temporary account lock: see below. |
| Sign-in via your SSO provider failed, the SSO session has expired, etc. | An error returned by the identity provider. Start the SSO sign-in again. |
Temporary lock
Section titled “Temporary lock”Every failure on the same email address is counted, whether it comes from the password or the two-factor code, and wherever it comes from. From the 5th failure within an hour, sign-ins to that address are blocked for 1 minute, then 2, 4, 8 minutes… with each new failure, one hour at most. A successful sign-in resets the counter. The lock behaves the same whether or not an account exists for that address: it reveals nothing. Wait for the time shown, or use Forgot password? if you are no longer sure of your password.
If your address has not been confirmed yet, you do not get an error: you are sent to the Check your inbox screen, which lets you resend the link.
Creating an account
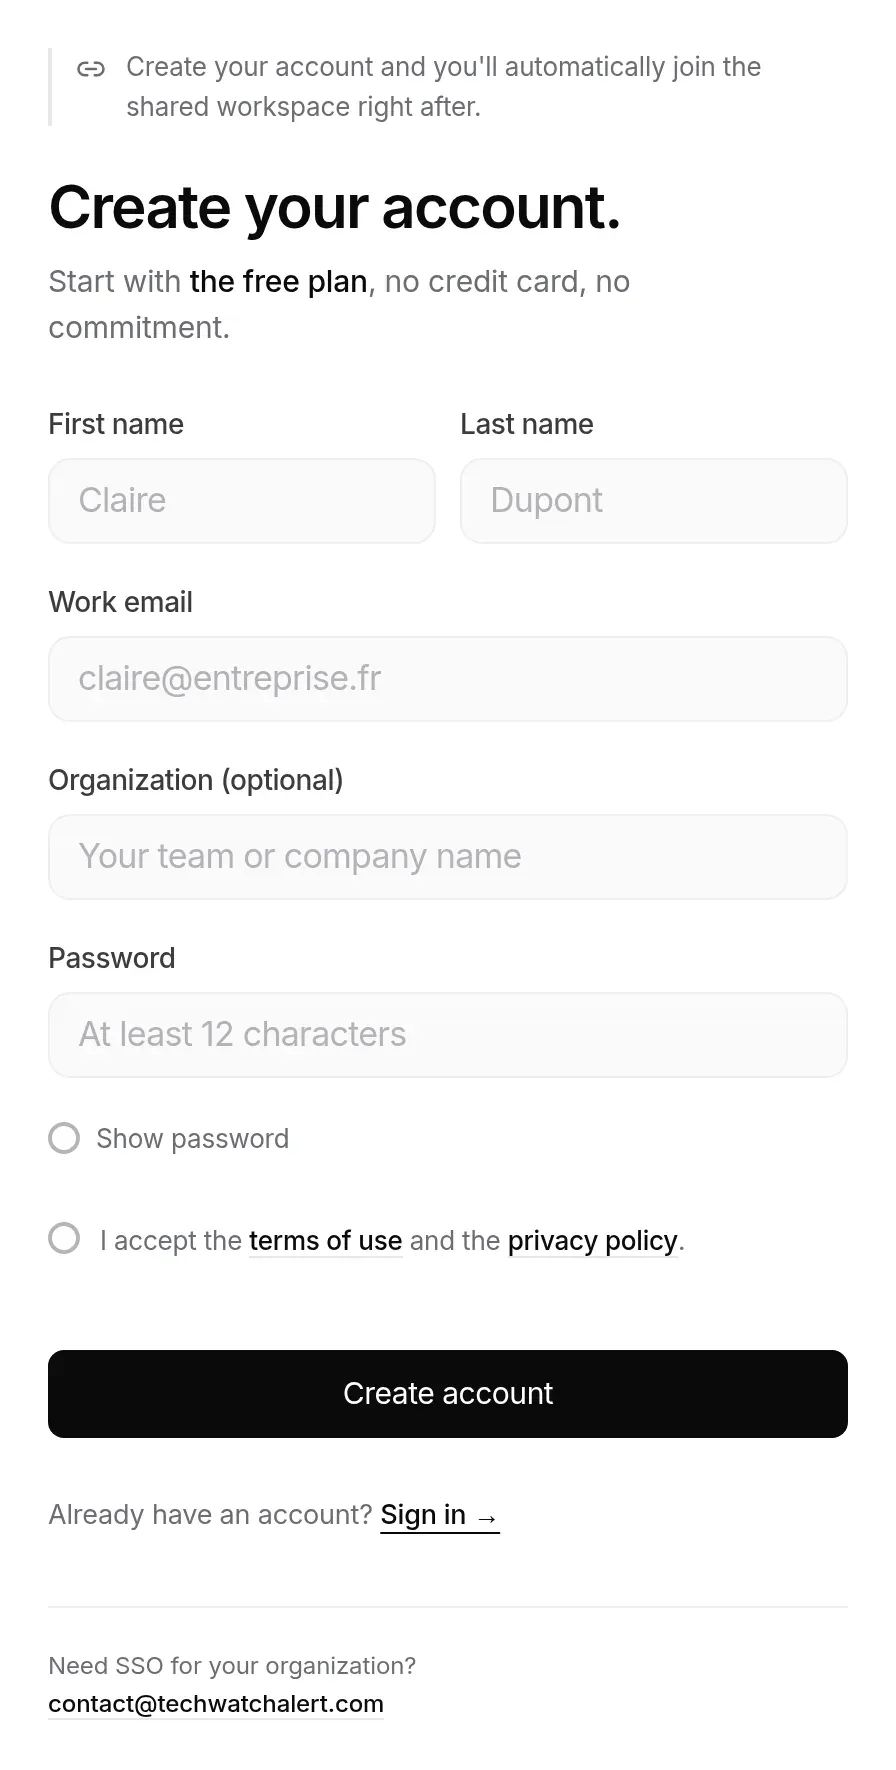
Section titled “Creating an account”Address: /register, or Create an account → from the sign-in screen.
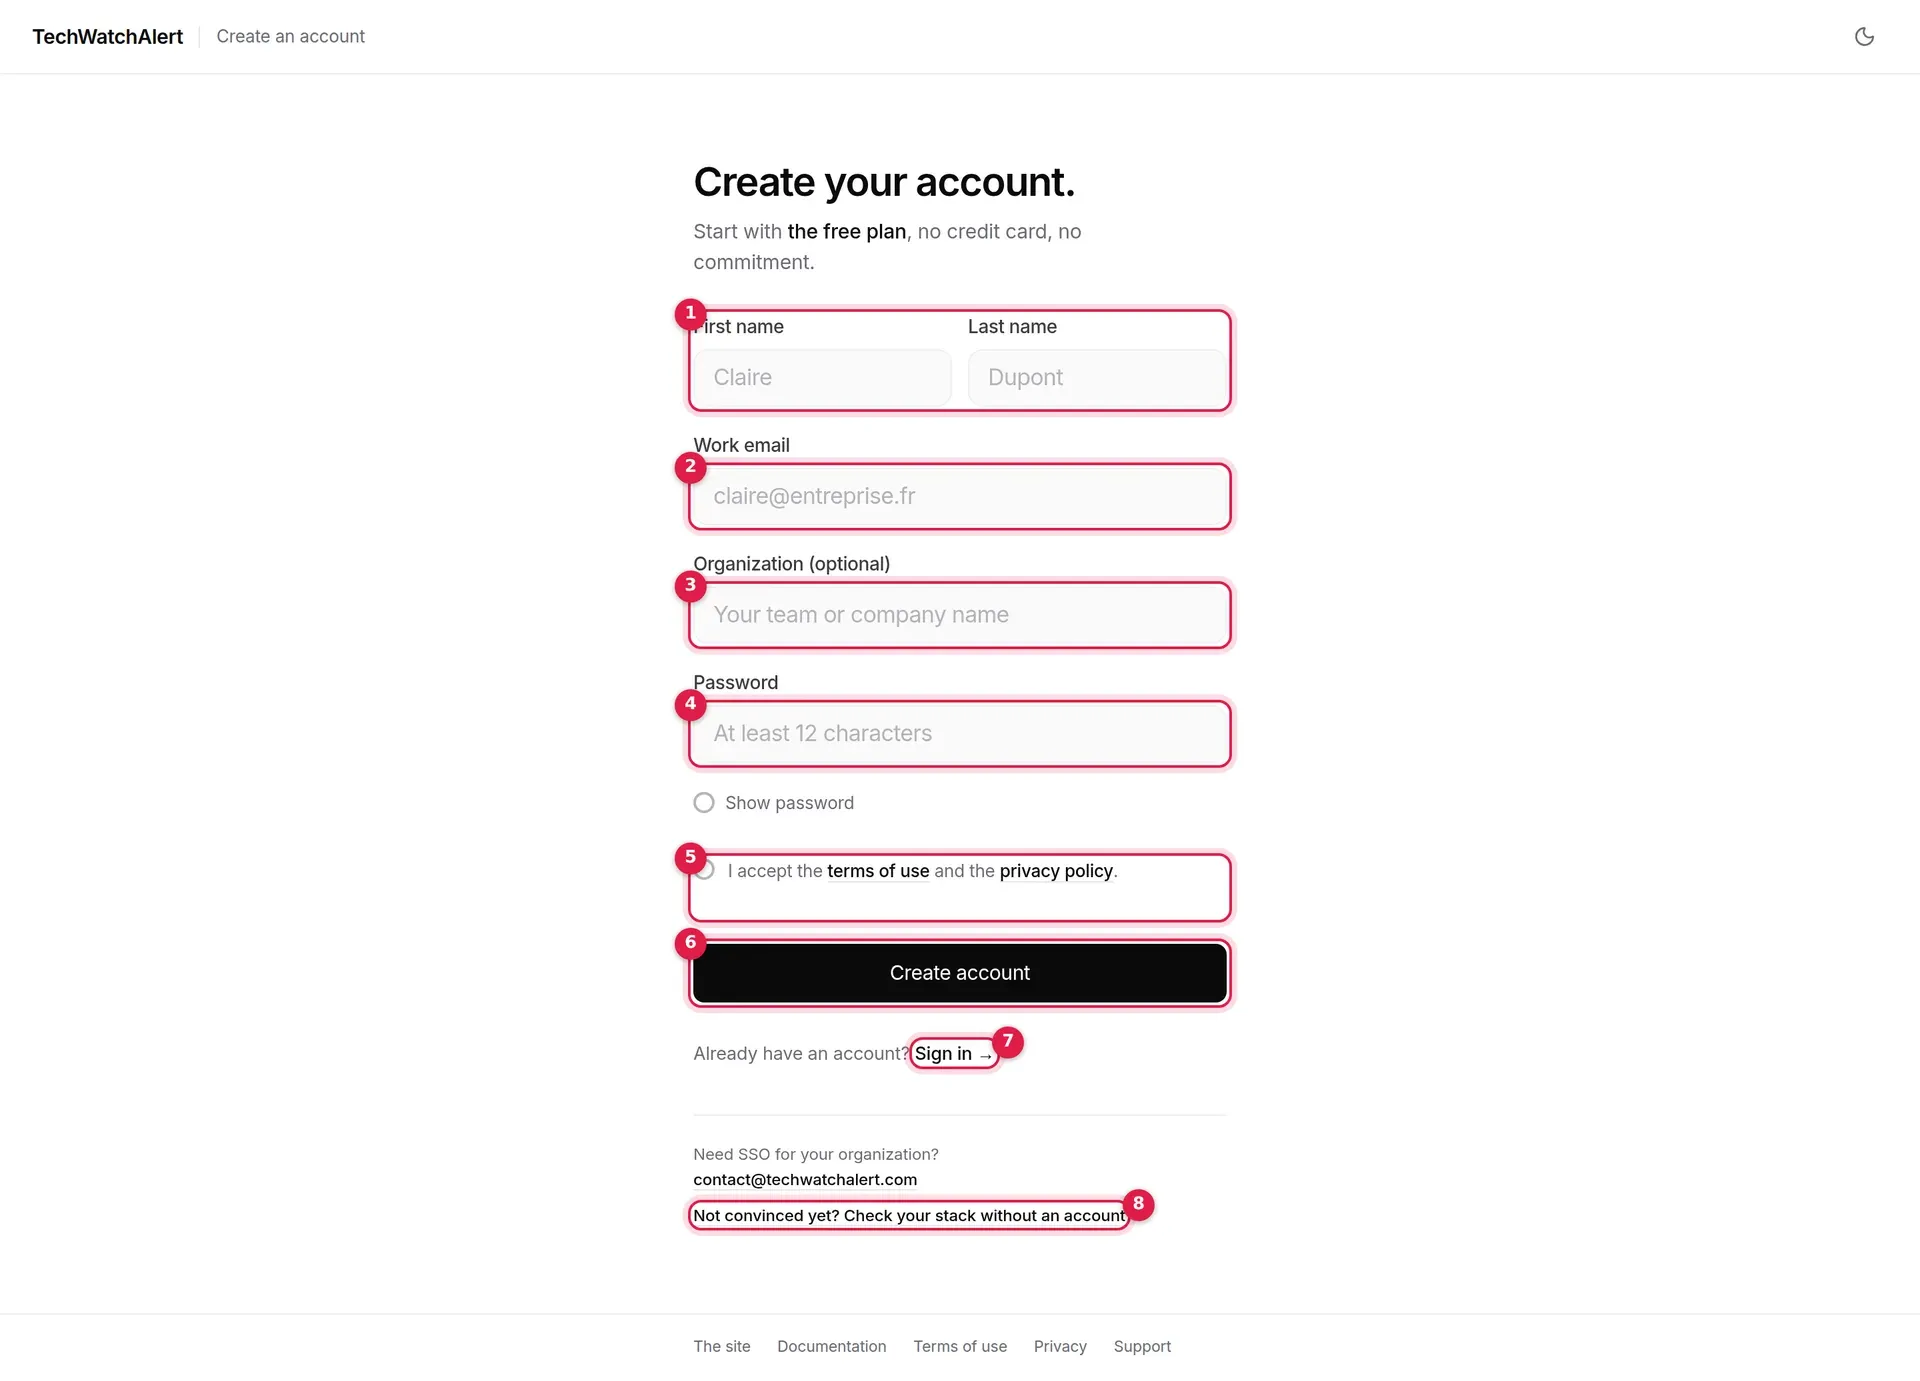
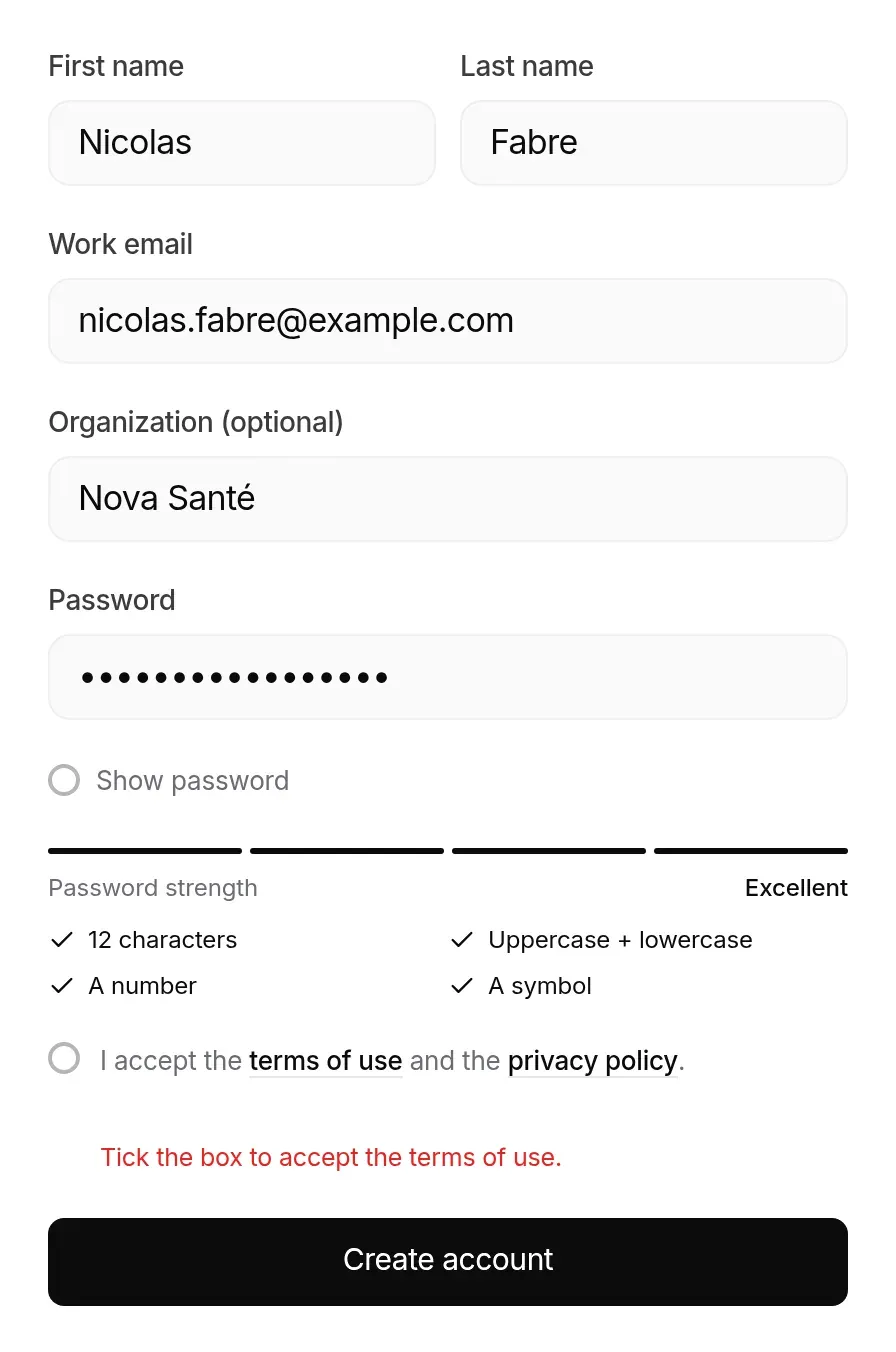
- First name and Last name: required.
- Work email: required. It becomes your identifier (stored in lower case).
- Organization (optional): your team’s or company’s name. It is not sent to the server at this stage: it prefills the organisation name in the start-up wizard, if you then sign in from the same browser.
- Password: see the rules below. The Show password box displays it.
- I accept the terms of use and the privacy policy: required.
- Create account.
- Sign in →: if you already have an account; the address you typed is carried over to the sign-in screen.
- Not convinced yet? Check your stack without an account: leads to trying without an account.
Below the form, a line gives the address to write to for enterprise SSO (contact@techwatchalert.com).
You start on the free plan, with no credit card. Sign-up does not create an organisation: the start-up wizard does that at your first sign-in, unless you join an organisation through an invitation (accepted when you confirm your address).
Password rules
Section titled “Password rules”It is the same rule everywhere: at sign-up, when resetting and when changing your password in the settings. As soon as you enter the field, a gauge and four rules appear. Each rule you meet is ticked, and the gauge goes up a step (Weak, Fair, Good, Excellent):
- at least 12 characters;
- Uppercase + lowercase;
- A number;
- A symbol (any character that is neither a letter nor a digit).
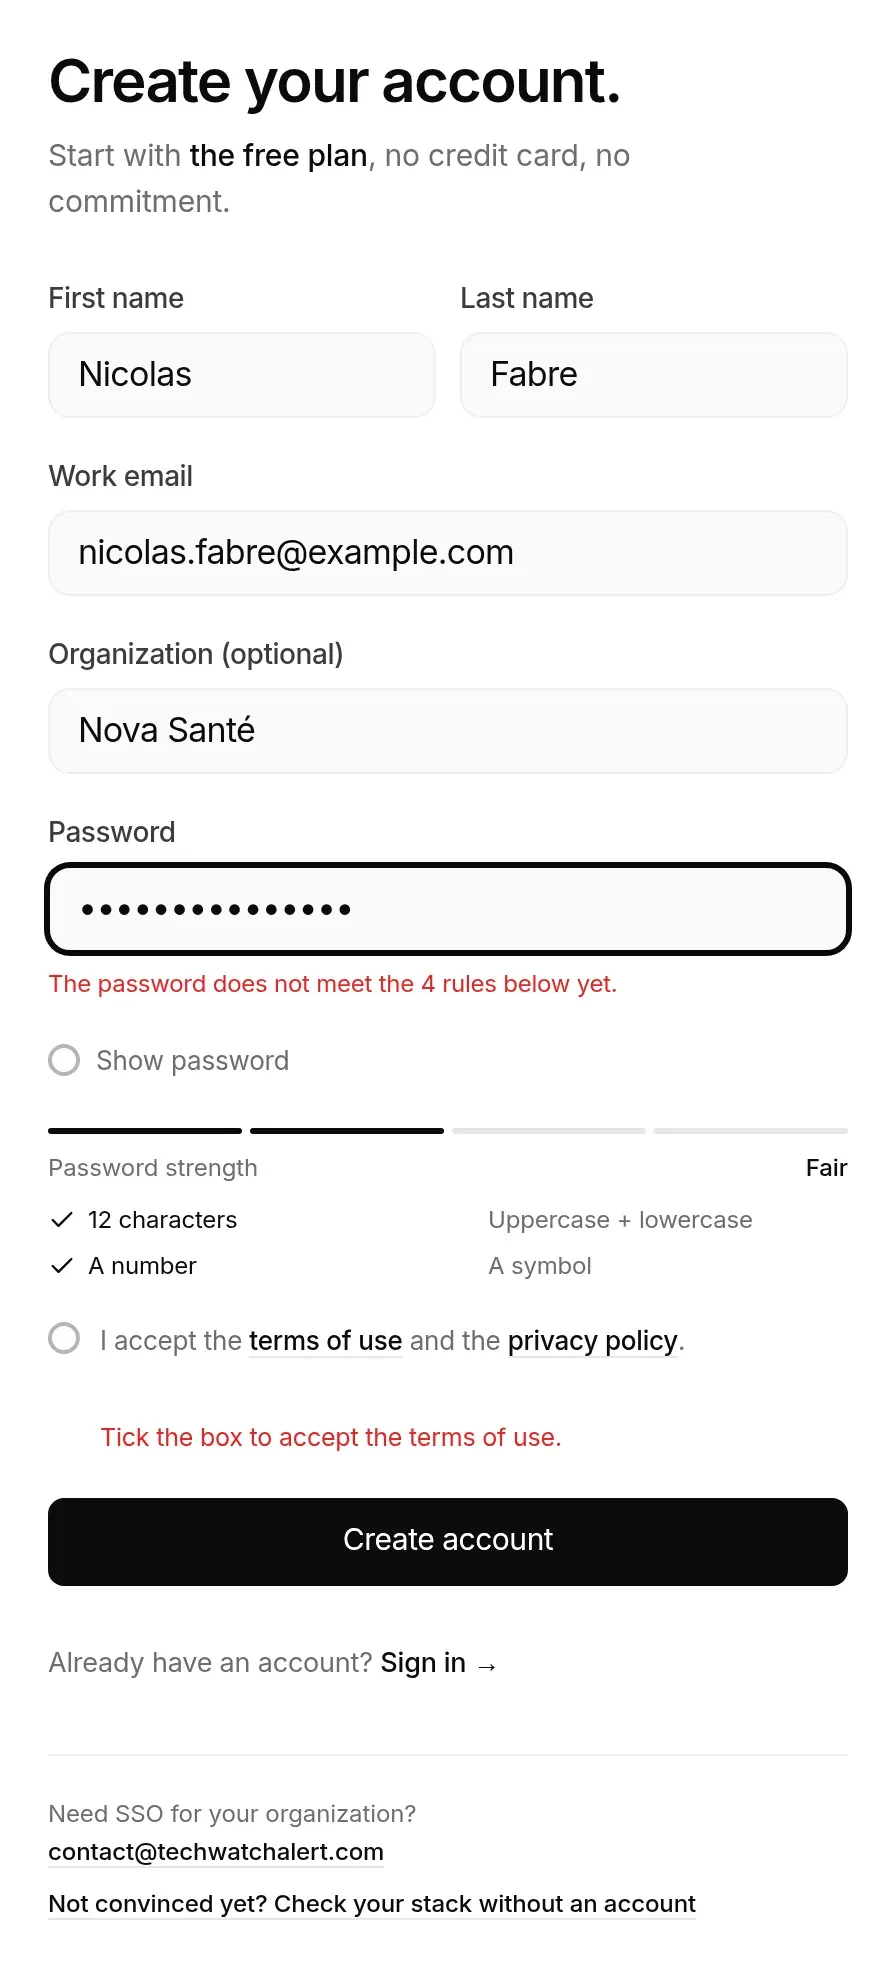
The Create account button is never greyed out: when clicked, it says what is missing and puts the cursor there.
- A rule is missing (length included): The password does not meet the 4 rules below yet.
- Box not ticked: Tick the box to accept the terms of use.
Other refusals
Section titled “Other refusals”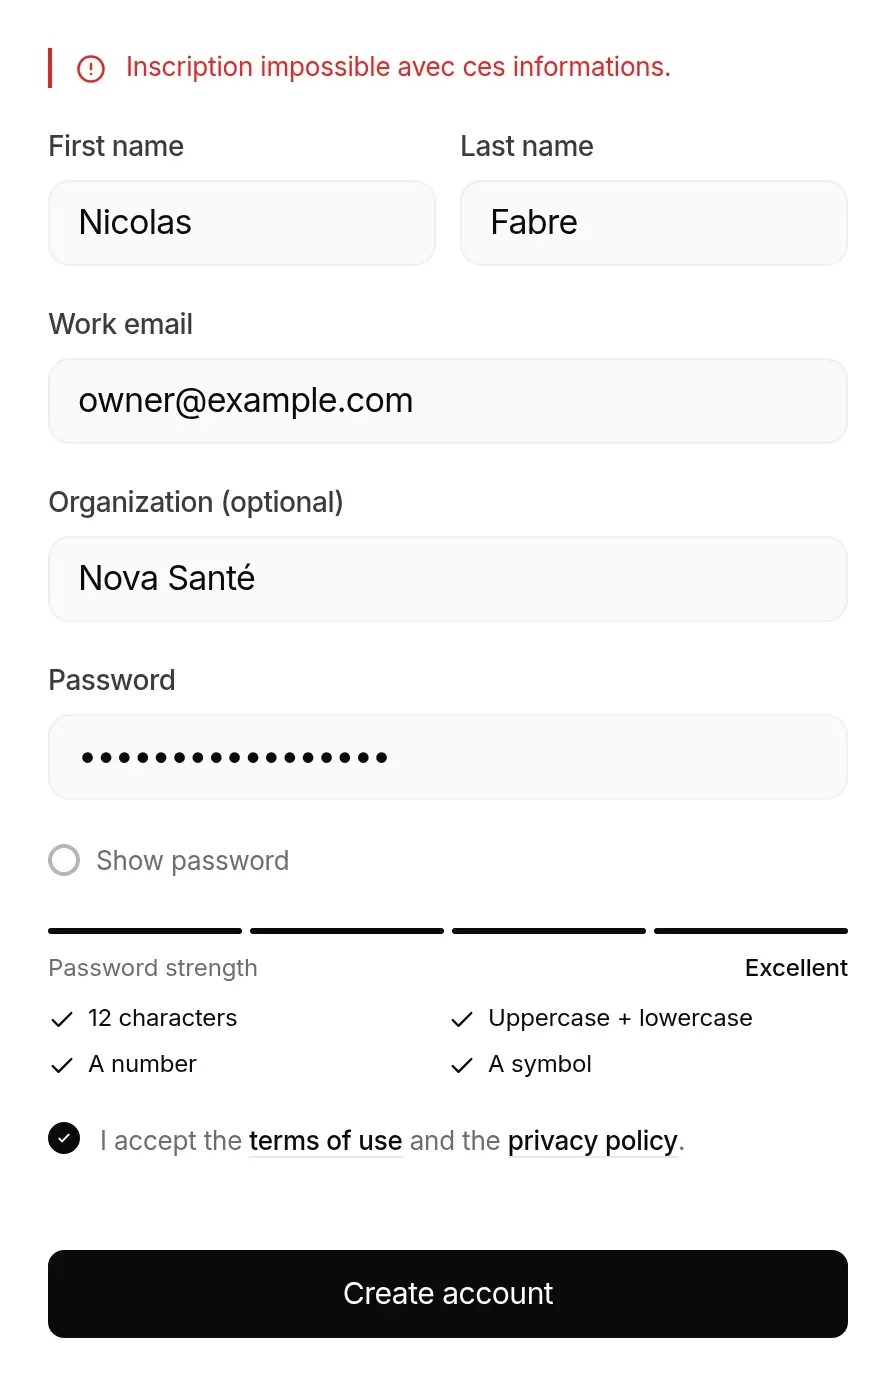
| Message | Cause |
|---|---|
| Inscription impossible avec ces informations. (sign-up not possible with this information) | An account already exists for this address. The message does not say so explicitly, so as not to reveal which addresses are registered. Use Sign in → or Forgot password?. |
| Les adresses email temporaires ou jetables ne sont pas autorisées… (disposable addresses are not allowed) | An address from a disposable email service. |
| Trop de tentatives. Réessayez dans une minute. (too many attempts) | More than 10 attempts in a minute from the same network address. |
If your domain belongs to an organisation that requires SSO, password sign-up is refused: sign in directly with the SSO button on the sign-in screen.
After submitting
Section titled “After submitting”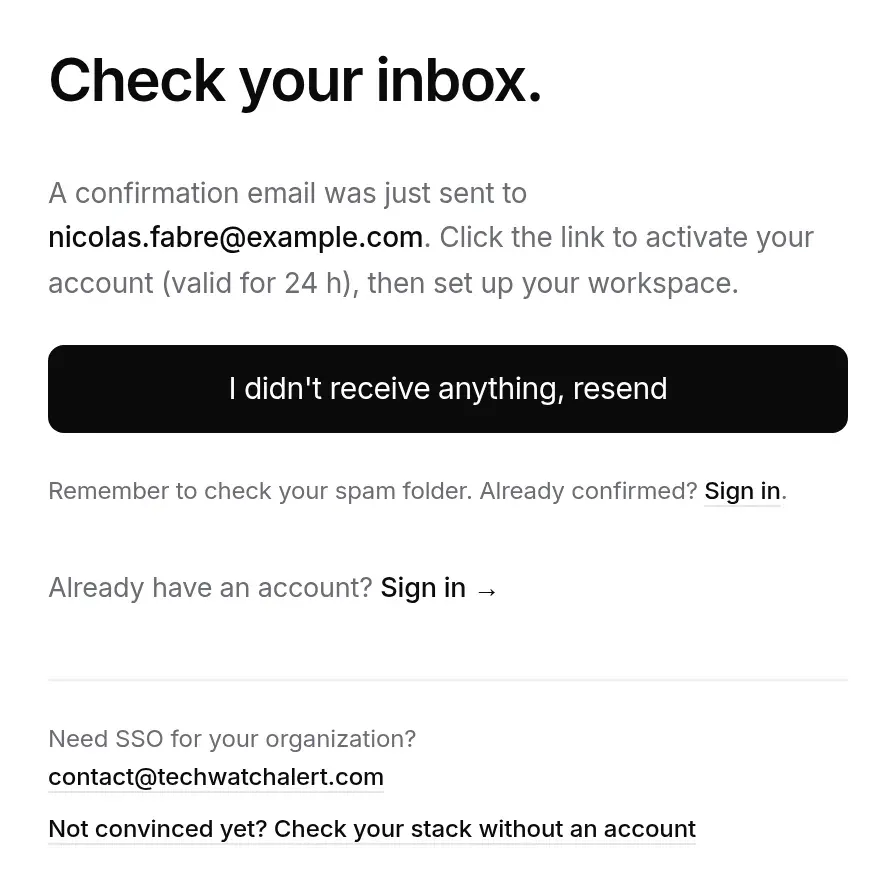
A confirmation email is sent to your address. Its link is valid for 24 hours. The I didn’t receive anything, resend button opens the resend screen described below; the Sign in link is for when you have already confirmed.
Confirming your email address
Section titled “Confirming your email address”Address: /verify-email. You get here in three ways: after sign-up, by clicking the link in the email, or by trying to sign in before confirming.
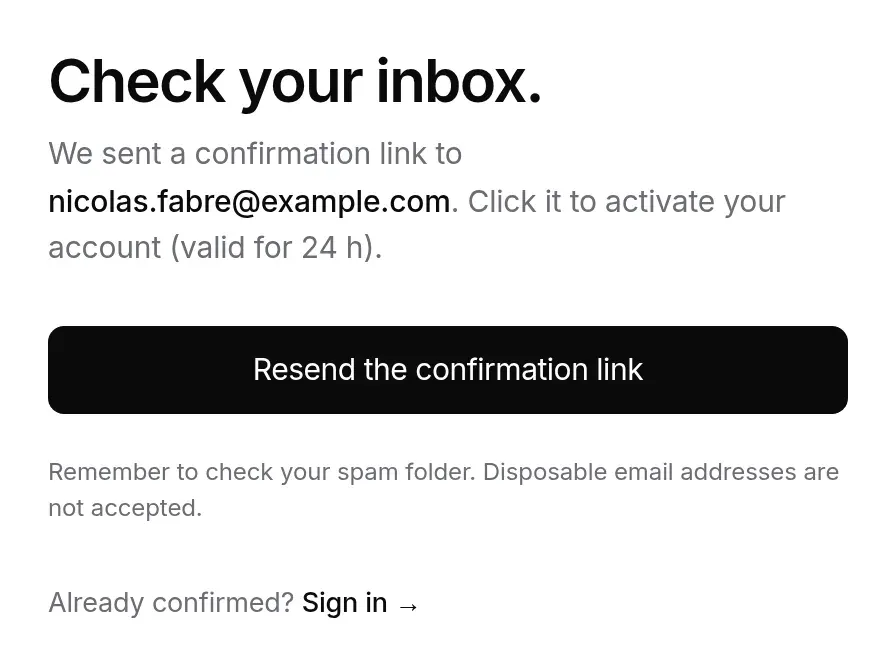
- Waiting: the screen reminds you of the address and offers Resend the confirmation link. After sending: “If an unconfirmed account exists for this address, a new link has just been sent.” The same recipient gets no more than one link every two minutes.
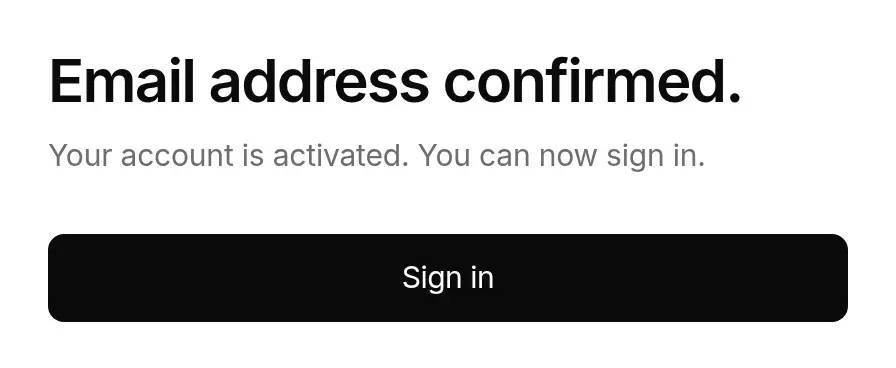
- Link clicked: “Confirming…”, then Email address confirmed. and the Sign in button.
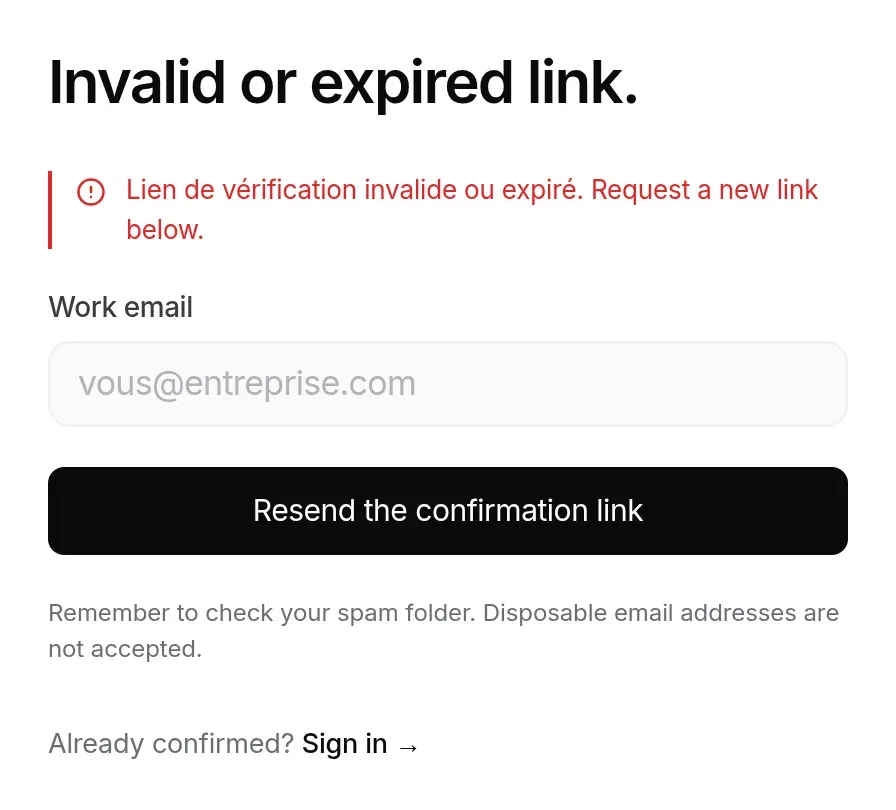
- Invalid or expired link: an error message, then a Work email field to ask for a new link.
Two-factor authentication (2FA)
Section titled “Two-factor authentication (2FA)”Two-factor authentication adds, after the password, a 6-digit code produced by an authenticator app (Google Authenticator, 1Password, Authy, FreeOTP…).
Turning it on
Section titled “Turning it on”-
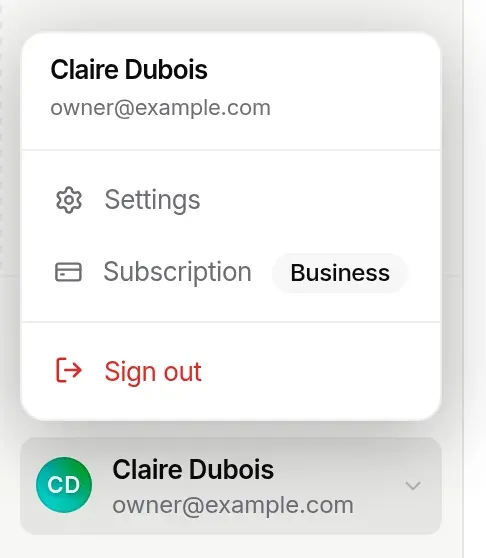
Open the user menu (at the bottom of the sidebar) › Settings › Security.
-
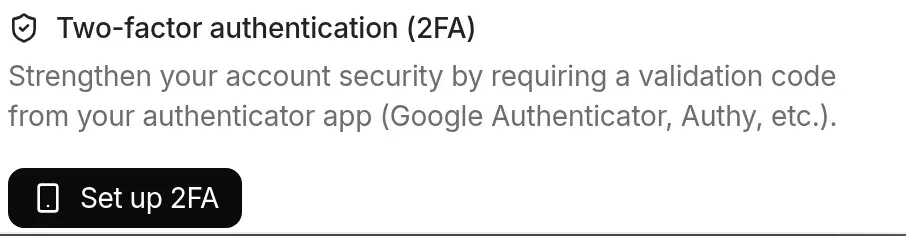
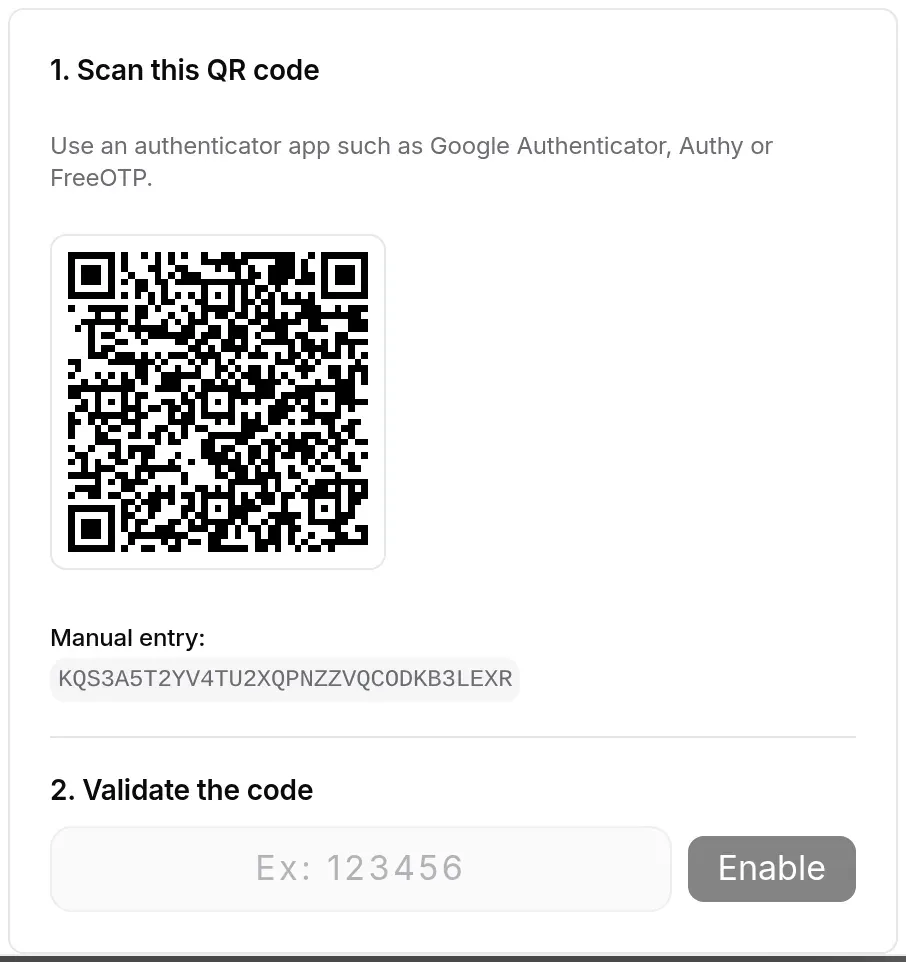
Click Set up 2FA. A QR code appears, with the key to type in by hand if you cannot scan it (Manual entry).
-
Scan it with your app, type the 6-digit code it shows and click Enable.
-
TechWatchAlert then shows 10 recovery codes. Each works only once and they will never be shown again: Download or Copy them, then click I’ve saved my codes.
When 2FA is turned on, all your other sessions are signed out; the device you are using stays signed in. Turning it off and regenerating codes are described in Account settings.
Signing in with 2FA
Section titled “Signing in with 2FA”After the password, the Two-step verification. screen opens (address /2fa).
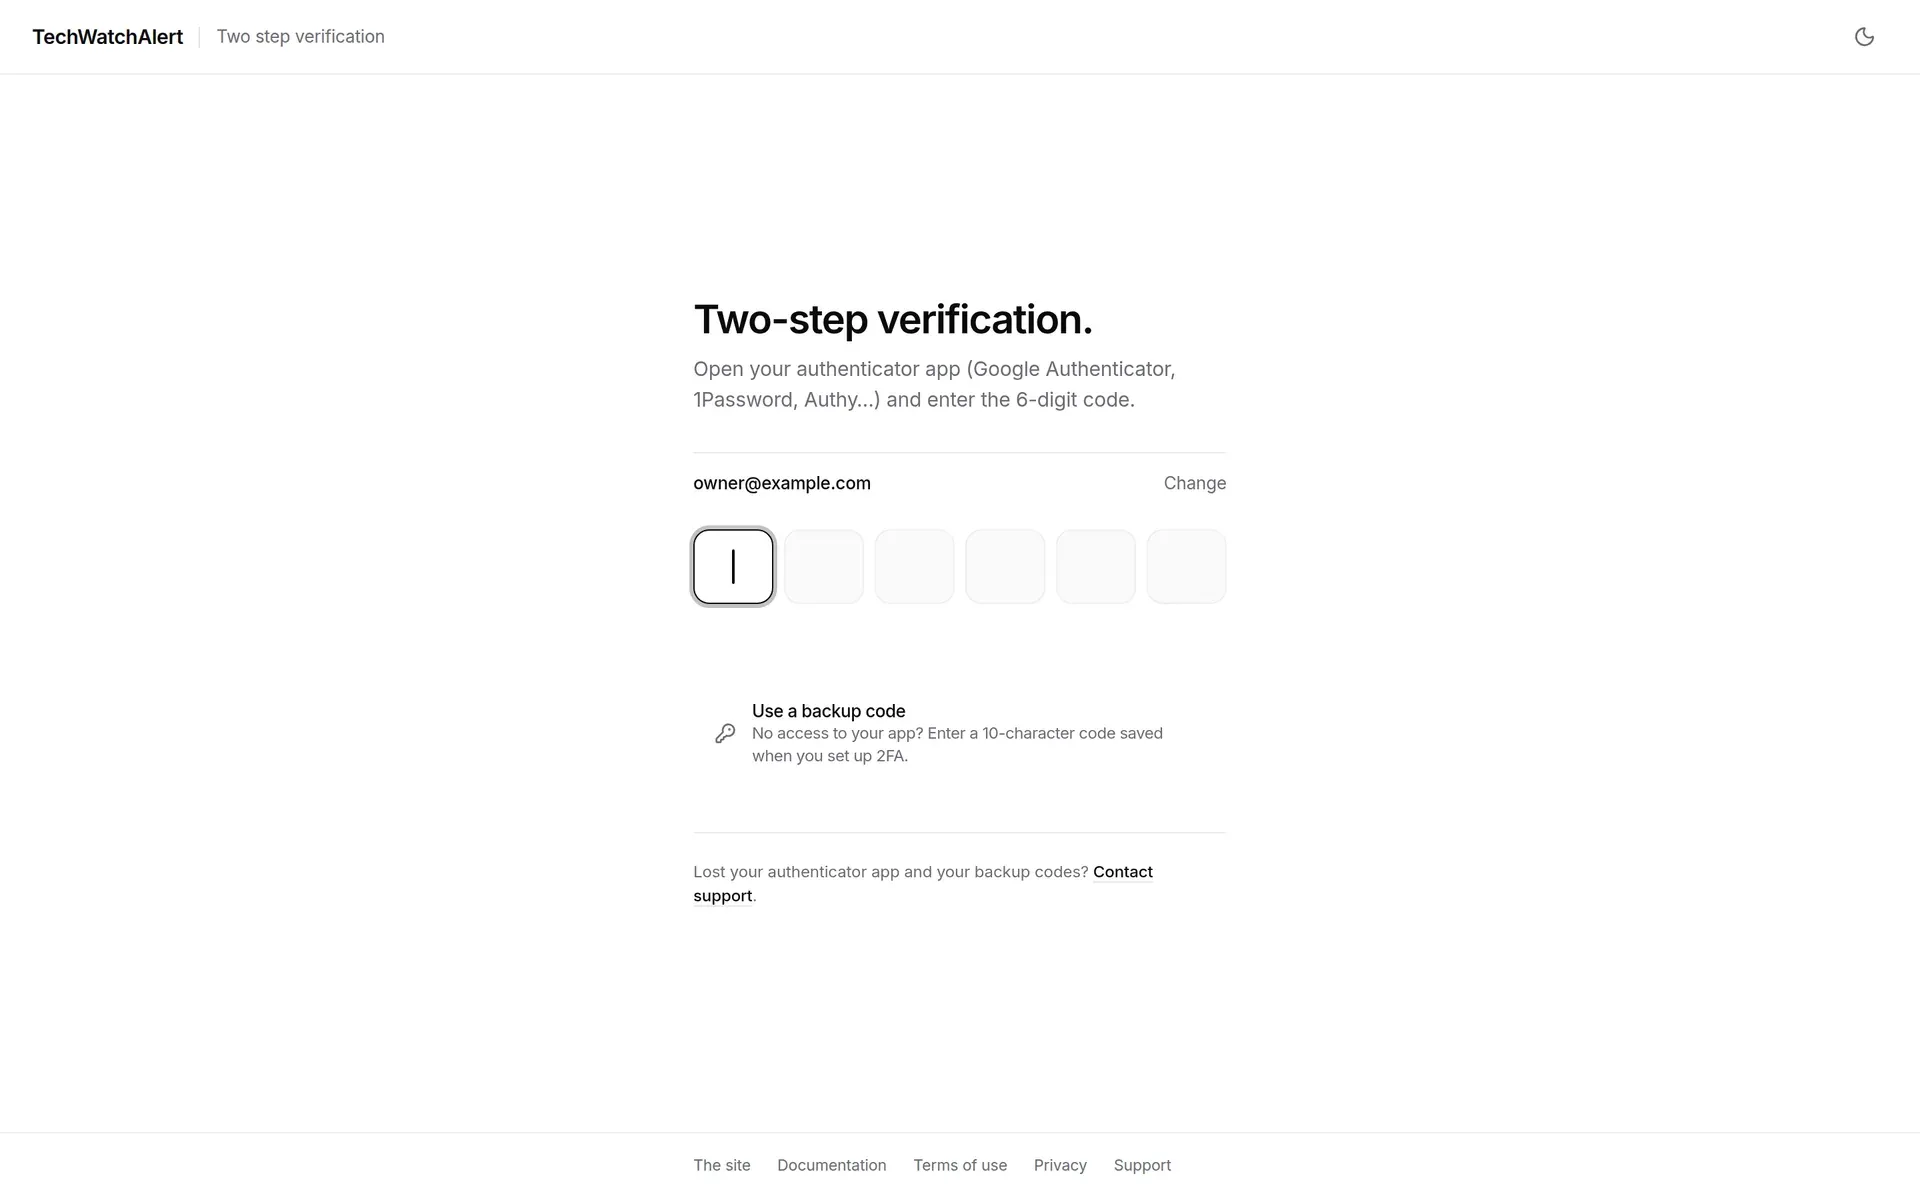
- Your address is shown; Change takes you back to the sign-in screen.
- Type the 6 digits: the code is sent automatically at the sixth digit, with no button to click. You can also paste it.
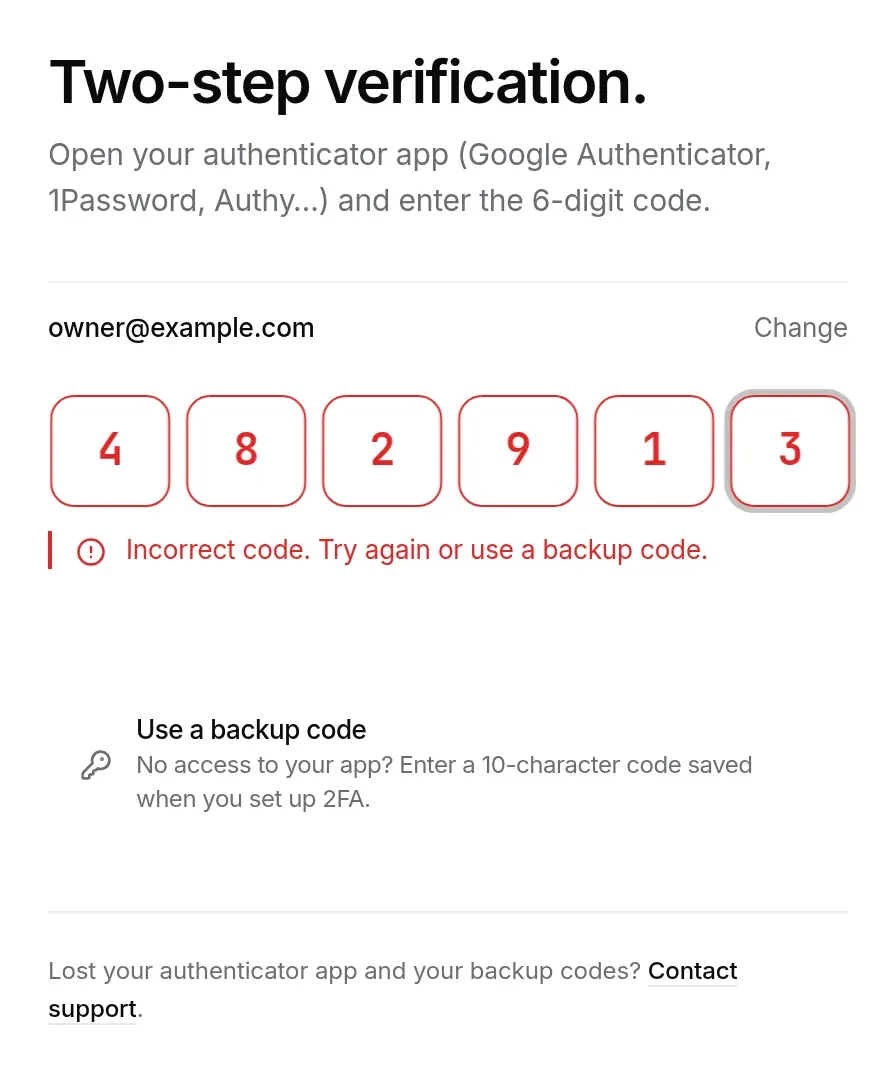
- A wrong code shakes the boxes, shows Incorrect code. Try again or use a backup code. and then clears them for another try.
The rules:
- You have 5 minutes between the password and the code.
- 5 attempts at most per sign-in: on the fifth wrong code, the step is cancelled.
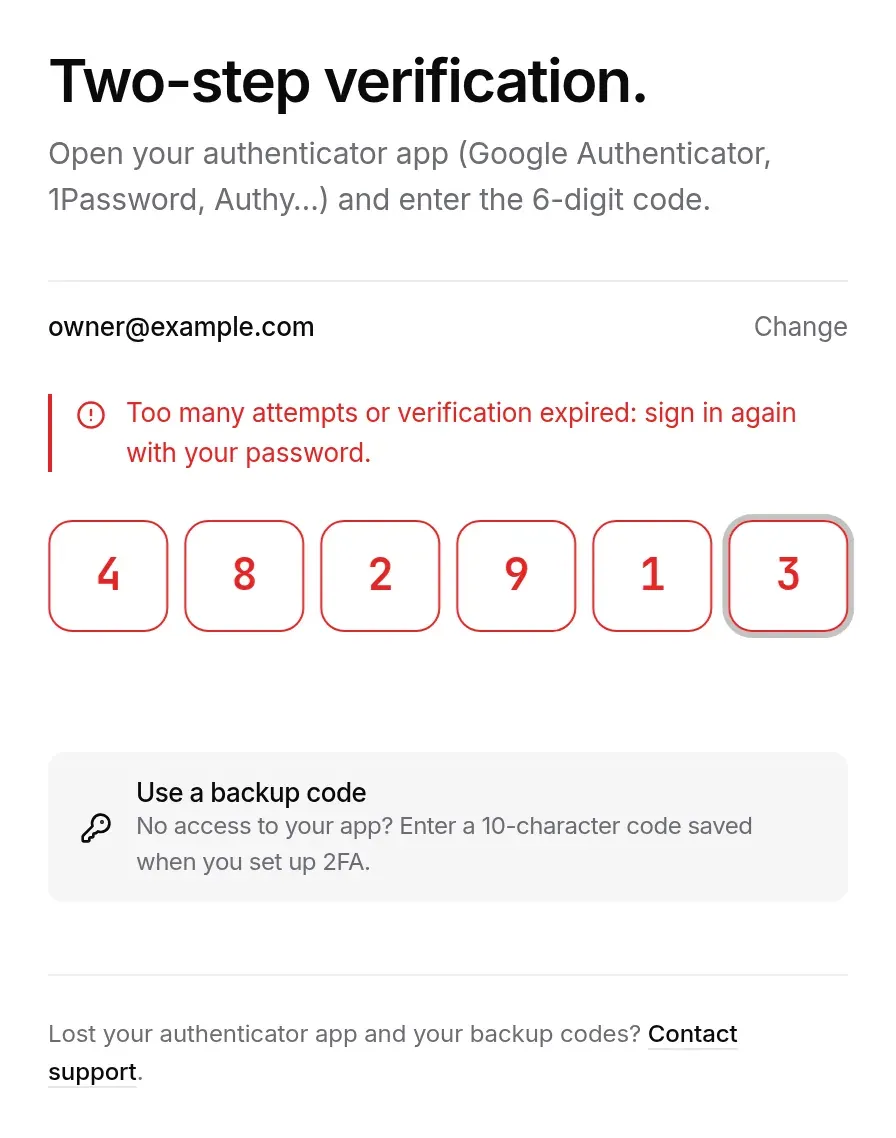
- Beyond these limits, the screen shows Too many attempts or verification expired: sign in again with your password. and takes you back to the sign-in screen.
- A wrong code also counts towards the account’s temporary lock.
- A code that has been accepted cannot be used again, even within its 30 seconds of validity.
Backup code
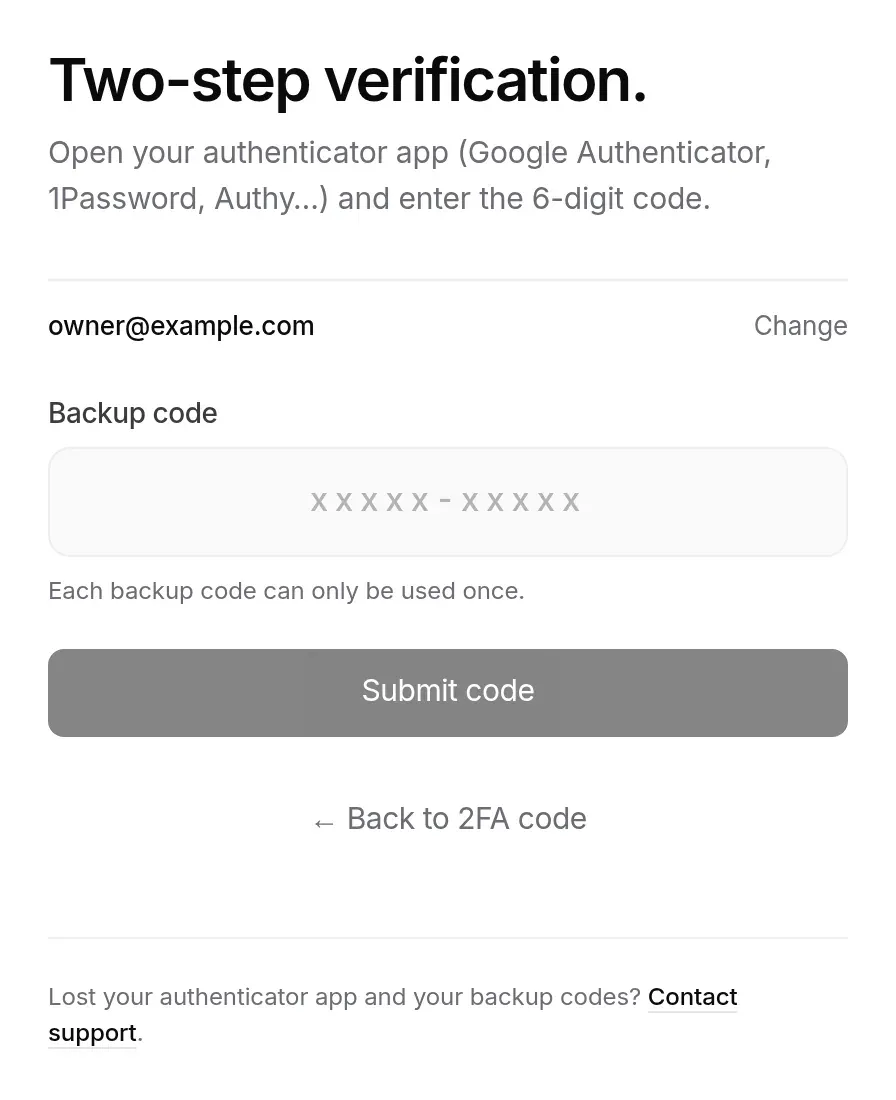
Section titled “Backup code”Without your app, click Use a backup code and enter one of the codes saved when you turned 2FA on (10 characters; hyphens, spaces and capitals are ignored). The Submit code button becomes active from 10 characters. Each code works only once. ← Back to 2FA code returns to the code boxes.
Forgotten password
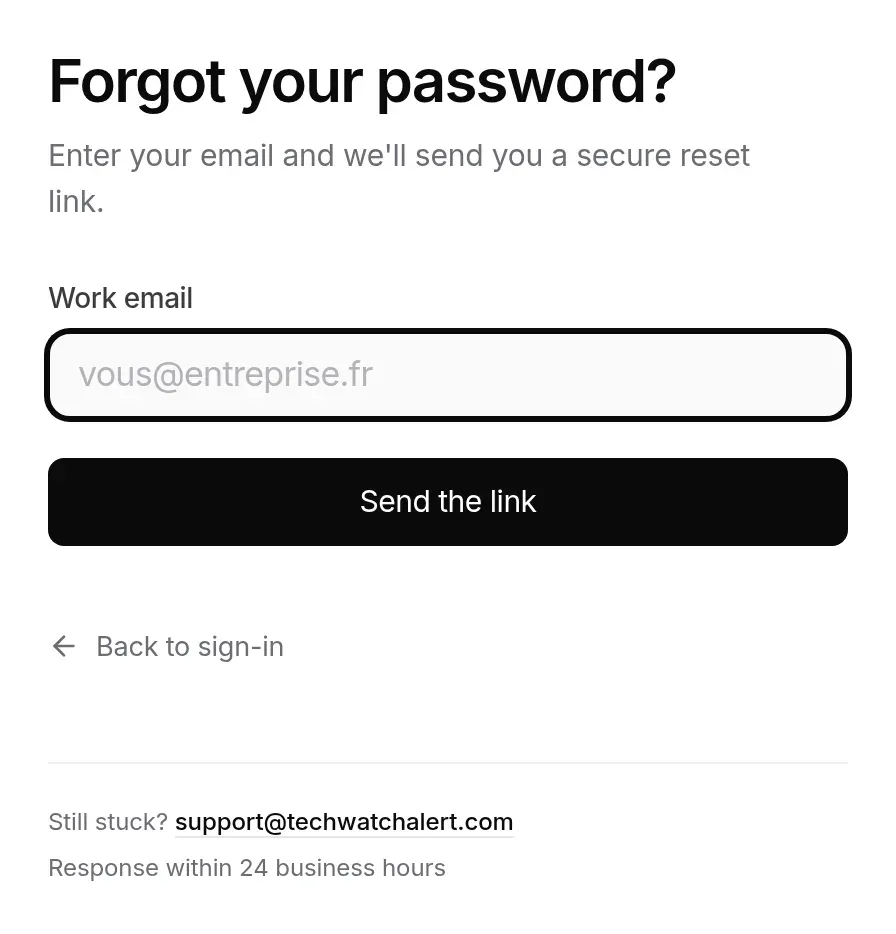
Section titled “Forgotten password”Address: /forgot-password, or Forgot password? on the sign-in screen.
-
Enter your Work email and click Send the link.
-
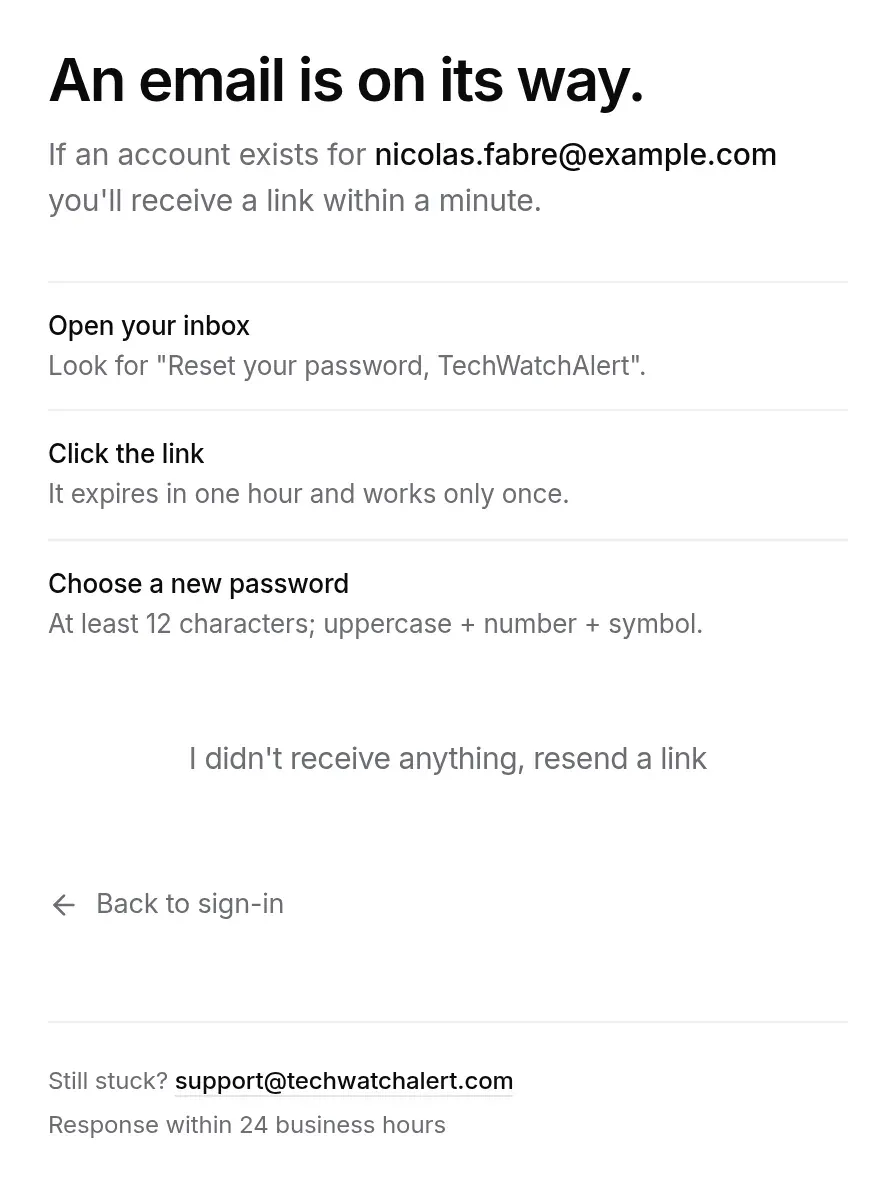
The An email is on its way. screen appears in every case, whether or not the address has an account: this is deliberate, so as not to reveal who is registered.
-
Open the “Reset your password, TechWatchAlert” email. It says when, from where and from which device the request was made: if it was not you, ignore it.
-
Click the link: it is valid for one hour and works only once.
If your address belongs to an organisation that requires SSO, no link is sent (the screen stays the same): your local password is not used, sign in through SSO.
I didn’t receive anything, resend a link sends it again. The same recipient gets no more than one link every two minutes, even if the “Link resent ✓” message appears. Back to sign-in returns to /login.
Choosing a new password
Section titled “Choosing a new password”Address: /reset-password, opened from the link in the email.
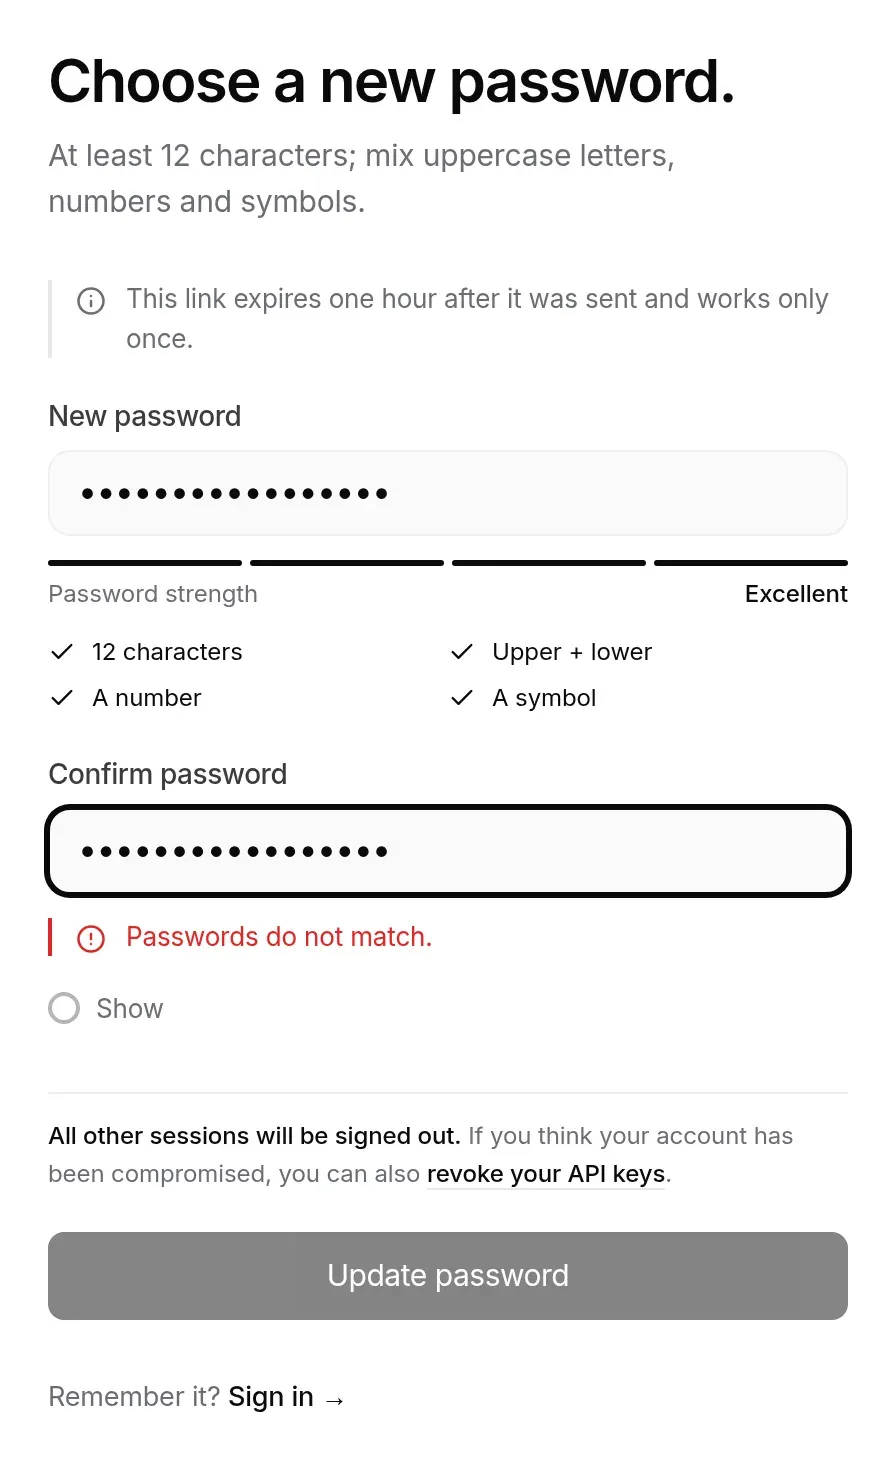
- New password: the same four rules as at sign-up (12 characters, upper and lower case, a number, a symbol), with the same gauge.
- Confirm password: if the two differ, “Passwords do not match.” appears.
- Show: displays both fields.
- Update password only becomes active when all four rules are met and both entries are identical.
The server checks the same rules and refuses a password that is too weak. Once the password has been changed (Password updated.), all your open sessions are signed out, on every device. Sign in again with Sign in.
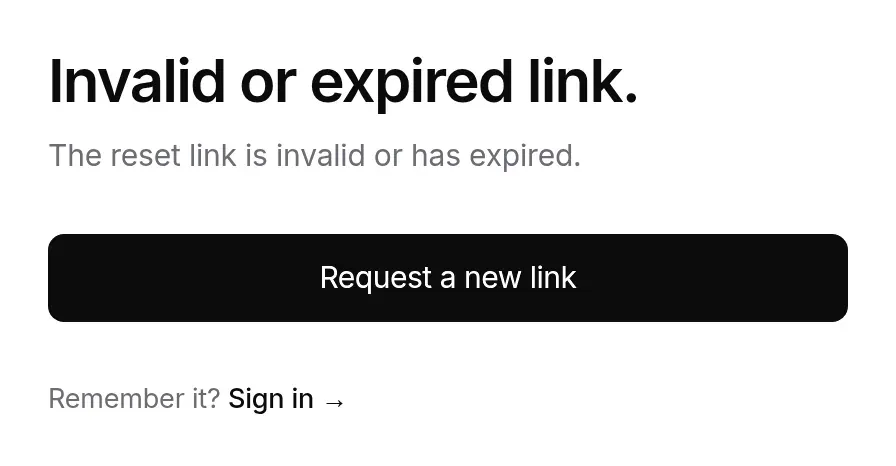
A link that has already been used, has expired or is incomplete leads to Invalid or expired link., with the Request a new link button.
Try without an account
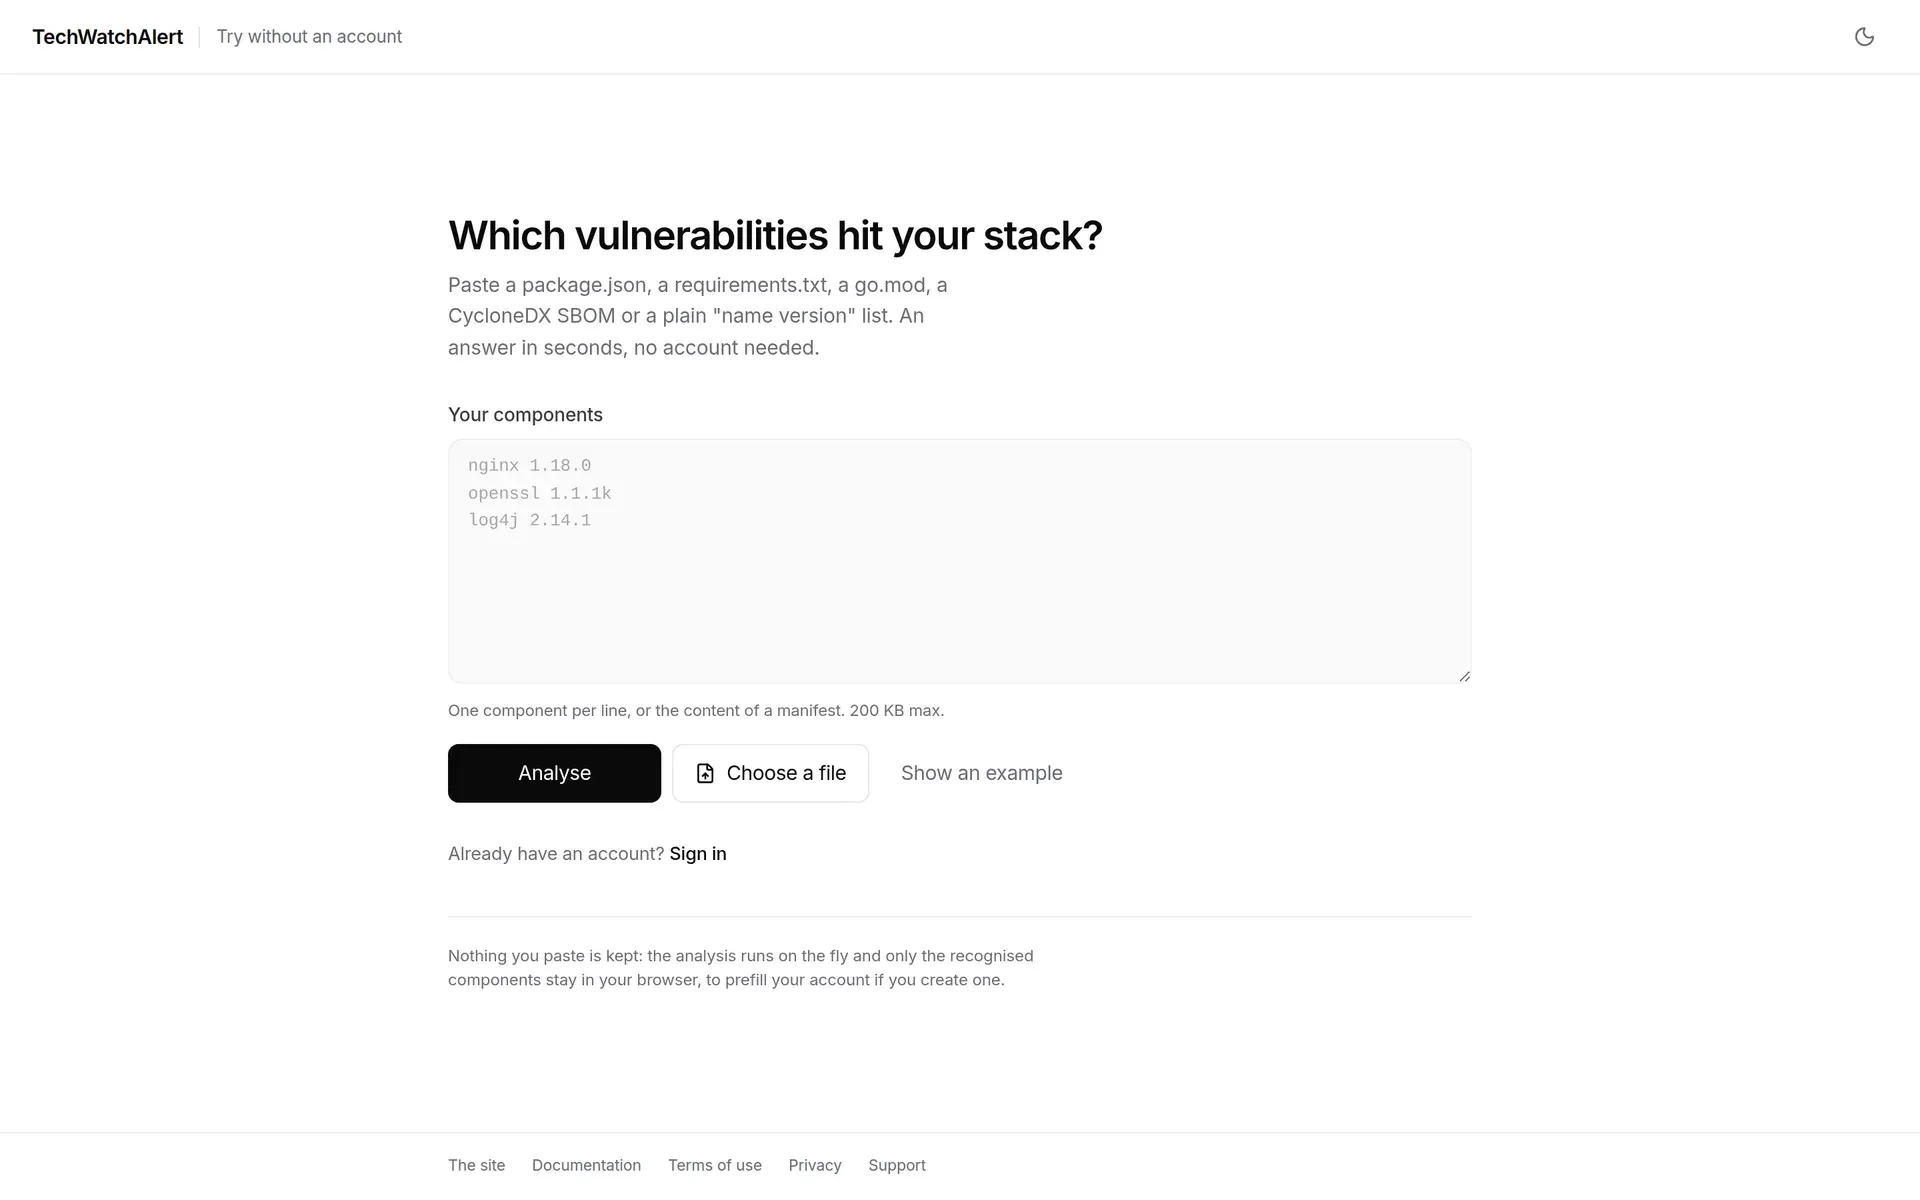
Section titled “Try without an account”Address: /essai, or Not convinced yet? Check your stack without an account on the sign-up screen. This screen shows, without an account, which known vulnerabilities affect a list of components.
-
In Your components, paste:
- a “name version” list, one component per line (
nginx 1.18.0); - or the content of a manifest:
package.json,requirements.txt,go.mod…; - or a CycloneDX SBOM (JSON or XML).
You can also click Choose a file (
.json,.txt,.xml,.lock,.toml,.mod,.sum,.cdx,.gradle,.csprojfiles, 200 KB at most), or Show an example, which fills the field with five old components.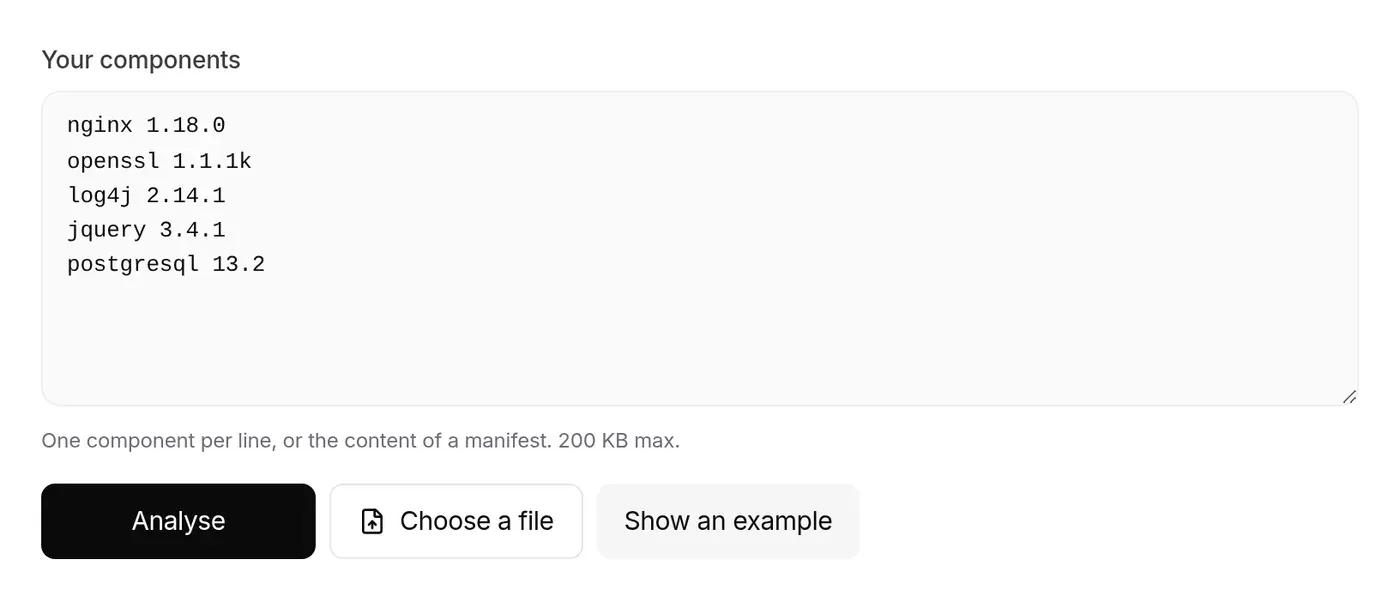
- a “name version” list, one component per line (
-
Click Analyse.
The result appears below the form:
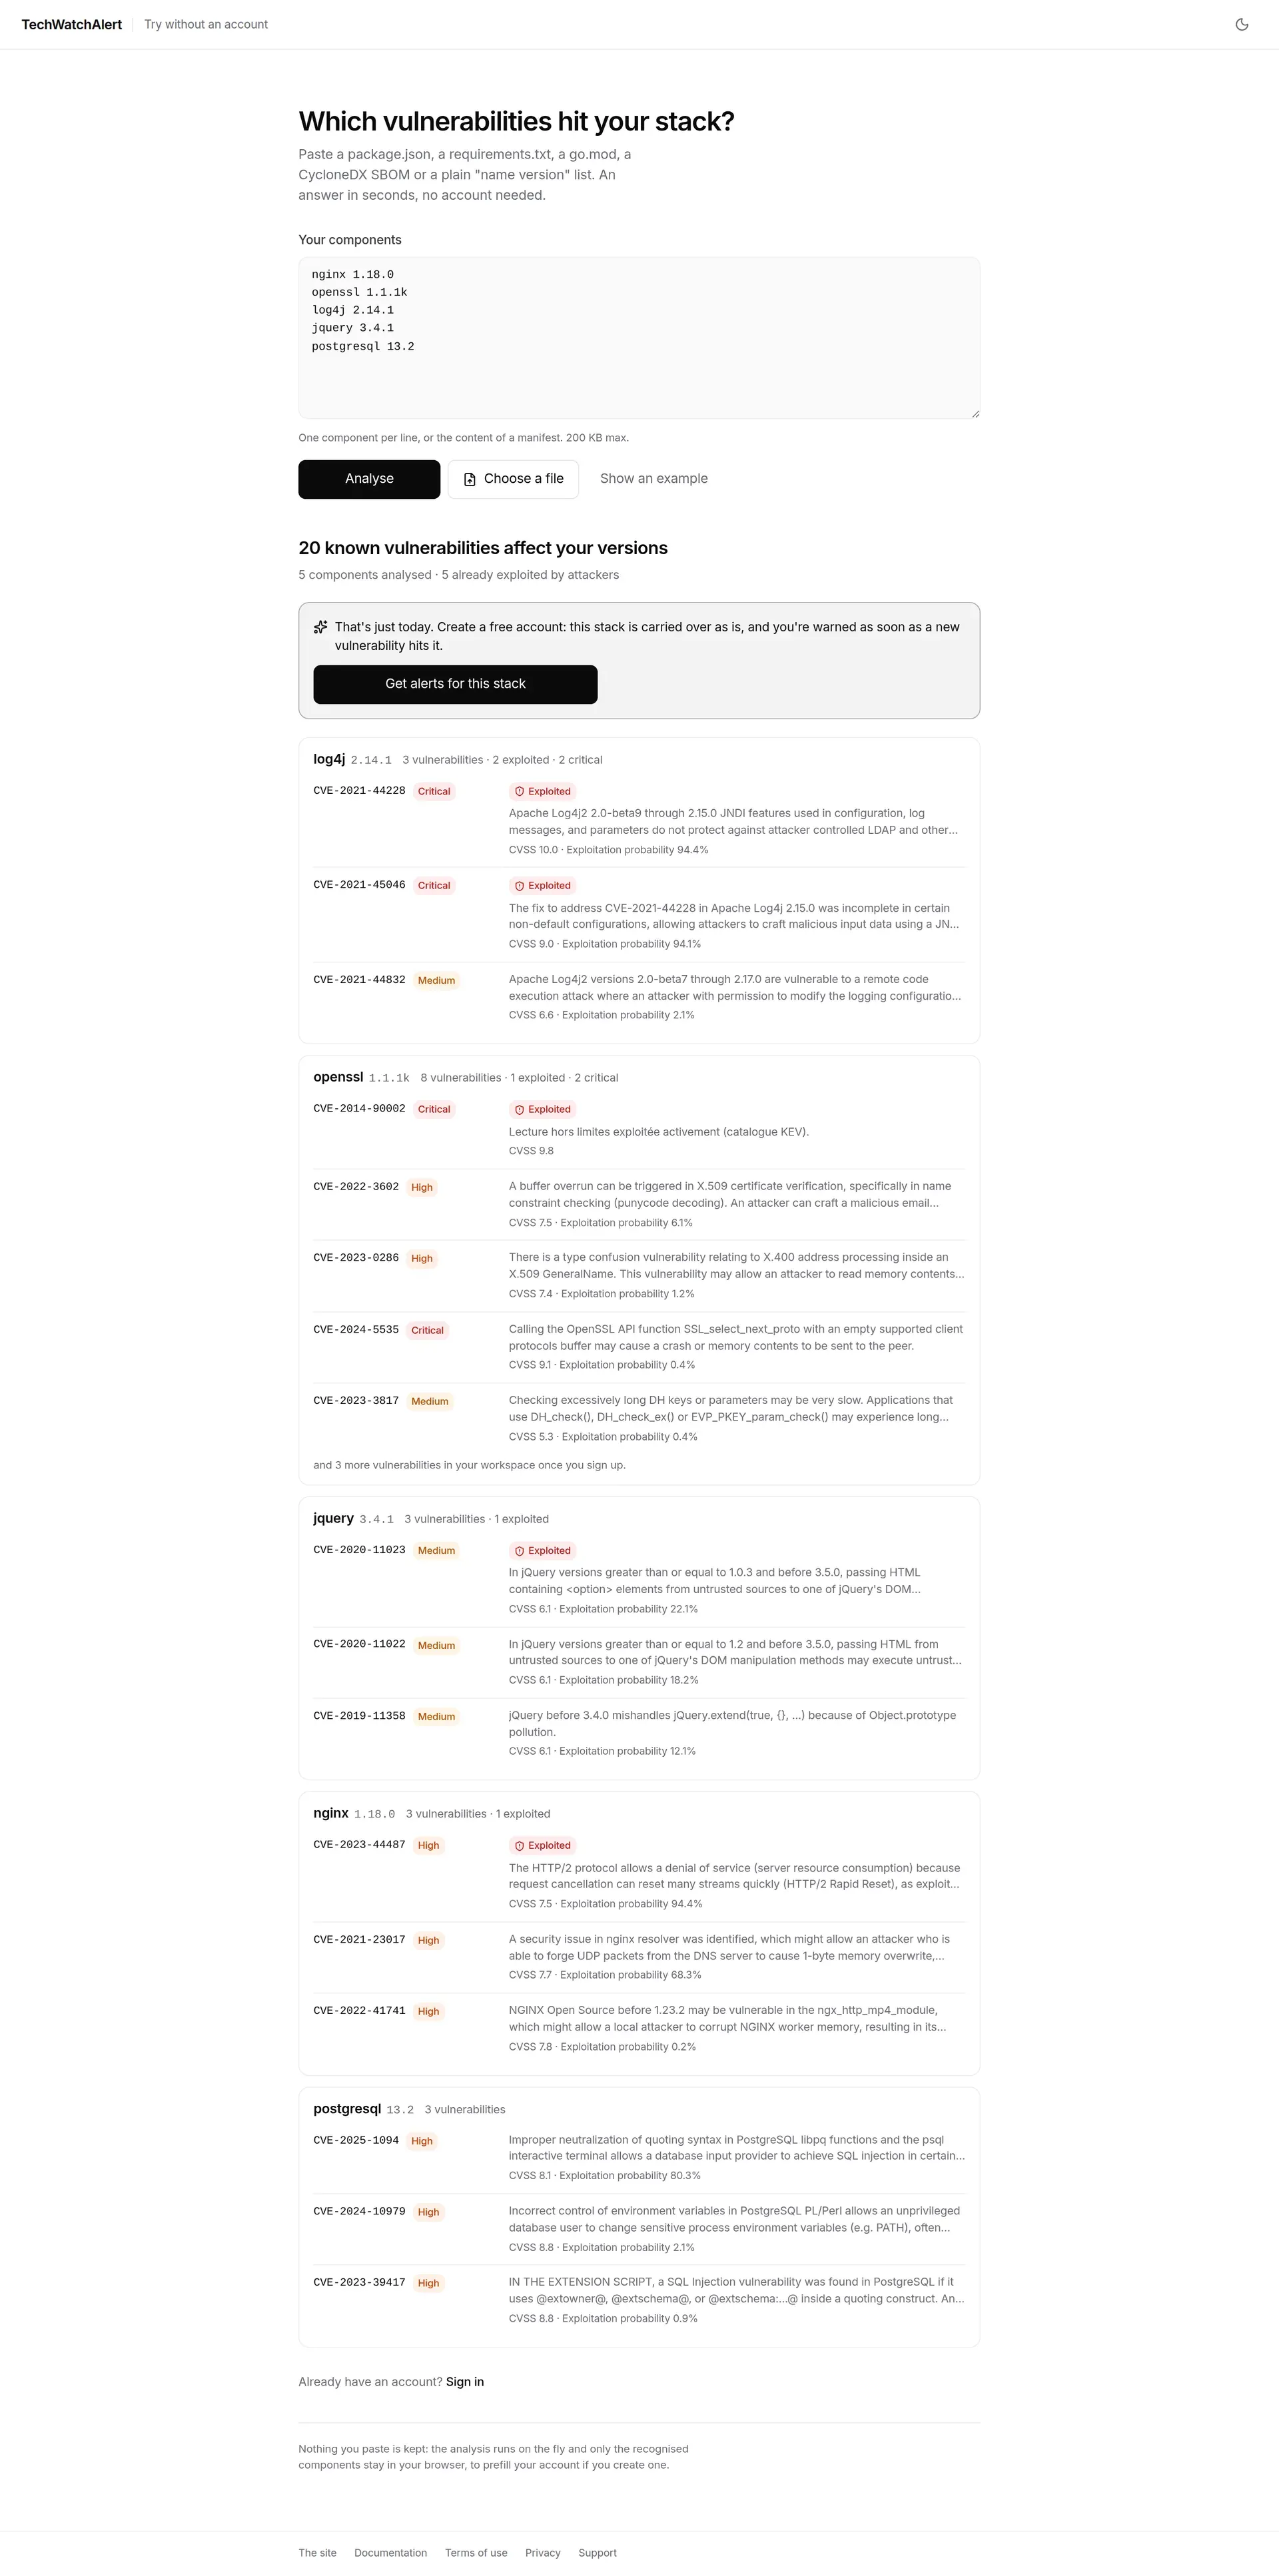
- a heading (“20 known vulnerabilities affect your versions”, or “No known vulnerability in these versions”) and the number of components analysed and of vulnerabilities already exploited;
- one card per recognised component, most exposed first (first those with exploited vulnerabilities, then critical ones, then the most vulnerabilities). For each: the number of vulnerabilities, exploited and critical ones, the recommended version (“Upgrade to X or later”) when known, and at most five detailed vulnerabilities: identifier, severity, Exploited badge, summary (in English, as published), CVSS score and exploitation probability (EPSS). The others are counted (“and 3 more vulnerabilities in your workspace once you sign up”);
- the list of components that were not recognised (the first 12 are shown).
A vulnerability counts as exploited when it is in the KEV catalogue or when known exploitation has been reported elsewhere.
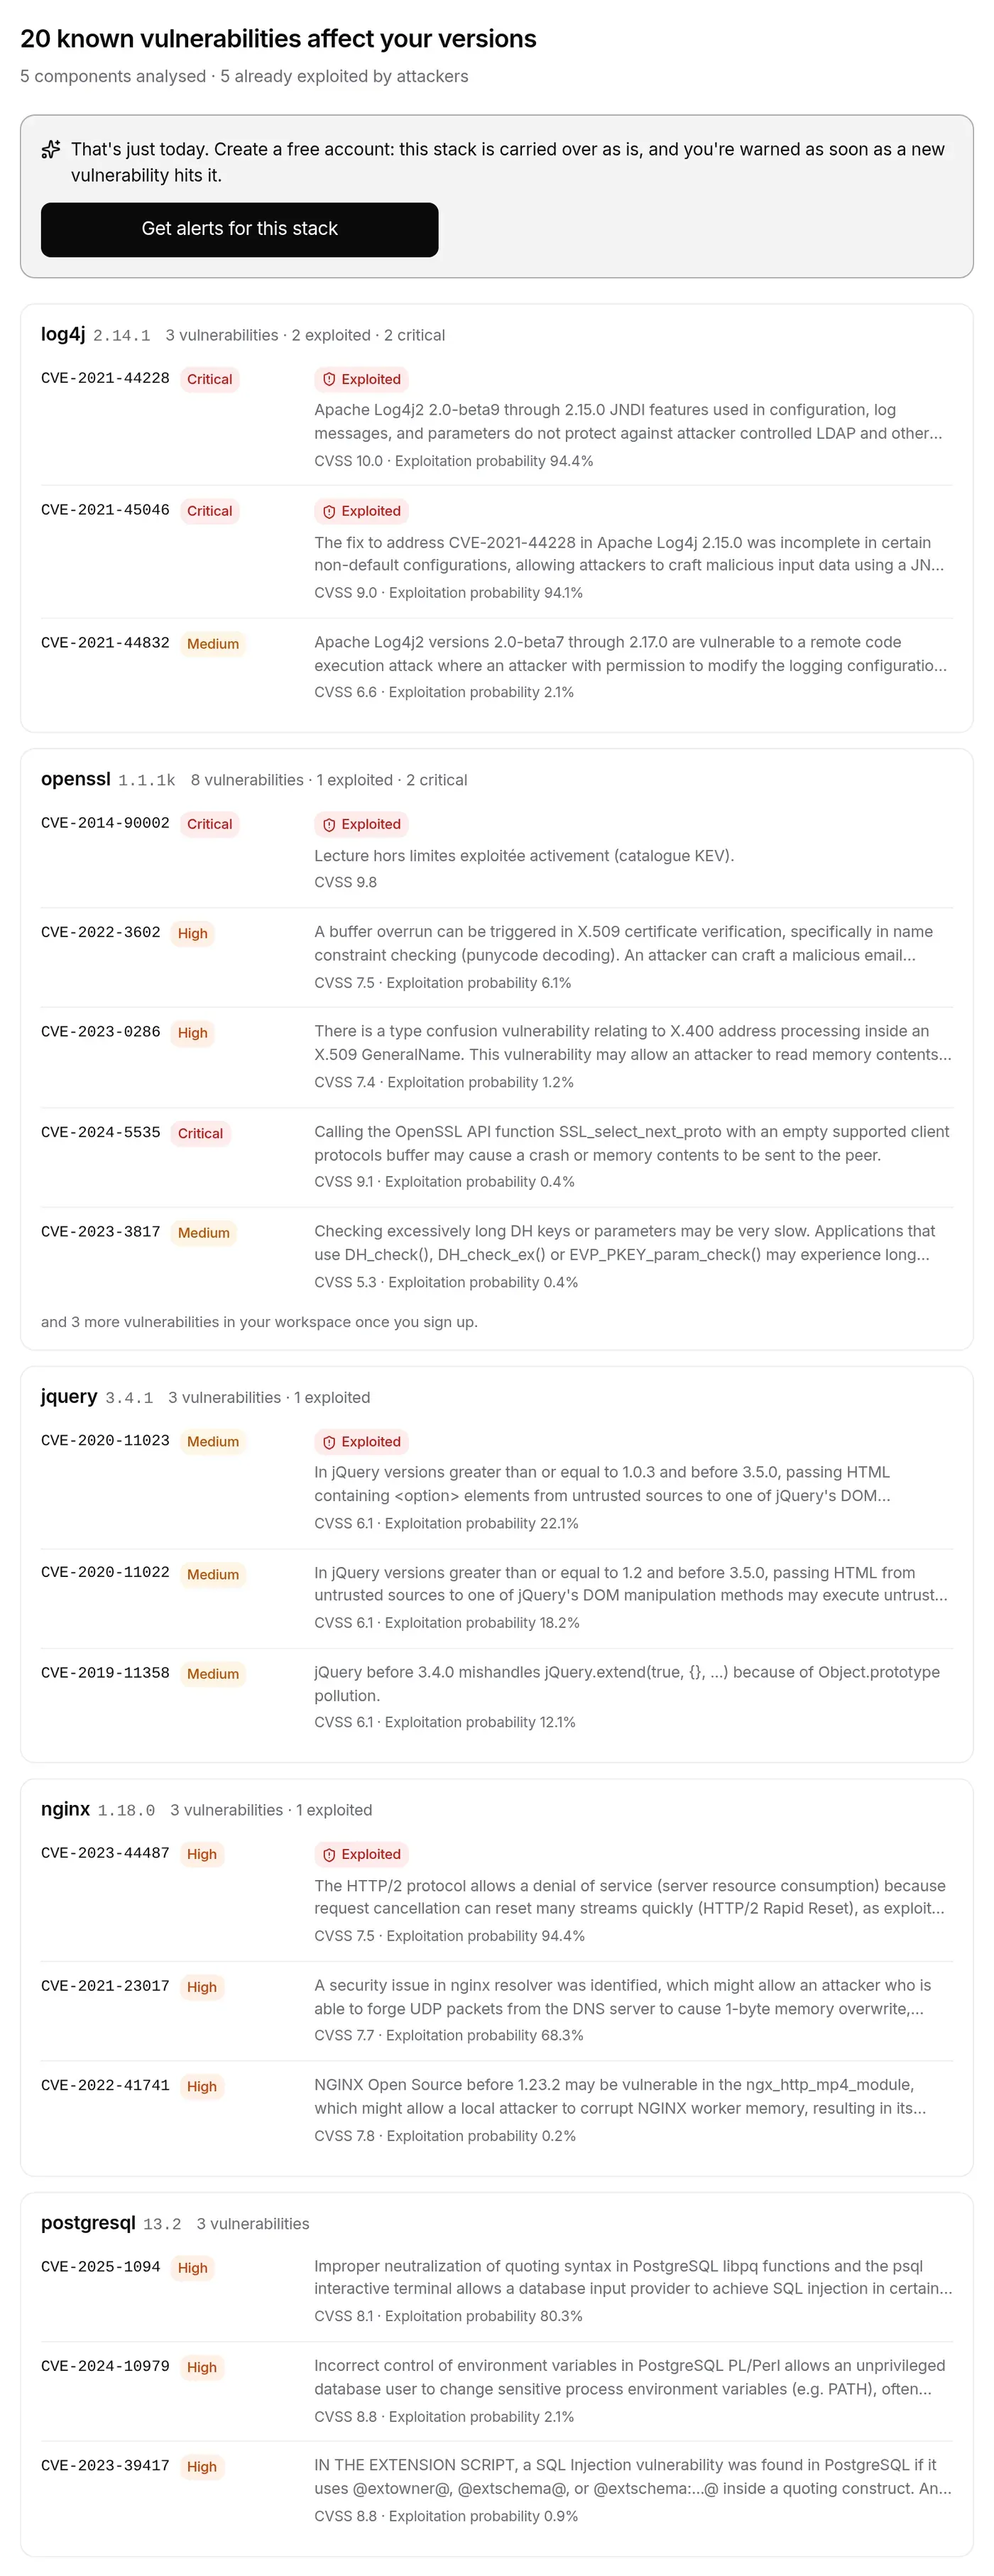
Get alerts for this stack leads to sign-up. The recognised components are kept in your browser and prefill the stack in the start-up wizard after sign-up (same browser).
Rules of the trial:
- nothing you paste is stored on the server;
- at most 300 components are analysed (product and version duplicates count once);
- 10 analyses per hour from the same network address (message, in French: “Beaucoup d’essais depuis cette adresse…”), plus an overall cap when the trial is in high demand;
- empty content gives “Paste at least one component, or choose a file.”; a file that is too large, “This file is over 200 KB…”; content in which no component is recognised, “Aucun composant reconnu…” (no component recognised).
Accepting an invitation
Section titled “Accepting an invitation”When an administrator invites you (see Team, roles and groups), you receive a link to /invitations/accept/….
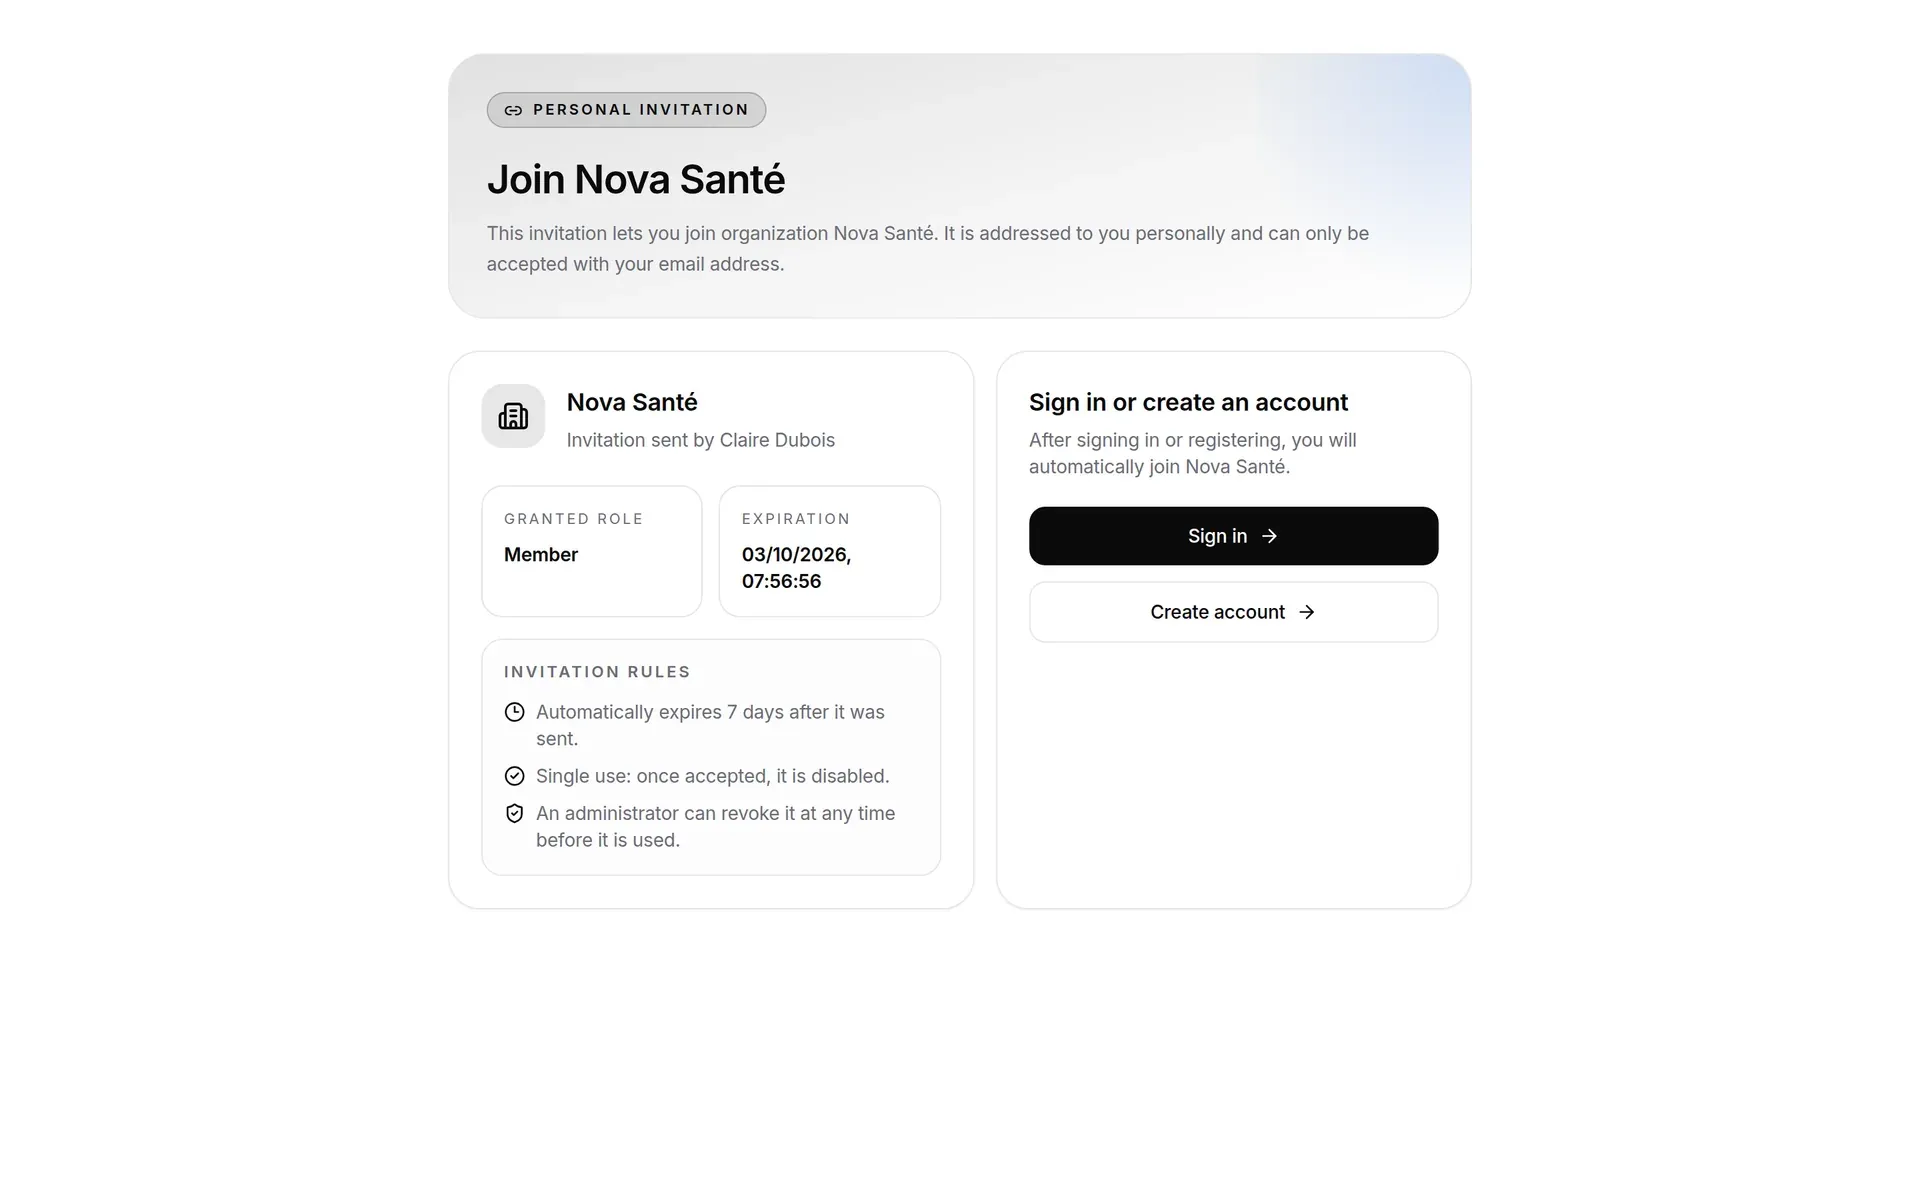
The screen shows:
- the organisation or project to join, and who invited you;
- the Granted role and the Expiration date;
- the Personal invitation label (addressed to you alone) or Invitation link (shareable link);
- the Invitation rules: automatic expiry (7 days after sending for a personal invitation, 24 hours for a link), single use, can be revoked by an administrator until it has been used.
Then:
-
Not signed in: Sign in or Create account. The invitation is remembered by the browser and accepted automatically right after you sign in; for a new account, after confirming your address and signing in for the first time. A banner reminds you of this on those screens.
-
Already signed in: the invitation is accepted on its own (“Accepting invitation…”). You are then taken to the settings of the organisation you joined, or to the dashboard for a project.
A named invitation (sent to a specific address) can only be accepted by the account with that address. If you create your account with that address, you join the organisation as soon as you confirm your email address (the confirmation link is the proof), and the start-up wizard is skipped. A shareable link (with no address) expires 24 hours after it is created; a named invitation lasts 7 days by default.

Possible messages: Invitation unavailable, followed by the reason, shown in French (“Invitation introuvable” — not found, “Invitation expirée” — expired, or already accepted or revoked); then, when accepting, “Cette invitation n’est pas destinée à votre compte” (a named invitation opened with another account) or “Vous êtes déjà membre de cette organisation” (already a member). An invitation whose author has since left the organisation or lost their administrator role is revoked when you open it. An invitation to an organisation’s project requires you to be a member of the organisation already. Once signed in, you can also accept or decline your personal invitations from the Organizations page (Invitations received box).
Signing out
Section titled “Signing out”Open the user menu (your name, at the bottom of the sidebar) and click Sign out. The session is closed on the server and you return to the sign-in screen.
The session is also cut on the server straight away, without waiting for its token to expire. To close all your sessions (on other devices), change your password or turn on two-factor authentication.
Who can do what
Section titled “Who can do what”- Anyone can create an account, try without an account and request a password reset.
- Two-factor authentication is set per account, by its holder. An organisation can, however, require SSO for its domains.
- Only the role chosen by the sender of an invitation is granted: you cannot change it by accepting.
Frequently asked questions
Section titled “Frequently asked questions”I did not receive the confirmation email. Check your spam folder, then use I didn’t receive anything, resend. Wait two minutes between requests. Disposable addresses are refused at sign-up.
The confirmation link no longer works. It expires after 24 hours and works only once. Request another one from the screen that appears.
I signed up with the wrong address. Your account address can be changed in Account settings once you are signed in: the change is confirmed by a link sent to the new address. If you cannot sign in, create a new account with the right address.
“Trop de tentatives sur ce compte” (too many attempts on this account). Several attempts on your address have failed: wait for the time shown (one hour at most), then try again, or reset your password.
I have lost my phone. Sign in with a backup code. Turning 2FA off or regenerating codes, however, requires a code from the app itself: without it, contact support to reset two-factor authentication, then turn it back on with your new device.