First steps
This page takes a new account from its first sign-in to its first alerts. It is written for the person setting up their team’s workspace; if you were invited into an existing organisation, you go straight to the dashboard (see Accepting an invitation).
The start-up wizard
Section titled “The start-up wizard”Address: /onboarding. It opens automatically at the first sign-in of an account that does not belong to any organisation yet, and at every sign-in until it has been completed. An account that has already completed the wizard is sent to the dashboard.
The wizard has two steps, listed on the left of the screen, with the progress (Step 1 of 2) at the top right. On a small screen, the left-hand column is hidden.
Step 1: the organisation
Section titled “Step 1: the organisation”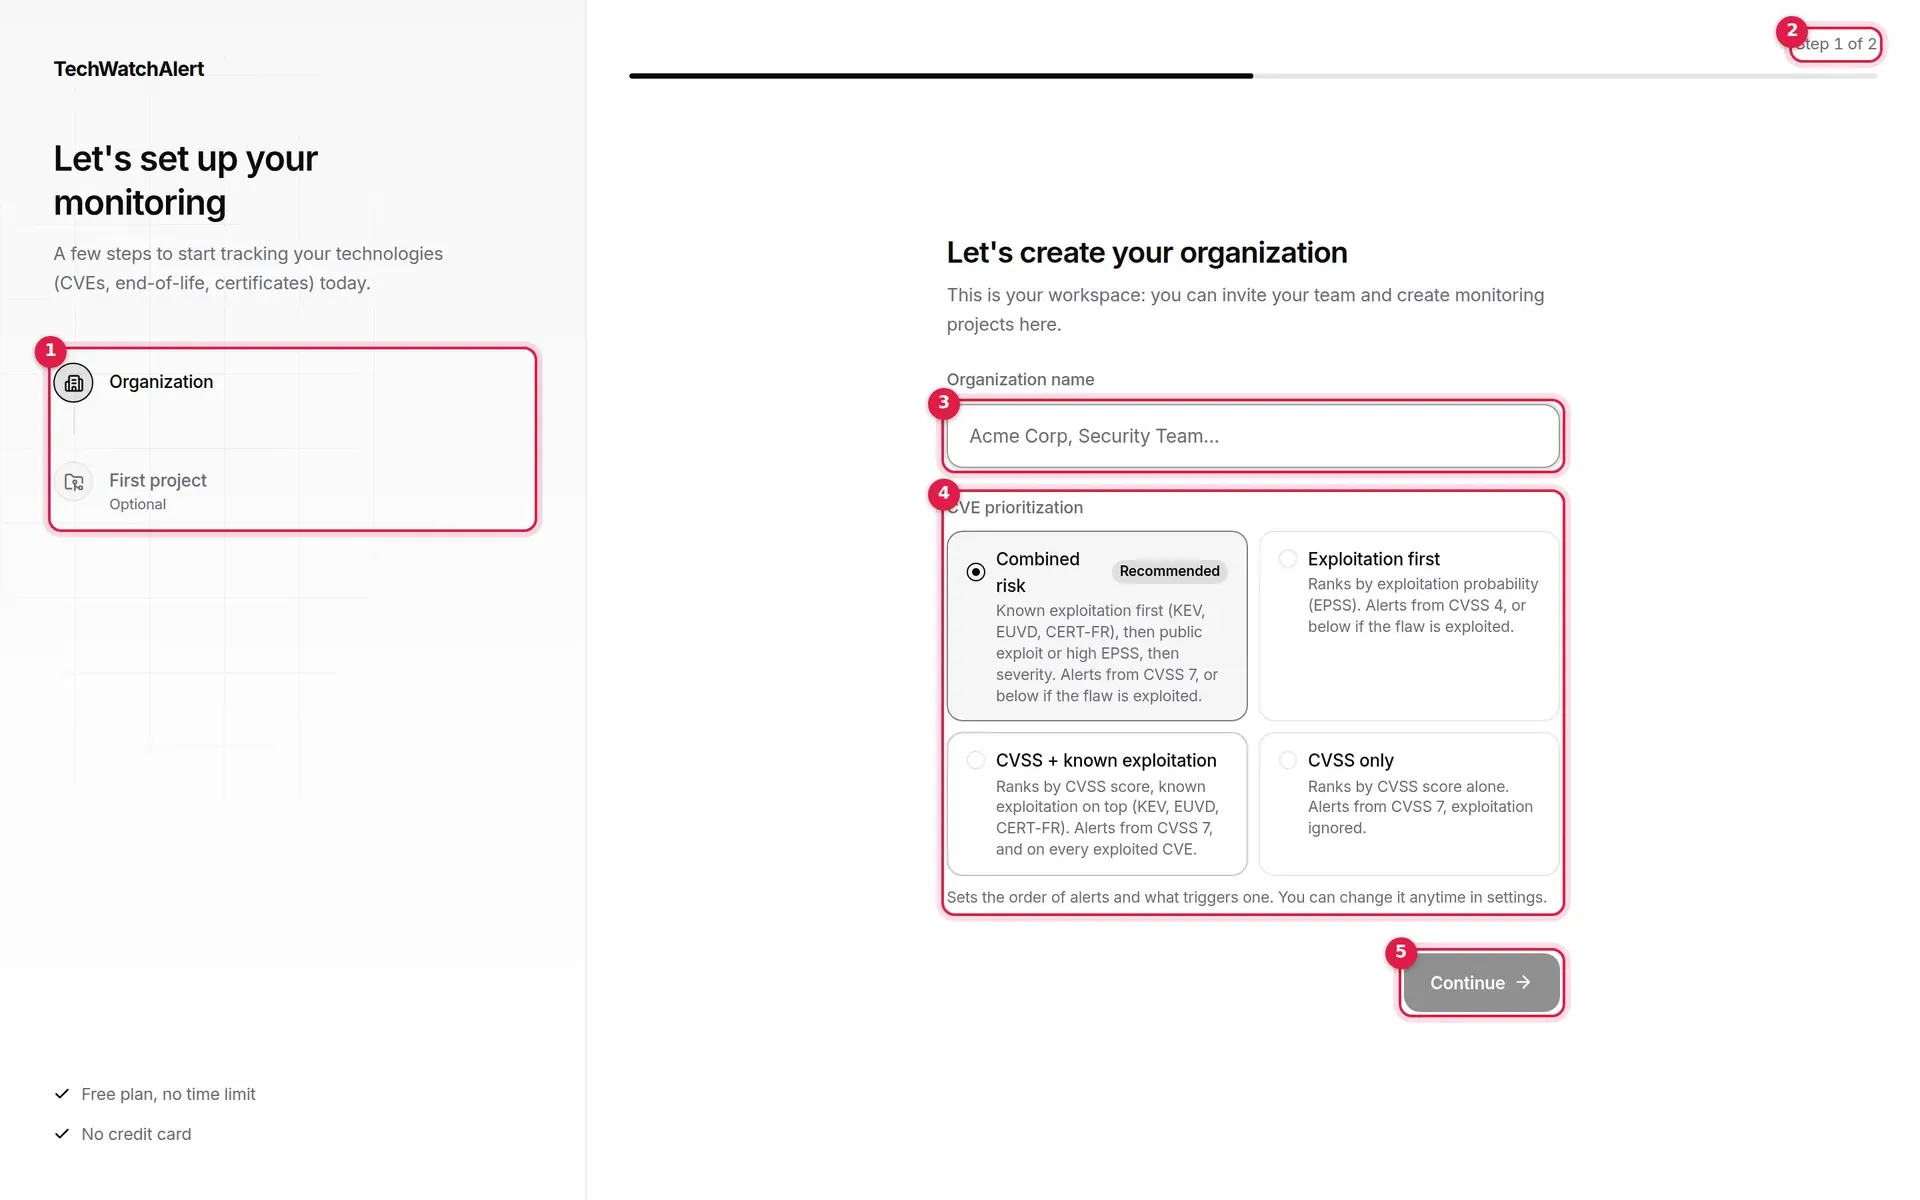
- The two steps: Organization, then First project (marked “Optional”).
- Progress.
- Organization name: required (at most 120 characters). This is your workspace; you will invite your team and create your projects in it. If you typed it at sign-up, it is prefilled.
- CVE prioritization: the model that decides the order of alerts and what triggers an alert.
- Continue: greyed out while the name is empty. Pressing Enter in the field does the same.
The four models on offer:
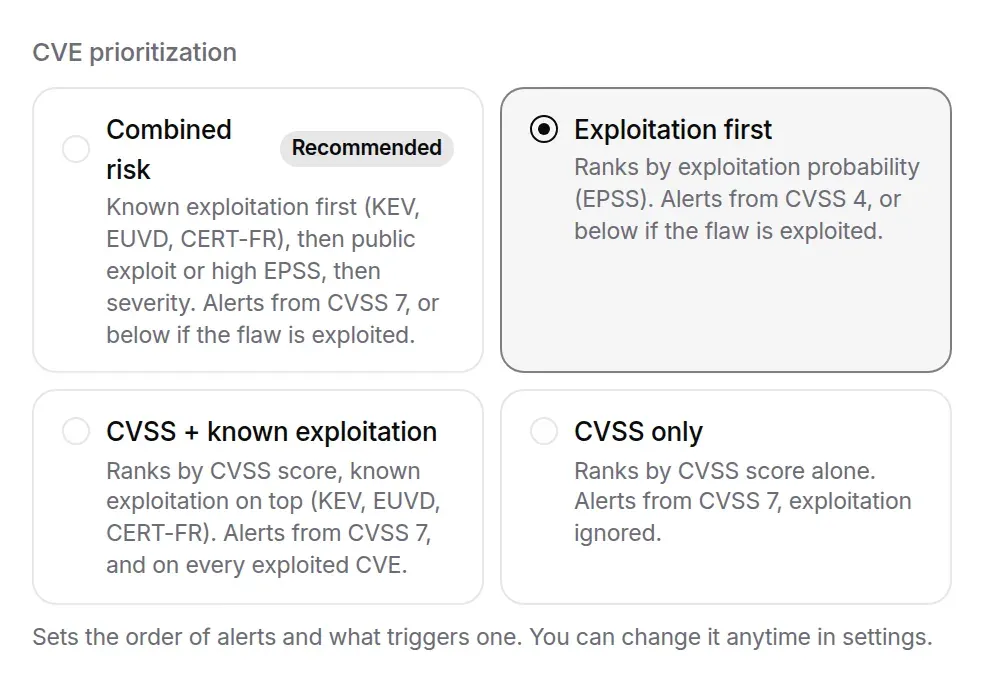
| Model | Order of alerts | What raises an alert |
|---|---|---|
| Combined risk (Recommended, selected by default) | Known exploitation first (KEV, EUVD, CERT-FR), then public exploit or high EPSS, then severity. | CVSS 7 and above, or below if the vulnerability is exploited. |
| Exploitation first | Exploitation probability (EPSS). | CVSS 4 and above, or below if the vulnerability is exploited. |
| CVSS + known exploitation | CVSS score, known exploitation on top. | CVSS 7 and above, and every exploited CVE. |
| CVSS only | CVSS score alone. | CVSS 7 and above; exploitation is ignored. |
The model is saved for the whole organisation and can be changed at any time in its settings (see Organisations). The terms are defined in the Glossary.
Step 2: the first project and its stack
Section titled “Step 2: the first project and its stack”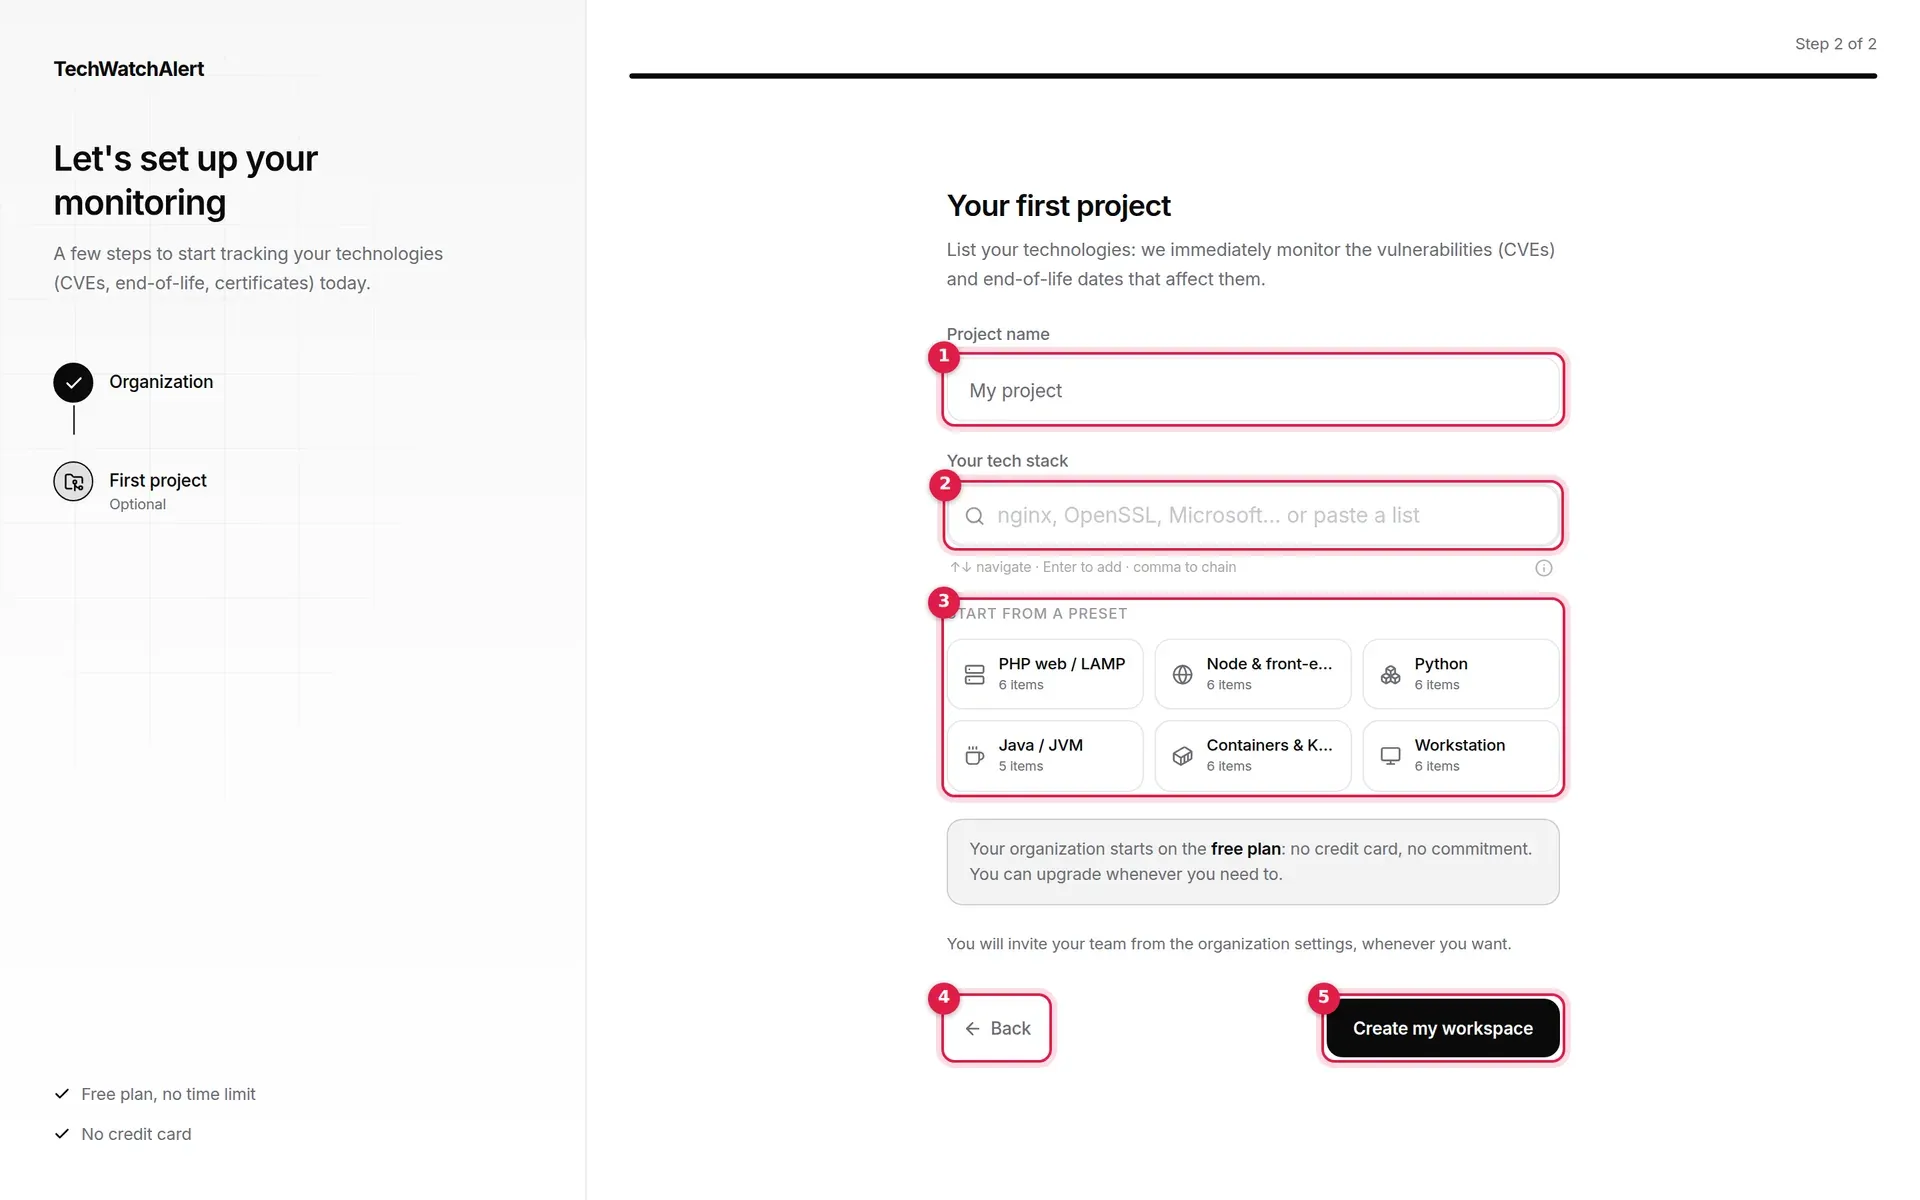
- Project name: optional; if left empty, the project is called “My project”. A project is a monitored scope: an application, a website, a fleet of workstations.
- Your tech stack: assisted entry (see below).
- Start from a preset: six ready-made sets, shown while the stack is empty: PHP web / LAMP, Node & front-end, Python, Java / JVM, Containers & K8s, Workstation (5 or 6 entries each). One click adds them all; then remove the ones that do not apply to you.
- Back: returns to step 1 without losing anything.
- Create my workspace: creates everything at once (see What the wizard creates).
Two reminders appear below the stack: the organisation starts on the free plan (no credit card, no commitment), and you will invite your team later from the organisation settings.
Declaring your first three components
Section titled “Declaring your first three components”Three components are enough to get monitoring going. In Your tech stack:
-
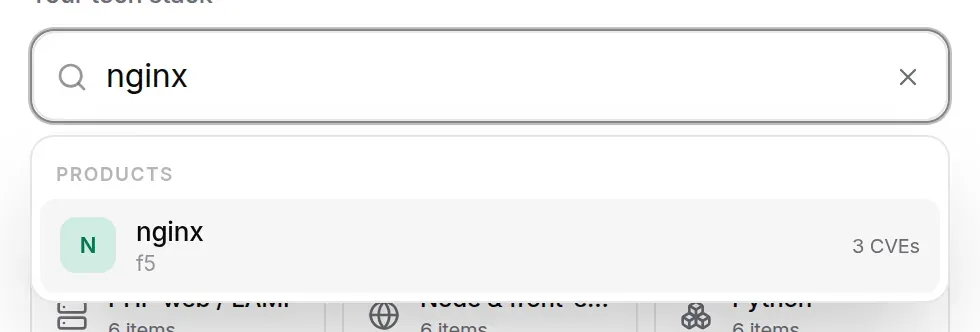
Type the name of a product or vendor (“nginx”, “OpenSSL”, “Microsoft”). The list suggests matches from the catalogue, grouped under Products and Vendors, with the vendor below the product name and the number of known CVEs.
-
Choose with the arrow keys then Enter, or click. A comma adds what you typed so you can carry on; you can also paste a whole list (separated by commas, semicolons or line breaks). The last row of the list, Add “…”, adds the name exactly as typed, even if it is not in the catalogue. The information icon, to the right of the hint below the field, sums up these rules.
-
Repeat for the next two. Each entry appears below the field, with a cross to remove it (Backspace in the empty field removes the last one).
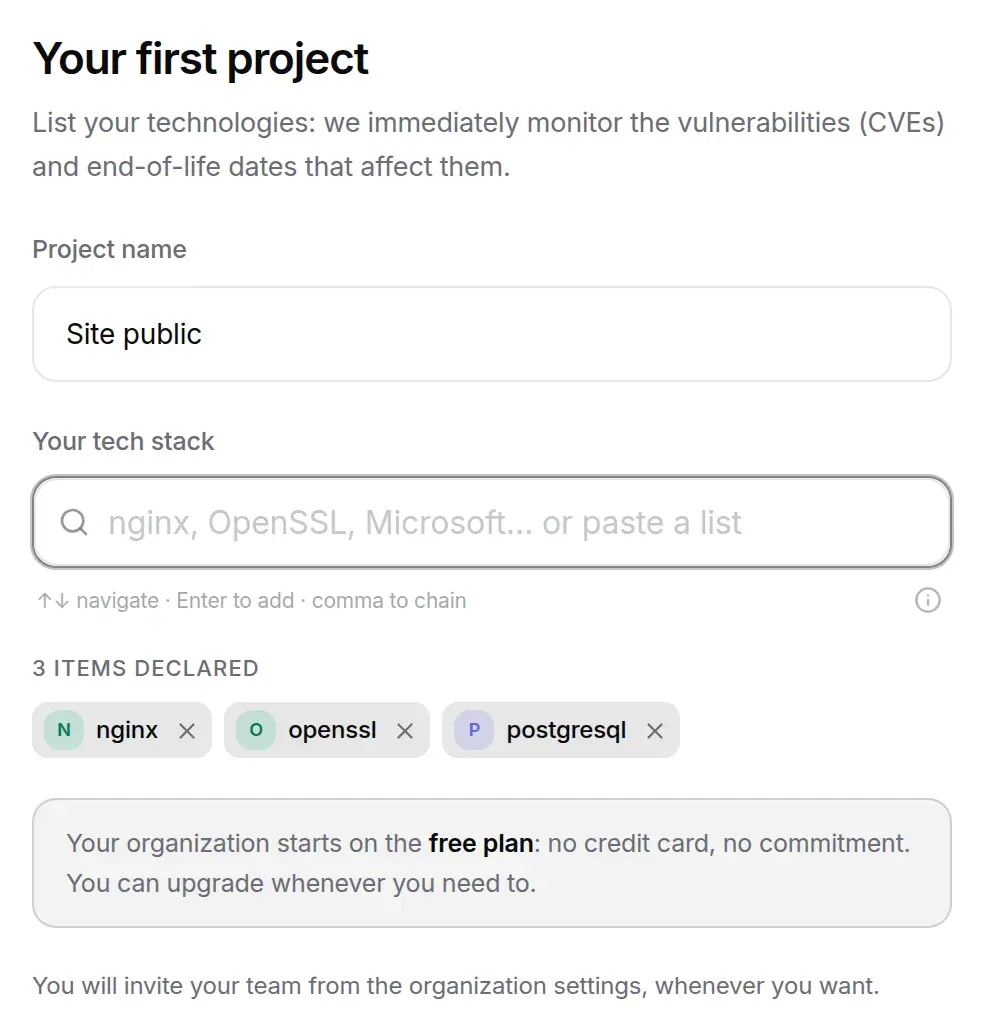
An entry that is not in the public catalogue stays in orange, with a note that it will raise no alerts: that is expected for in-house software. A name pasted as part of a list is matched to the catalogue a moment later (“matching against the catalogue…”).
The wizard records neither versions nor thresholds: you add those afterwards on the Stack page, along with file imports, connectors and detection from a URL (Imports, connectors and scans). The wizard accepts at most 50 entries.
What the wizard creates
Section titled “What the wizard creates”When you click Create my workspace (“Creating your workspace…”), TechWatchAlert creates in one go:
- the organisation, on the free plan, with you as its owner, the prioritisation model you chose and a system group, Administrateurs, that you belong to;
- the project, marked as the default project, with you as its owner;
- the declared stack;
- the project’s default workflows (see Choosing who receives alerts);
- your dashboard.
Your project has just been created: only vulnerabilities published from today will become alerts. Older vulnerabilities affecting the stack do not show up as alerts (they can still be browsed in the CVE database). If a vulnerability published today already affects it, a message says so (“1 already published vulnerability affects the project’s stack: it is in its alerts.”) and you land on the Alerts page; otherwise, on the dashboard.
If something goes wrong, the error message appears below the buttons and you stay on the step.
A new account’s dashboard
Section titled “A new account’s dashboard”Until the project has produced anything, the dashboard already lays out the cards that follow-up will use (Priority CVEs, Upcoming deadlines, Open exposure, Components to update), each with the step that fills it, and, at the very top, the Getting started card.
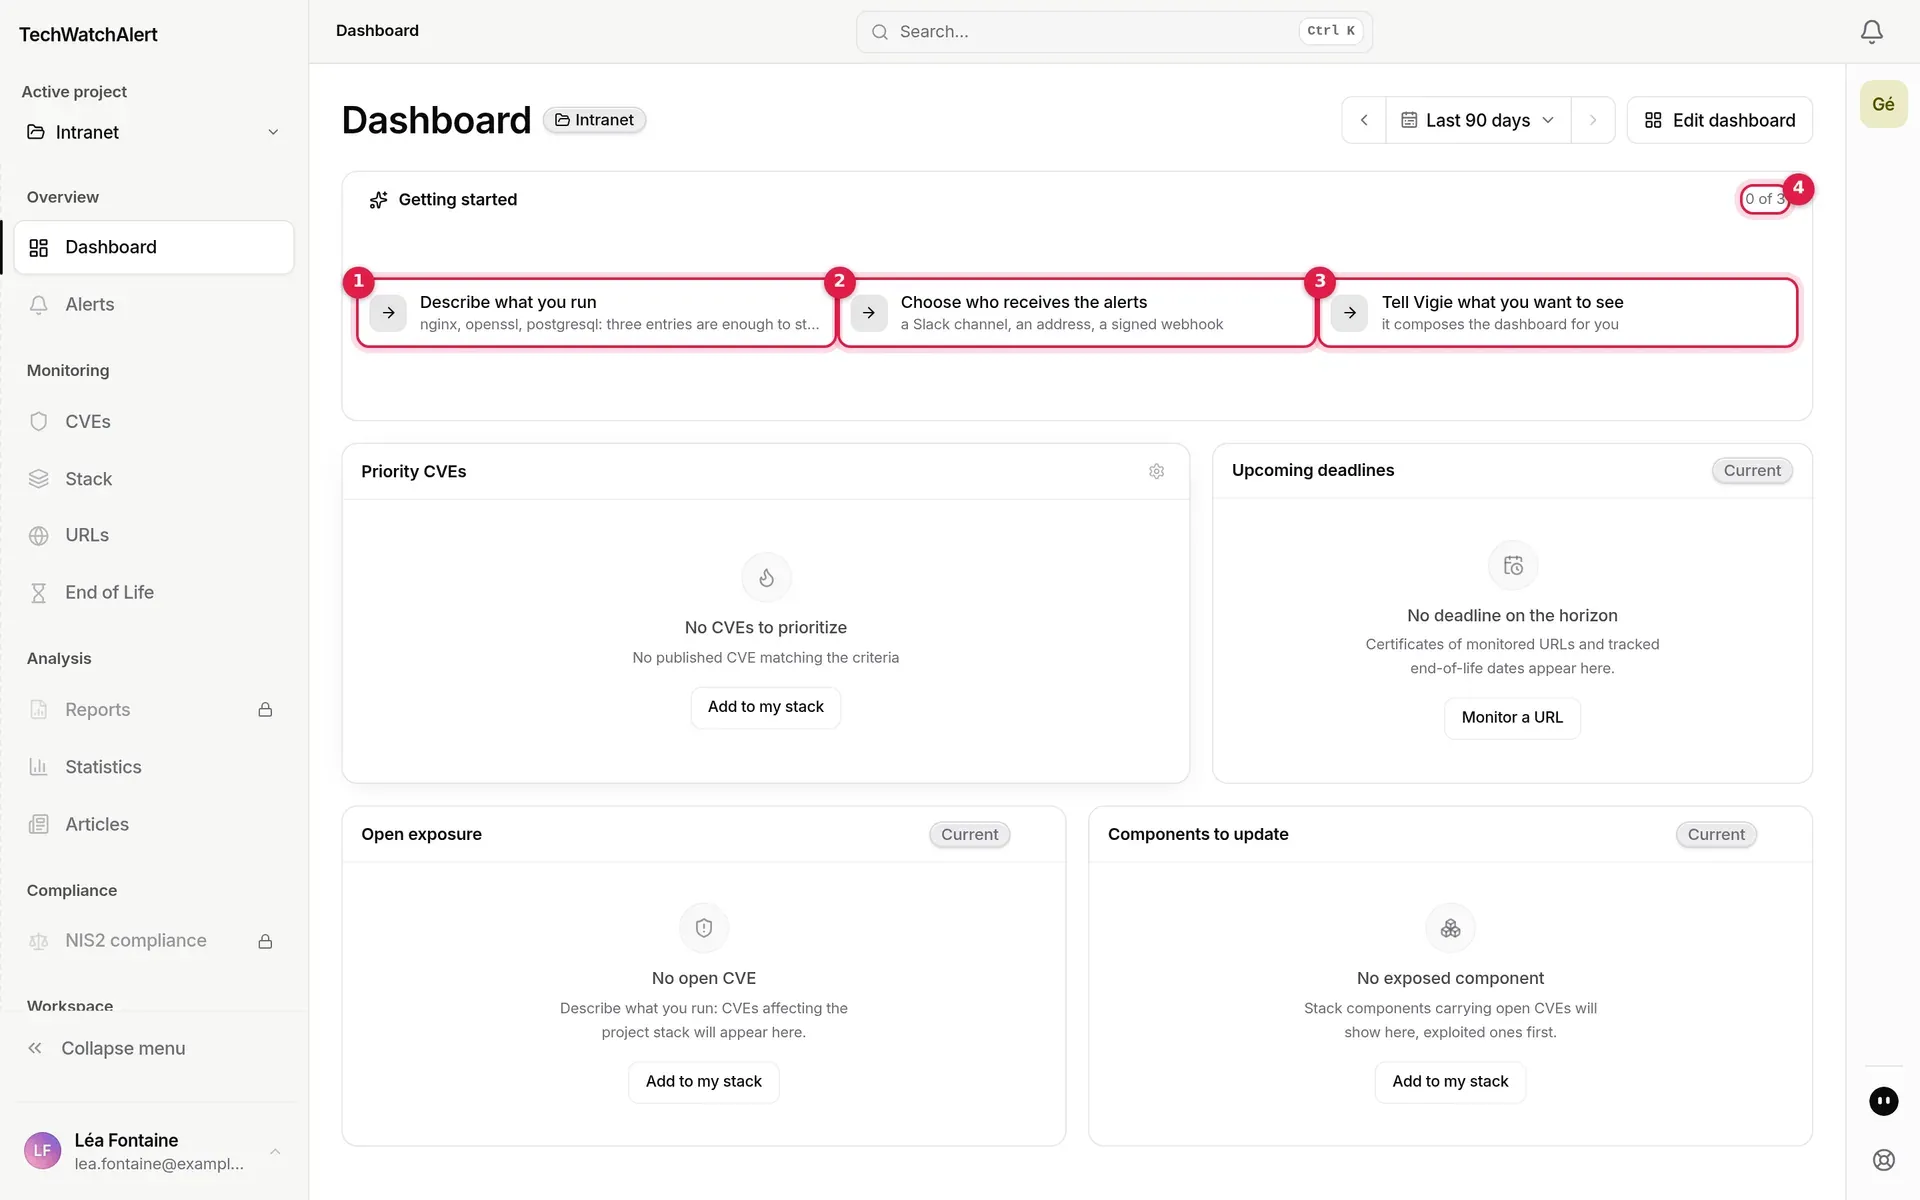
- Describe what you run: leads to the Stack page.
- Choose who receives the alerts: opens the default CVE workflow on the Workflows page.
- Tell Vigie what you want to see: opens the Team chat panel straight on Vigie, the AI assistant, which builds the dashboard for you. This line only appears if the assistant is turned on for the platform.
- Progress: how many steps are done out of the lines shown (three, or two without the assistant).

A completed step turns green, ticked and struck through:
- Describe what you run is ticked as soon as at least one entry in the project’s stack is matched to the catalogue;
- Choose who receives the alerts is ticked as soon as one of the project’s workflows has run at least once;
- Tell Vigie what you want to see is never ticked.
The card spans the full width of the dashboard and cannot be resized. You can remove it like any other widget by editing the dashboard (see Dashboard).
The card disappears on its own at your first alert in the dashboard’s project: if you have not touched the starting dashboard, it gives way to the follow-up layout (alerts, priority CVEs…); if you have rearranged it, only the card is removed and the rest of your layout is kept.
Creating your first project
Section titled “Creating your first project”The first project is normally created by the wizard. To create more: open the project selector at the top of the sidebar and click New project.
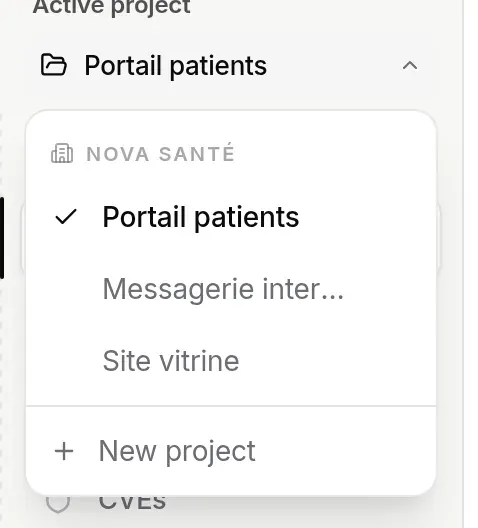
The number of projects depends on the plan: 1 on the Free plan, 5 on Team, unlimited above that (see Plan and billing). The creation window and project settings are described in Projects.
Filling in the stack
Section titled “Filling in the stack”The Describe what you run card leads to the Stack page. While it is empty, the page offers the same presets as the wizard and three other ways to fill it: Add to stack, Detect from a URL and Import a file.
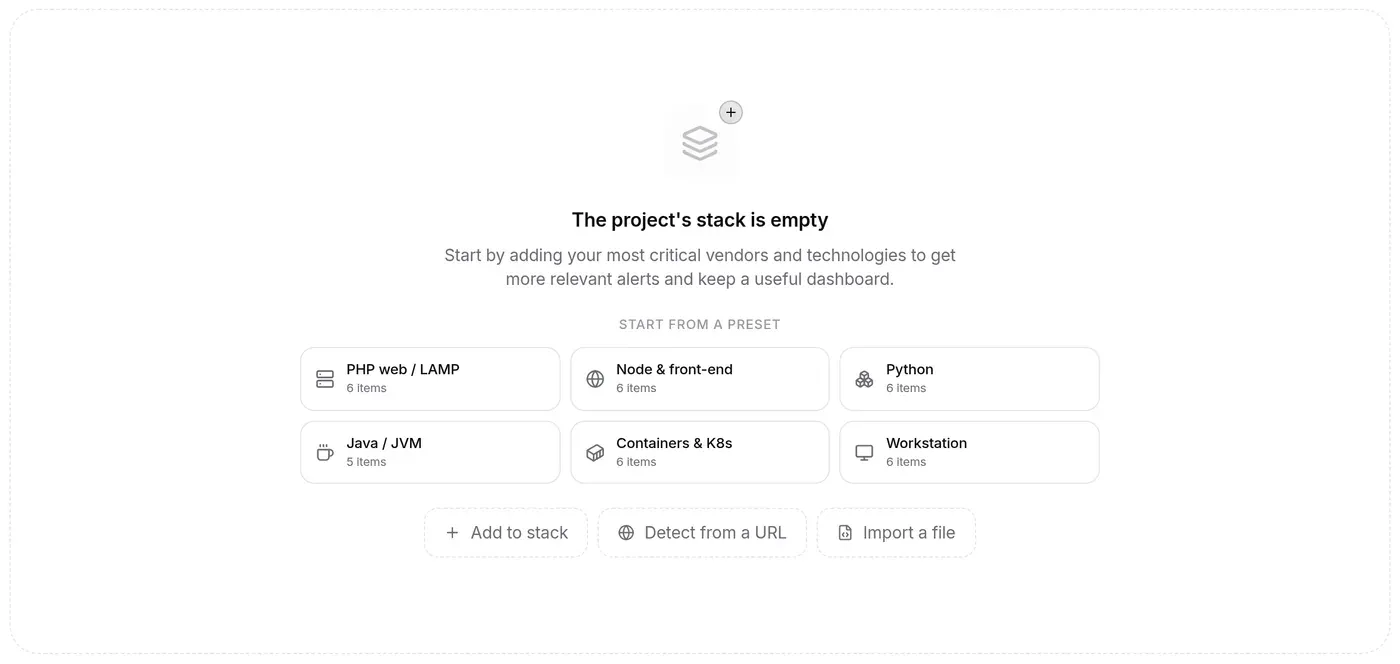
On the Free plan, a project’s stack holds at most 10 entries (200 on Team, unlimited above that). Everything is covered in Stack.
Choosing who receives alerts
Section titled “Choosing who receives alerts”In TechWatchAlert, every notification goes through a workflow. Each project gets five when it is created, all active:
| Workflow | Trigger | What it does |
|---|---|---|
| Default CVE workflow | New CVE in the stack | Creates the alert’s case, then in-app notification, email and a call to the project’s webhooks. |
| CVE now exploited | A CVE in the stack becomes exploited | In-app notification, email and a call to the project’s webhooks. |
| Default end-of-life workflow | End of life of a tracked version approaching | In-app notification. |
| Active support ending | End of active support of a tracked version approaching | In-app notification. |
| New releases | New release of a tracked product | In-app notification. |
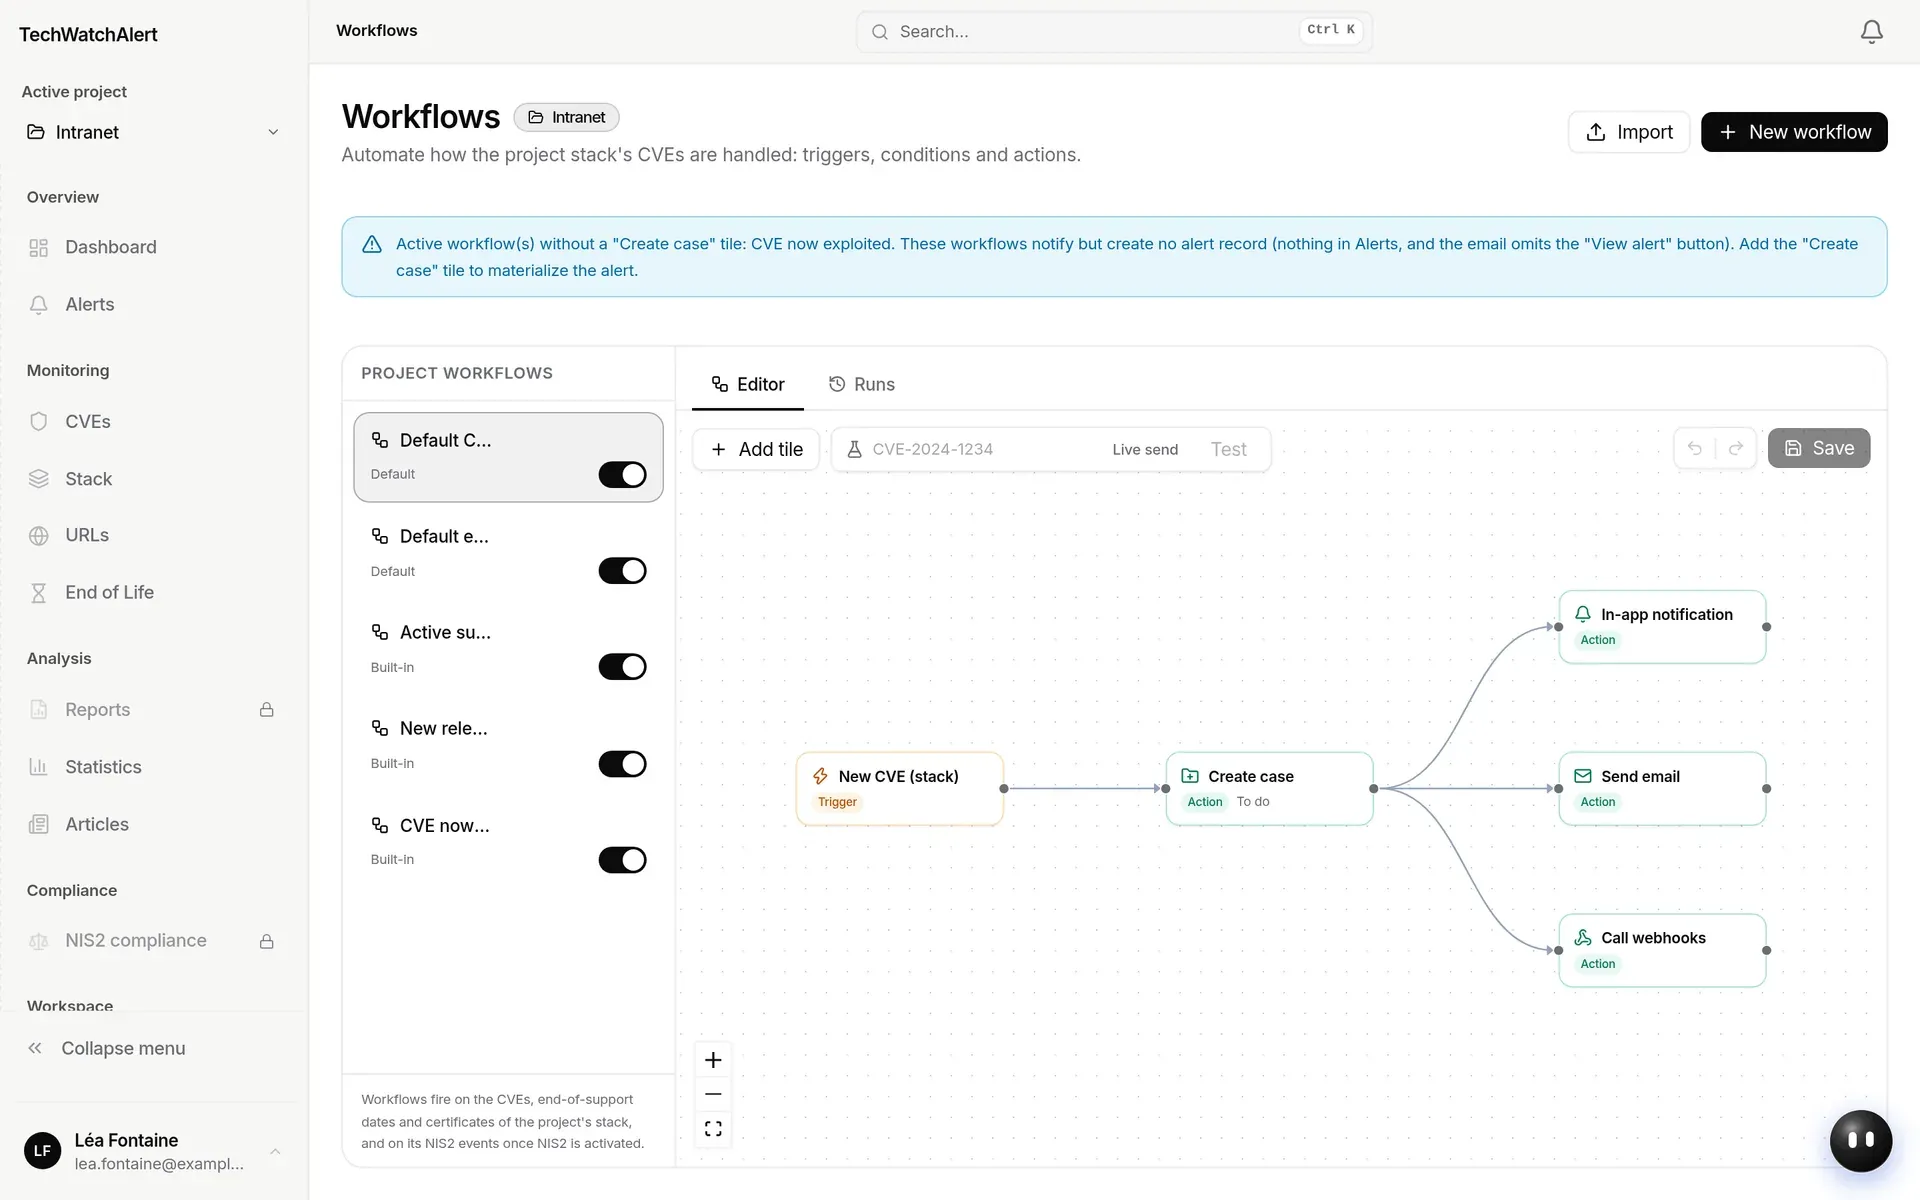
So, without changing anything, each project member receives new CVEs in the application and by email, according to their own notification preferences. To change who is told and how:
- everyone sets their preferences in Settings › Notifications (see Account settings);
- team channels (Slack, Teams, webhook) are connected as described in Notifications and channels;
- workflows are edited, switched off or added to in Workflows.
On the Free plan, a project cannot have a webhook; it can have up to 5 on Team and unlimited above that.
Inviting your team
Section titled “Inviting your team”The wizard does not offer this: invitations are sent from the organisation settings, whenever you like. On the free plan, the organisation has only one member. See Team, roles and groups.
What depends on the plan
Section titled “What depends on the plan”The Free plan includes CVE search, alerts, the stack, end-of-life tracking, articles and the AI assistant, with 1 project, 1 member, 10 stack entries and 3 monitored URLs. Case management, reports and multi-member organisations start with the Team plan; NIS2 compliance, the API and inventory connectors with the Pro plan. Entries that are not included are marked with a padlock in the sidebar (see Finding your way around).
Frequently asked questions
Section titled “Frequently asked questions”I closed the wizard without finishing. It opens again at your next sign-in. Nothing is created until you click Create my workspace.
No alerts are coming in. Check that your stack entries are matched to the catalogue (not orange), that the active project is the right one, and that the prioritisation model is not filtering out low-severity vulnerabilities. An alert only appears if a CVE affects the project’s stack and passes prioritisation.
Can I rename the organisation or project later? Yes, in their settings: see Organisations and Projects.